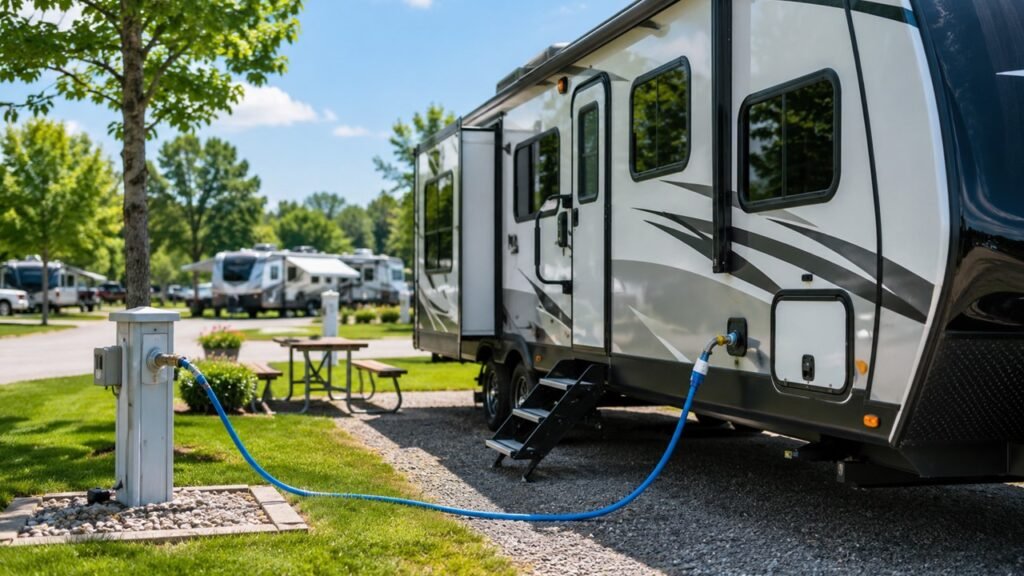
Your RV water pressure usually goes up and down because the campground supply is fluctuating, the pressure regulator is restricted, air is entering the plumbing, or the onboard water pump is cycling unevenly. Clogged filters, kinked hoses, dirty inlet screens, incorrect valve positions, and plumbing leaks can also cause inconsistent flow.
The easiest way to find the problem is to identify whether it happens on city water, freshwater-tank water, or at only one fixture. Below, I’ll help you narrow down the cause, test each component, and fix the pressure safely.
Key Takeaways
- Fluctuating pressure on city water often points to the campground supply, regulator, hose, or filter.
- Pulsing pressure from the freshwater tank usually involves the pump, strainer, trapped air, or a suction leak.
- A regulator limits excessive incoming pressure but cannot boost a weak campground supply.
- Pressure changes at only one faucet usually indicate a clogged aerator or fixture problem.
- A pump that cycles with every small water demand may benefit from an accumulator tank.
- Check filters, valves, hoses, and air leaks before adjusting or replacing the water pump.
- Never raise pressure beyond the limit stated in your RV owner’s manual.
Why Does My RV Water Pressure Keep Fluctuating?
Fluctuating RV water pressure means the water supply cannot maintain a steady combination of pressure and flow. You may notice the shower changing from strong to weak, a faucet pulsing, or the pump repeatedly turning on and off.
The cause often depends on which water source you are using. When connected to city water, the campground supply, regulator, water filter, and hose are the most likely places to look. When drawing from the freshwater tank, the problem is more likely related to the water pump, inlet strainer, tank level, valves, or air entering the suction line.
It also helps to separate pressure from flow. Pressure describes the force inside the water system, while flow describes how much water can move through it. A clogged filter or undersized hose can create disappointing flow even when a pressure gauge initially shows a reasonable reading.
Common Causes of RV Water Pressure Going Up and Down
Several parts of an RV water system can create the same symptom. Start with the simplest external components before assuming the water pump or internal plumbing has failed.
Fluctuating Campground Water Pressure
Campground water pressure may change as other campers use showers, washing machines, hoses, and sinks. Pressure is often less consistent during busy mornings and evenings.
You can check this by attaching a pressure gauge directly to the campground spigot. Take one reading with no water running, then watch the gauge while someone opens a faucet inside your RV. If the pressure falls significantly under use, the campground supply may not be delivering enough water.
A pressure regulator can protect your RV from sudden high pressure, but it cannot create pressure or flow that the campground supply does not provide.
Faulty or Incorrectly Adjusted Water Pressure Regulator
A pressure regulator is designed to reduce excessive campground pressure before the water enters your RV. However, a clogged, damaged, undersized, or poorly adjusted regulator can also restrict flow.
Many fixed RV regulators are preset around 40–50 PSI, although your RV manufacturer’s stated limit should always determine the correct setting.
Inspect the regulator for:
- Sediment inside the inlet screen
- Mineral deposits around the fittings
- A damaged or inaccurate gauge
- Corrosion inside the regulator
- An adjustment screw set too low
- A regulator that changes pressure without being adjusted
If pressure improves when you temporarily test with a known-good regulator, the original regulator is likely the problem. Do not connect directly to an unknown high-pressure source merely to test the flow.
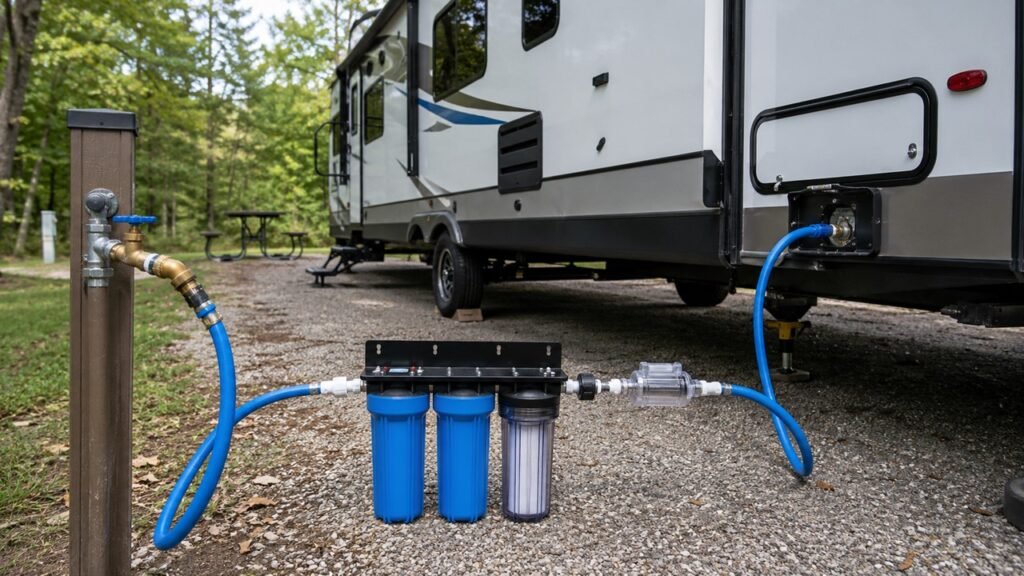
Clogged RV Water Filter
A water filter adds resistance to the water system. As sediment, rust, and mineral particles collect inside the filter media, the restriction becomes greater.
A clogged filter may allow the pressure to build while every fixture is closed. Once you open a faucet, the initial flow feels strong and then quickly weakens because water cannot pass through the filter fast enough.
Pentair notes that some filters create considerable backpressure when their rated flow is exceeded, resulting in lower system pressure and flow.
Temporarily bypass the filter and test the faucet. If the flow becomes steady, replace the cartridge with one that matches your RV’s required flow rate. Do not assume a disposable cartridge can be washed and safely reused.
Kinked or Restricted Drinking-Water Hose
A hose may look normal while still restricting water. Tight bends, flattened sections, internal deterioration, and small inner diameters can reduce the volume reaching your RV.
Walk along the full hose and check for:
- Sharp bends near the spigot
- A hose trapped beneath a tire or storage bin
- Flattening around a reel
- Damaged fittings
- Debris inside the connector
- A long, narrow hose supplying several fixtures
If possible, test with a shorter drinking-water-safe hose of a suitable diameter. A hose problem is especially likely when the pressure changes as the hose moves or warms in the sun.
Air Trapped in the Water Lines
Air pockets can cause spurts, sputtering, and sudden changes in pressure. This commonly happens after winterization, tank filling, filter replacement, plumbing repairs, or running the freshwater tank empty.
To remove trapped air, fill the freshwater tank or reconnect the city-water supply. Then open each hot and cold fixture one at a time until the water runs steadily.
Remember to confirm that the water heater is full before turning on its electric heating element. Operating an empty water heater can damage the element.
RV Water Pump Cycling or Surging
An RV demand pump activates when opening a fixture lowers system pressure. It shuts off after the fixture closes and the pump restores pressure.
At very low flow, some pumps repeatedly reach their shutoff point and restart a moment later. You hear the motor pulse while the water becomes stronger and weaker. A restrictive faucet, clogged aerator, pressure-switch problem, or incorrectly set internal bypass can make the cycling worse.
Pentair’s troubleshooting information lists restrictions, air leaks, clogged strainers, worn pump valves, check-valve problems, low voltage, and leaking fixtures among the possible causes of cycling, low flow, and loss of prime.
Dirty Water Pump Strainer
Most RV pumps have a strainer between the freshwater tank and pump inlet. It prevents debris from reaching the pump’s diaphragm and valves.
As the screen becomes blocked, the pump struggles to draw enough water. The result may be weak flow, pressure pulsing, excessive noise, or difficulty priming.
A cracked strainer housing or damaged O-ring can also pull air into the pump. Because the pump inlet operates under suction, an air leak may occur without leaving an obvious puddle.
Low Freshwater Tank Level
A nearly empty tank may allow the pump pickup to draw air, particularly when your RV is parked on a slope. Water may cover the outlet while the RV is level but move away from it when the vehicle leans.
Check the actual tank level instead of relying completely on the monitor panel. Tank sensors can become inaccurate because of residue or uneven tank shape.
If filling the tank stops the pressure fluctuation, the pump was probably starving for water or pulling air near the tank outlet.
Loose Pump-Side Connection or Suction Leak
A loose inlet fitting can let the pump pull air into the line. Unlike a leak on the pressurized side, it may not drip water when the pump is off.
Check the connection between the tank and pump, including:
- The tank outlet
- Winterization valve
- Shutoff valve
- Flexible inlet hose
- Strainer bowl
- Strainer O-ring
- Pump inlet fitting
Look for loose fittings, cracked plastic, pinched seals, and tubing that collapses while the pump runs.
Partially Closed or Incorrectly Positioned Valve
RV plumbing may contain several valves for winterization, tank filling, city-water selection, and water-heater bypassing. A valve that is only partly open can restrict flow and cause the pump to behave unpredictably.
Compare the valve positions with the plumbing diagram or owner’s manual for your specific RV. Valve layouts vary, so another owner’s photographs may not match your system.
Pay particular attention to the winterization suction valve. When it is slightly open, the pump may pull air through the antifreeze pickup tube instead of drawing only water from the tank.
Clogged Faucet Aerator or Showerhead
When the pressure problem affects only one faucet, the main water supply may be working correctly. Debris and mineral deposits often collect in faucet aerators, showerheads, and flow restrictors.
Remove the aerator or showerhead and test the fixture briefly without it. If the flow becomes steady, rinse the screen and soak mineral-coated removable parts in white vinegar.
A local restriction can also cause the pump to cycle rapidly because the fixture is allowing only a small amount of water to pass.
Sticking Check Valve or City-Water Inlet
Check valves allow water to move in one direction. They are commonly found in the city-water inlet, water heater, pump, and tank-fill system.
Sediment, mineral deposits, worn seals, or broken springs can make a check valve stick intermittently. This can reduce flow, cause pressure changes, allow the pump to lose prime, or let city water enter the freshwater tank.
A faulty pump check valve is especially likely when the freshwater tank slowly fills or overflows while the RV remains connected to city water.
Plumbing Leak
A leak allows stored pressure to escape. On city water, the result may be consistently reduced flow. On pump water, the pump may restart even though every faucet is closed.
Inspect under sinks, around the toilet, behind access panels, near the water heater, and around low-point drains. Also look for:
- Damp flooring
- Swollen cabinet panels
- Water stains
- Musty smells
- Dripping sounds
- Moisture beneath the RV
- A pump that cycles without water use
Turn off the water source immediately if you find a significant leak.
Multiple Fixtures Running at the Same Time
An RV system has a limited flow capacity. When someone opens the kitchen faucet while another person showers, both fixtures must share the available water.
The pressure drop will be more noticeable when the system already has a restrictive regulator, clogged filter, narrow hose, or low-output pump. A small decrease is normal, but a dramatic change usually indicates that something is limiting the total flow.
Undersized or Failing RV Water Pump
A pump must provide enough gallons per minute for the fixtures you expect to use. A small pump may work comfortably with one faucet but struggle when you open a second fixture.
Internal wear can also reduce performance. Diaphragms, valves, pressure switches, check valves, and motors wear over time. Low voltage at the pump can produce similar symptoms, so check the electrical supply before replacing it.
What Your Water Pressure Symptoms Usually Mean
The pattern of the pressure change can often point you toward the correct component. Use this table as a starting point rather than replacing parts immediately.
| Water-Pressure Symptom | Most Likely Causes | First Thing to Check |
| Pressure rises and falls on city water | Campground supply, regulator, filter | Gauge at the campground spigot |
| Water pulses while using the freshwater tank | Pump cycling, trapped air, dirty strainer | Pump inlet and strainer |
| Flow starts strong and quickly weakens | Clogged filter, restricted hose, weak supply | Water filter |
| Only one faucet fluctuates | Clogged aerator or fixture cartridge | Aerator or showerhead |
| Hot water is weaker than cold water | Bypass valve, check valve, heater restriction | Water-heater valve positions |
| Pressure drops when a second fixture opens | Limited flow or system restriction | Filter, hose, and pump capacity |
| Pump pulses during low-flow use | Pressure-switch cycling or restriction | Faucet flow and pump behavior |
| Pump runs with every fixture closed | Leak, check valve, pressure loss | Plumbing connections |
| Water sputters and surges | Air in the lines or suction-side leak | Tank level and pump inlet |
| Pressure changes at busy campground times | Campground demand | Spigot pressure at different times |
How to Diagnose Fluctuating RV Water Pressure
Work through the system in a logical order. Testing one component at a time keeps you from buying a regulator, pump, or filter you do not need.
Step 1: Identify the Water Source
First, confirm whether your RV is using pressurized city water or the onboard freshwater tank.
When connected to city water, the onboard pump is normally unnecessary. Turn it off unless your RV manufacturer describes a different operating procedure.
If the problem happens only on city water, focus on the campground spigot, regulator, filter, hose, and city-water inlet. If it happens only on tank water, focus on the freshwater level, pump, strainer, valves, and suction lines.
Step 2: Test Several Fixtures
Run the kitchen faucet, bathroom faucet, shower, and toilet separately.
If every fixture fluctuates, the issue is probably affecting the entire system. If only one fixture behaves poorly, clean or inspect that fixture before troubleshooting the pump.
Test hot and cold water separately as well. A problem affecting only hot water directs you toward the water heater, bypass valves, or hot-side check valve.
Step 3: Measure Pressure at the Campground Spigot
Disconnect your RV equipment and attach a pressure gauge directly to the spigot. Turn on the supply and note the reading.
Then connect the regulator and compare the new reading. If the pressure falls much more than expected, the regulator may be clogged or faulty.
A gauge reading with no fixture open shows the pressure being held in the line. Watching the gauge while water runs helps you see whether the campground supply can maintain it under demand.
Step 4: Test Without the Water Filter
Temporarily remove or bypass the external filter and run a faucet. Keep the regulator installed for protection.
If the flow becomes noticeably stronger and steadier, replace the filter. Choose a cartridge with enough flow capacity for whole-RV use when it filters the entire incoming supply.
This is only a diagnostic test. Continue using suitable water treatment based on the water source and your filter manufacturer’s instructions.
Step 5: Inspect the Regulator and Screens
Turn off the water, relieve the pressure, and disconnect the regulator. Look inside the inlet for sediment, sand, rust, or damaged mesh.
Clean reusable screens gently. Replace the regulator when it remains unstable, cannot hold its setting, leaks, or shows severe internal corrosion.
Step 6: Inspect the Hose
Straighten every bend and check whether the hose is pinched. Examine both connectors for debris and damaged washers.
A spare known-good hose makes diagnosis easier. If pressure becomes steady with the replacement, retire the old hose rather than continuing to use an internally damaged one.
Step 7: Compare City Water With Tank Water
Testing both water sources can quickly separate external and internal problems.
- Stable pressure from the tank suggests a city-water supply, regulator, filter, or hose issue.
- Stable pressure on city water suggests a pump, strainer, tank, or suction-line issue.
- Fluctuation on both systems suggests an internal restriction, valve problem, leak, or fixture issue.
Do not leave the pump running unnecessarily while connected to city water.
Step 8: Check the Freshwater Tank and Pump Strainer
Add enough water to the tank for a reliable test. Turn off the pump, open a faucet to relieve pressure, and place a towel beneath the strainer.
Remove the clear strainer bowl, clean the screen, and inspect the O-ring. Reassemble it carefully without overtightening the plastic housing.
Run the pump and watch for bubbles moving through a clear section of line. Persistent bubbles suggest an air leak between the tank and pump.
Step 9: Purge Air From the Plumbing
With the water heater safely filled, run the cold side of each fixture until it stops sputtering. Repeat the process on the hot side.
Flush the toilet and operate any exterior shower or washing-machine connection. Air can remain trapped in branches that are used infrequently.
Step 10: Check for Leaks and Unwanted Pump Cycling
Close every fixture and listen to the pump.
A properly sealed system should hold pressure after the pump stops. If it restarts repeatedly, inspect for dripping faucets, a running toilet valve, loose fittings, leaking low-point drains, or an internal check-valve problem.
How to Fix RV Water Pressure That Goes Up and Down
Once you have isolated the cause, use the least invasive repair first. Cleaning a screen or correcting a valve position is safer and cheaper than adjusting the pump.
Clean the Regulator and Inlet Screen
Shut off the campground spigot and open a faucet to release pressure. Disconnect the regulator, remove any accessible screen, and rinse away sediment.
Do not force tools into the regulator body. Replace it if cleaning does not restore consistent performance or if the gauge remains inaccurate.
Set an Adjustable Regulator Correctly
Connect the regulator at the campground spigot so the hose and downstream equipment are also protected. Follow the regulator’s instructions when changing the setting.
Start conservatively and stay within the maximum pressure specified by your RV manufacturer. Many RV regulators are sold with settings around 40–50 PSI, but that does not make one pressure correct for every RV.
Do not raise the regulator setting merely to overcome a clogged filter or kinked hose. Remove the restriction instead.
Replace a Clogged Water Filter
Replace the filter when bypassing it restores normal flow, the cartridge has reached its rated service life, or the water has become discolored or unpleasant.
The replacement should match:
- The housing size
- The required filtration purpose
- The expected flow rate
- The maximum pressure rating
- The manufacturer’s replacement interval
Flush the new cartridge as instructed before directing the water into your RV.
Straighten or Replace the Freshwater Hose
Remove tight bends and support heavy filters so they do not pull the hose downward at the spigot.
Replace hoses with soft spots, damaged liners, flattened sections, leaking fittings, or visible contamination. Use a drinking-water-safe hose intended for potable-water service.
Clean Faucet Aerators and Showerheads
Unscrew the aerator or showerhead and remove the screen. Rinse loose debris, then soak mineral-coated parts in vinegar.
Reassemble the components in the correct order. Missing washers or incorrectly installed flow restrictors can create leaks or unusual spray patterns.
Clean the RV Water Pump Strainer
Use the following process:
- Turn off the pump.
- Open a faucet to relieve pressure.
- Place a towel beneath the strainer.
- Unscrew the strainer bowl.
- Remove and rinse the screen.
- Inspect the bowl and O-ring for cracks.
- Reassemble the strainer without overtightening it.
- Turn on the pump and check for leaks or bubbles.
Pump manufacturers commonly require an inlet strainer to keep debris away from the pump’s valves and diaphragm.
Purge Air From the Water Lines
Fill the freshwater tank or connect a stable city-water supply. Open fixtures one at a time, starting with the fixture closest to the water source.
Run both cold and hot sides until the stream becomes steady. Include the shower, toilet, outdoor shower, and low-use fixtures.
If air returns shortly afterward, look for a loose pump inlet connection, cracked strainer, incorrect winterization-valve position, or low tank level.
Tighten Loose Pump Connections
Turn off the pump and relieve pressure before handling fittings. Hand-tighten loose quick-connect fittings and verify that their O-rings are seated correctly.
Do not overtighten plastic fittings. Excessive force can crack the pump head, strainer housing, or threaded adapter.
Replace hardened seals, cracked strainers, and damaged tubing instead of trying to stop an air leak with excessive sealant.
Correct Water-Heater and Winterization Valves
Place the water-heater bypass valves in the normal operating position after winterization. Fully close the antifreeze pickup valve and fully open the tank supply valve.
Because manufacturers use different valve layouts, follow the diagram for your RV. Do not assume that every valve handle should point in the same direction.
Repair Plumbing Leaks
Tighten loose fittings carefully and replace damaged seals or tubing. For PEX repairs, use fittings and tools suitable for the tubing installed in your RV.
Dry the area completely after the repair and pressurize the system while watching for fresh moisture. Hidden water can continue dripping from insulation or cabinet cavities after the original leak is stopped.
Replace a Faulty Regulator or Pump
Replace the regulator when it cannot maintain a steady setting, leaks, or remains restricted after cleaning.
Consider pump replacement when the pump cannot prime, cannot reach shutoff pressure, has a leaking housing, repeatedly overheats, or delivers weak flow after all external restrictions and air leaks have been corrected.
Match a replacement pump to your RV’s voltage, recommended PSI, flow requirement, electrical circuit, port size, and available mounting space.
Should I Adjust My RV Water Pump?
Some RV pumps have separate pressure-switch and internal bypass adjustments. Changing these settings may sometimes reduce cycling, but it should not be the first troubleshooting step.
The pressure switch and bypass must remain correctly balanced. On certain SHURflo bypass pumps, the manufacturer warns that incorrect adjustment can cause the switch and bypass settings to overlap, preventing the pump from shutting off. SHURflo specifically states that bypass adjustment should be performed by a professional technician with suitable gauges and equipment.
Before touching an adjustment screw:
- Confirm the freshwater tank contains enough water.
- Clean the pump strainer.
- Purge air from the plumbing.
- Check inlet fittings for air leaks.
- Clean restricted aerators and showerheads.
- Confirm the pump receives proper voltage.
- Read the manual for the exact pump model.
- Mark the original screw position.
- Make only the adjustment described by the manufacturer.
- Stop if the pump begins running continuously.
A quarter-turn adjustment shown in a video for one pump may be unsafe for another model. When no official adjustment procedure is available, leave the settings alone and consult an RV technician.
Will an Accumulator Tank Stop Water Pressure Fluctuations?
An accumulator tank stores a small amount of water under pressure. It can supply brief, low-volume water demands without forcing the pump to start immediately.
This can reduce pump pulsing, rapid cycling, noise, and pressure changes at low-flow fixtures. Pentair describes its accumulator as a pressure-storage and pulsation-dampening device that can reduce pump on-and-off cycling.
However, an accumulator tank does not repair:
- A clogged filter
- A restricted regulator
- A kinked hose
- A suction-side air leak
- A cracked strainer
- A worn pump
- A plumbing leak
- Low campground pressure
- Incorrect valve positions
Check whether your pump is designed to use an accumulator. Some modern internal-bypass pumps are intended to provide smooth low-flow performance without one. Pentair states that certain Revolution and 4048 bypass pumps do not require an accumulator.
When an accumulator is appropriate, set its air pre-charge according to the pump and tank manufacturer’s instructions. The pressure must be checked with the pump off and the water side depressurized.
Why Does My RV Water Pressure Change Between Hot and Cold?
When cold water flows normally but hot water does not, focus on the water-heater plumbing. The main campground supply or pump is less likely to be the only cause.
Water-Heater Bypass Valve Is Partially Closed
A partially closed bypass or supply valve restricts water entering or leaving the heater. This commonly happens when valves are not fully returned to their normal positions after winterization.
Check the operating diagram near the water heater or in your RV manual. Make sure each valve is fully open or closed as required rather than sitting halfway between positions.
Water-Heater Check Valve Is Sticking
Many RV water heaters use a check valve to control the direction of water flow. Mineral buildup or a damaged internal spring can cause intermittent restriction.
A sticking outlet check valve may produce weak hot-water flow at every fixture while the cold side remains strong. Replacing it may require access behind the water heater.
Sediment Has Accumulated in the Water Heater
Minerals and debris can collect inside a tank-style water heater. Sediment may restrict fittings, clog a drain opening, or move into faucet screens after flushing.
Follow the water-heater manufacturer’s maintenance instructions. Turn off the fuel, electricity, and water supply, and allow the water to cool before draining or servicing the tank.
Shower Mixing Valve Is Restricted
A shower valve or cartridge mixes hot and cold water. Debris inside the cartridge can make the pressure and temperature change as you turn the handle.
If the problem occurs only at the shower, remove and inspect the showerhead first. If the showerhead is clear, the mixing cartridge may need cleaning or replacement.
Cold-Water Flow Is Overpowering Hot-Water Flow
A restriction on the hot side can allow stronger cold-water flow to dominate the mixture. You may experience temperature swings that feel like pressure changes.
Compare the hot and cold flow at another faucet. If hot water is consistently weaker throughout the RV, inspect the water-heater valves and check valve.
Why Does My RV Water Pressure Drop When I Open Two Faucets?
Your RV water pressure drops when two faucets are open because both fixtures must share the available water flow. A slight reduction is normal, especially with an onboard pump.
A severe drop usually points to limited system capacity or a restriction. Common causes include a clogged filter, narrow hose, low-flow regulator, small plumbing lines, weak campground supply, or pump with insufficient gallons-per-minute capacity.
A pressure regulator does not produce additional water. Raising its setting cannot overcome a campground supply that lacks sufficient flow.
Before installing a larger pump, confirm that your RV plumbing, electrical circuit, water heater, fittings, and fixtures can safely support it. A high-flow pump may draw more current and expose weak plumbing connections.
What Is the Correct Water Pressure for an RV?
There is no single pressure setting that is correct for every RV. Safe pressure depends on the manufacturer’s plumbing design, fittings, fixtures, water heater, filters, and age of the system.
Many commonly sold fixed RV regulators operate around 40–50 PSI. Some RV components and newer plumbing systems may permit a different range, so the owner’s manual remains the safest authority.
Use these practical guidelines:
- Check the RV owner’s manual for its maximum water pressure.
- Use a regulator whenever connecting to campground water.
- Choose a regulator with a readable gauge.
- Inspect older plumbing before using higher settings.
- Never increase pressure to compensate for a restriction.
- Check pressure again after changing filters or regulators.
- Stop the supply if pressure suddenly rises beyond the safe limit.
When Fluctuating Pressure Indicates a Failing RV Water Pump
Pressure fluctuation alone does not prove that your pump is bad. Pumps are often replaced unnecessarily when the real issue is a clogged strainer, air leak, low tank level, or restricted valve.
A failing pump becomes more likely when:
- It cannot prime with sufficient water in the tank.
- It repeatedly loses prime after air leaks are repaired.
- Every fixture pulses despite unrestricted plumbing.
- The motor speed changes unexpectedly.
- It runs continuously without reaching shutoff pressure.
- Water leaks from the pump head.
- It becomes unusually hot during light use.
- It repeatedly blows the correct fuse.
- Cleaning the strainer does not improve flow.
- Proper voltage reaches the pump, but output remains weak.
- Internal valves, diaphragms, or pressure-switch parts are damaged.
Before ordering a replacement, read the model label. Match the voltage, maximum pressure, flow rate, fuse requirement, port type, dimensions, and duty rating.
When Should You Call an RV Technician?
Some pressure problems can expose electrical wiring, concealed plumbing, or the water heater. Professional diagnosis is worthwhile when the repair moves beyond basic cleaning and inspection.
Call an RV technician when:
- The pump will not shut off after basic troubleshooting.
- Pressure exceeds the RV’s limit despite using a regulator.
- Water is leaking behind a wall or beneath the floor.
- Pump wiring is damaged, hot, or discolored.
- A water-heater check valve requires difficult disassembly.
- The pump adjustment procedure is unclear.
- The system repeatedly loses pressure without a visible leak.
- Plumbing components have frozen or cracked.
- City water continually fills the freshwater tank.
- The pump overheats or repeatedly blows fuses.
- You cannot safely access the leaking component.
Catching a hidden leak early can prevent damage to flooring, cabinets, insulation, wiring, and wall panels.
How to Prevent Uneven RV Water Pressure
Regular inspection keeps small restrictions from turning into frustrating pressure problems.
- Carry an adjustable regulator with a gauge.
- Check campground pressure before connecting your RV.
- Flush the campground spigot before attaching the hose.
- Use a drinking-water-safe hose in good condition.
- Replace filters according to their rated capacity.
- Clean city-water inlet screens regularly.
- Clean faucet aerators and showerheads.
- Keep the freshwater tank above the pump pickup level.
- Inspect the pump strainer during routine maintenance.
- Check pump-side fittings for air leaks.
- Avoid operating the pump with an empty tank.
- Verify valve positions after winterizing or sanitizing.
- Drain and winterize the system before freezing weather.
- Inspect plumbing connections after rough travel.
- Keep a spare filter and strainer O-ring in the RV.
Quick RV Water Pressure Troubleshooting Checklist
Use this order when you need to find the problem quickly:
- Confirm whether you are using city water or tank water.
- Test more than one faucet.
- Compare hot-water and cold-water flow.
- Check campground pressure with a gauge.
- Inspect the water-pressure regulator.
- Temporarily bypass the external filter.
- Straighten and inspect the drinking-water hose.
- Clean the city-water inlet screen.
- Check the freshwater tank level.
- Clean the pump inlet strainer.
- Inspect pump-side fittings for air leaks.
- Purge air from all hot and cold lines.
- Verify winterization and bypass-valve positions.
- Listen for pump cycling with every fixture closed.
- Inspect the plumbing for leaks.
- Check voltage at the pump when it is running.
- Review the pump manufacturer’s troubleshooting guide.
- Replace or adjust components only after isolating the cause.
Final Thoughts
When your RV water pressure goes up and down, do not immediately blame the pump. First identify the water source, test several fixtures, measure campground pressure, and inspect the regulator, filter, hose, screens, and valves.
For tank-water problems, check the freshwater level, pump strainer, suction fittings, and trapped air. Adjust or replace the pump only after you have ruled out simpler restrictions and leaks.
Related FAQs
These quick answers cover the most common causes of uneven RV water pressure on city water and the freshwater tank.
Why Does My RV Water Pressure Pulse When the Pump Runs?
Pulsing pressure usually happens when the pump rapidly switches on and off because of low water flow, trapped air, a clogged aerator, a dirty strainer, or incorrect pump settings.
Why Does My RV Water Pressure Start Strong and Then Drop?
Water that starts strong and quickly weakens usually points to a clogged filter, restricted hose, faulty regulator, weak campground supply, or a pump struggling to draw enough water.
Why Does My RV Water Pressure Fluctuate on City Water?
City-water pressure may fluctuate because of changing campground demand, a clogged regulator, dirty filter, kinked hose, blocked inlet screen, or a sticking check valve.
Why Does My RV Water Pressure Fluctuate When Using the Freshwater Tank?
Fluctuating tank-water pressure is commonly caused by a low tank level, trapped air, a clogged pump strainer, loose inlet fittings, or a water pump that is cycling improperly.
Can a Water Pressure Regulator Cause Uneven Water Flow?
Yes, a clogged, damaged, undersized, or incorrectly adjusted regulator can restrict water flow and cause the pressure inside your RV to rise and fall.
Can I Run My RV Water Pump While Connected to City Water?
Most RVs do not need the water pump while connected to city water because the campground supply already pressurizes the plumbing system.
Does an RV Water Pressure Regulator Increase Low Pressure?
No, a standard RV water pressure regulator only reduces excessive incoming pressure and cannot increase weak campground water pressure.
Can a Clogged RV Water Filter Cause Pressure Surges?
Yes, a clogged filter can allow strong initial flow and then cause a sudden pressure drop because water cannot pass through the filter fast enough.
How Do I Get Air Out of My RV Water Lines?
Open each hot and cold faucet one at a time and let the water run until all sputtering stops and the stream becomes steady.
Why Does My RV Water Pump Cycle When No Water Is Running?
A pump that cycles with every fixture closed usually indicates a plumbing leak, dripping faucet, faulty toilet valve, loose connection, or failing check valve.
Why Is My RV Shower Pressure Inconsistent?
Inconsistent shower pressure may come from a clogged showerhead, restricted mixing valve, pump cycling, weak campground supply, or another fixture being used at the same time.
Can High Campground Water Pressure Damage My RV?
Yes, excessive campground pressure can damage RV hoses, fittings, faucets, valves, filters, water heaters, and other plumbing components.

Michael Carter is an experienced RV traveler who focuses on practical outdoor trips across the States. He writes clear, step-by-step guides and realistic reviews based on real travel needs. His aim is to help RV and camper owners plan informed, simpler journeys with confidence.