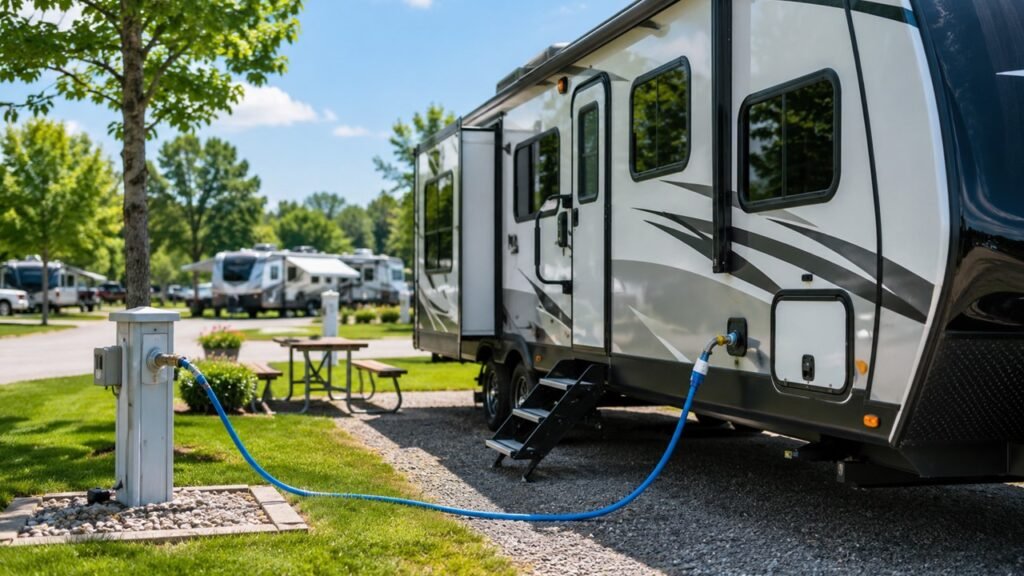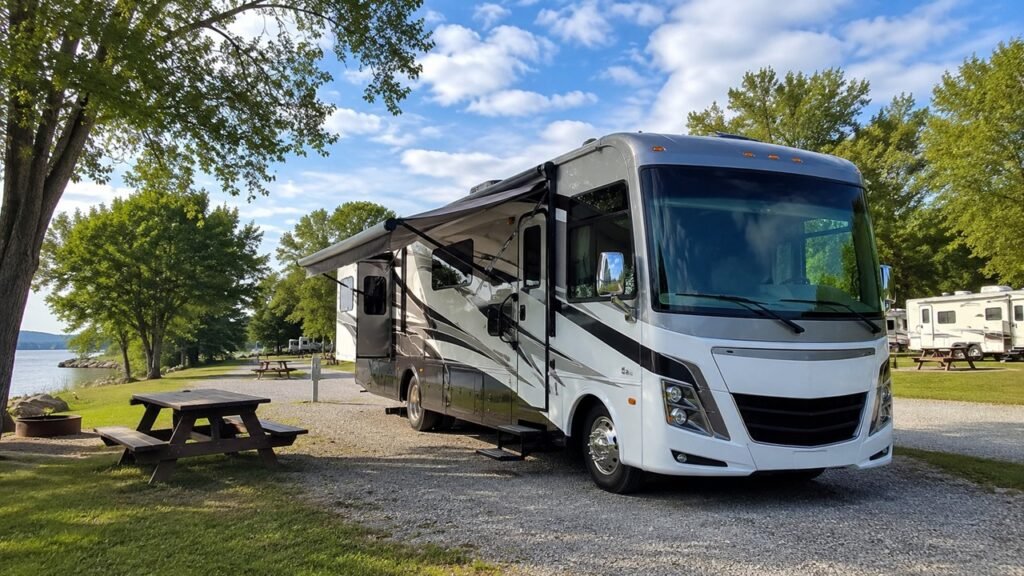
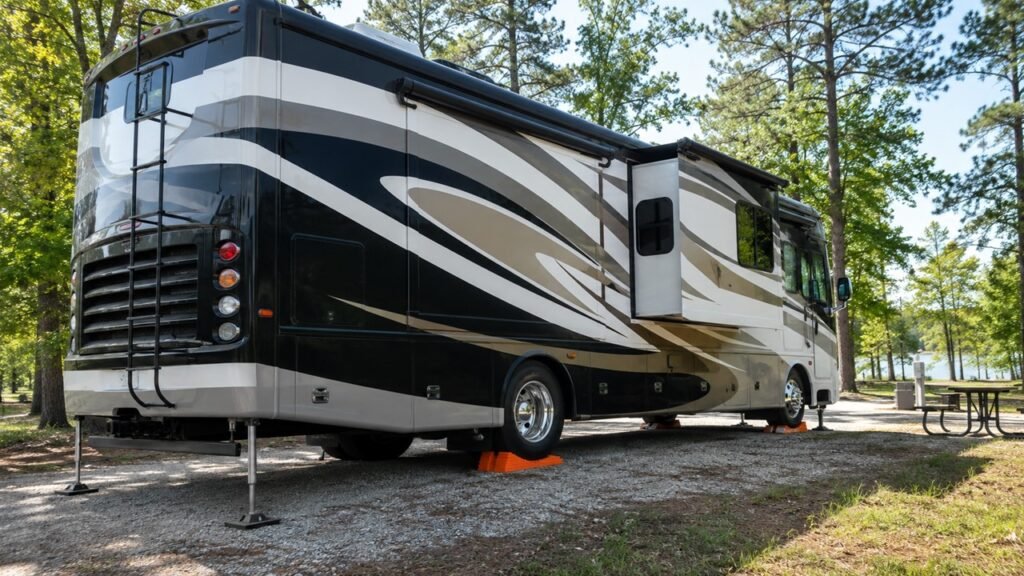
RV leveling works by raising the low side or low end of your RV until the rig sits evenly from side to side and front to back. You can do this with leveling blocks, curved ramps, tongue jacks, landing gear, hydraulic jacks, electric jacks, or an automatic leveling system.
In this guide, we’ll walk through why RV leveling matters, how different leveling systems work, the correct order to level an RV, and what to avoid so you do not damage your camper, appliances, jacks, or slide-outs.
Key Takeaways
- RV leveling means making your camper even from side to side and front to back.
- Side-to-side leveling usually comes before front-to-back leveling.
- Travel trailers often use leveling blocks, ramps, and a tongue jack.
- Fifth wheels usually use blocks or ramps first, then front landing gear.
- Motorhomes may use blocks, hydraulic jacks, or an auto-leveling system.
- Stabilizer jacks reduce movement, but they should not lift or level the RV.
- A level RV helps your refrigerator, slide-outs, doors, plumbing, and comfort.
- Always chock the wheels before unhitching a towable RV.
What Does RV Leveling Mean?
RV leveling means adjusting your RV so the living space sits evenly on the campsite. The goal is to remove the lean from side to side and front to back. When your RV is level, the floor feels normal, doors stay where they should, your bed does not feel sloped, and your appliances can work as intended.
A lot of beginners think leveling is only about comfort. Comfort is part of it, but it is not the whole reason. Your RV is a small house on wheels, and many parts inside depend on balance, gravity, and proper alignment.
There are two directions you need to think about. First, there is side-to-side leveling. This means checking whether the left or right side of the RV is lower. Then there is front-to-back leveling. This means checking whether the front or rear of the RV is sitting too low.
Most of the time, you correct the side-to-side level first. Then you secure the RV, unhitch if needed, and adjust the front-to-back level.
Why Does RV Leveling Matter?
Leveling your RV is one of those small setup steps that affects almost everything inside the camper. It helps your appliances work better, keeps your slide-outs from binding, improves drainage, and makes the RV feel more comfortable to live in.
It Helps Your RV Refrigerator Work Properly
Many RVs use absorption refrigerators, especially older models and gas/electric fridges. These refrigerators do not work the same way as a normal home refrigerator. They rely on heat, gravity, and internal fluid movement to cool properly.
When your RV is parked noticeably off-level for a long time, the refrigerator may not circulate properly. That can lead to poor cooling and, in some cases, long-term damage. This is why RV owners often care more about leveling than tent campers or car campers.
Newer refrigerators may be more forgiving, and some RVs use residential-style compressor fridges. Still, leveling your RV is a good habit because you may not always know how sensitive your fridge is until a problem happens.
It Protects Slide-Outs From Extra Strain
Slide-outs are heavy. They also need the RV frame to sit as square as possible. If your RV is twisted, leaning, or sitting unevenly, the slide-out mechanism can work harder than it should.
That extra strain can cause scraping, sticking, motor stress, seal issues, or alignment problems. You may notice the slide moving slowly, sounding rough, or not closing evenly.
A good rule is simple: level first, stabilize next, and extend slide-outs after that, unless your owner’s manual says otherwise.
It Makes Doors, Cabinets, And Beds Feel Normal
An unlevel RV can make everyday camping annoying. Cabinet doors may swing open. The bathroom door may not stay closed. You may feel like you are walking uphill inside your own camper.
Sleeping can also feel uncomfortable. Even a small slope can make your body slide toward one side of the bed. You may not notice it while standing, but you will usually feel it when trying to sleep.
Leveling fixes those small problems before they become part of your whole trip.
It Helps Plumbing And Tanks Drain Better
Your RV plumbing depends on gravity. Sinks, showers, toilets, gray tanks, and black tanks all work better when the RV is sitting correctly.
If the RV leans the wrong way, water may drain slowly. Tank readings may also seem odd because the liquid is sitting toward one side of the tank. You might think a tank is fuller or emptier than it really is.
Being level will not fix every plumbing issue, but it helps your water system behave more predictably.
How Does RV Leveling Work In Simple Terms?
RV leveling works by finding the low part of your RV and raising it until the RV sits evenly. You are not usually lowering the high side. Instead, you raise the low side with blocks, ramps, jacks, or an automatic leveling system.
For example, if the left side of your travel trailer is low, you place leveling blocks or ramps under the left-side tires. Then you slowly pull forward or back until the tires sit on the right height. Once the RV is level side to side, you chock the wheels and adjust the front-to-back level with the tongue jack.
With a fifth wheel, the idea is similar. You level side to side with blocks or ramps under the tires. Then, after chocking and unhitching, you use the front landing gear to raise or lower the front of the fifth wheel.
With a motorhome, you may drive the low tires onto blocks. If your motorhome has hydraulic or electric leveling jacks, those jacks can extend down to raise low corners of the coach. If you have auto-leveling, sensors read the RV’s position and the system adjusts the jacks for you.
So the basic idea is always the same: check the level, raise the low area, secure the RV, and stabilize it after it is level.
RV Leveling Vs Stabilizing: What Is The Difference?
Many new RV owners mix up leveling and stabilizing. They sound similar, but they do different jobs. Leveling makes the RV even. Stabilizing keeps the RV from rocking once it is already level.
| Feature | RV Leveling | RV Stabilizing |
| Main purpose | Makes the RV sit evenly | Reduces rocking and movement |
| Done when? | First during campsite setup | After the RV is already level |
| Common tools | Leveling blocks, ramps, tongue jack, landing gear, leveling jacks | Stabilizer jacks, scissor jacks, jack pads |
| Does it lift the RV? | Yes, when using proper leveling equipment | No, it should not lift the RV |
| Used for side-to-side correction? | Yes | No |
| Used for front-to-back correction? | Yes, with the right jack or system | No |
| Common mistake | Skipping the level check | Using stabilizers to lift the RV |
The important point is this: stabilizer jacks are not the same as leveling jacks. Stabilizers are made to reduce bounce and movement when people walk inside the RV. They are not designed to lift the full weight of the trailer.
If you use stabilizer jacks to level a travel trailer, you can bend the jacks, stress the frame, or damage mounting points. Level first with blocks, ramps, tongue jacks, landing gear, or a proper leveling system. Then lower the stabilizers until they are firm.
What Tools Do You Need To Level An RV?
You do not need every RV leveling tool on the market. The right setup depends on your RV type, campsite style, and whether your camper has manual or automatic leveling equipment.
- Bubble level: A simple tool for checking side-to-side and front-to-back level.
- Digital level: A more precise option, often used inside the RV or through an app.
- RV leveling blocks: Stackable blocks placed under tires to raise the low side.
- Curved leveling ramps: Ramps that let you fine-tune height as the tire rolls upward.
- Wheel chocks: Wedges placed against tires to stop the RV from rolling.
- Tongue jack: Used on travel trailers to raise or lower the front.
- Landing gear: Used on fifth wheels to adjust the front height.
- Hydraulic leveling jacks: Powerful jacks often found on motorhomes and larger RVs.
- Electric leveling jacks: Powered jacks that raise or lower the RV with less manual effort.
- Jack pads: Wide pads placed under jacks to prevent sinking on soft ground.
- Gloves and flashlight: Useful when setting up after dark or on rough campsites.
For a basic travel trailer, you may only need a bubble level, leveling blocks, wheel chocks, and a tongue jack. For a large motorhome, you may rely more on hydraulic jacks, jack pads, and an automatic leveling system.
Manual Vs Automatic RV Leveling Systems
RV leveling can be very simple or very advanced. Some campers use basic plastic blocks, while others press a button and let the RV level itself. Both methods work when used correctly.
| Leveling Type | How It Works | Best For | Main Advantage | Main Limitation |
| Leveling blocks | Tires drive onto stacked blocks | Travel trailers, motorhomes, campervans | Affordable and simple | Takes trial and error |
| Curved ramps | Tires roll up a curved ramp | Towables and smaller RVs | Easier height adjustment | Must match tire size and weight |
| Tongue jack | Raises or lowers the trailer front | Travel trailers | Great for front-to-back leveling | Does not fix side-to-side lean |
| Landing gear | Raises or lowers the fifth wheel front | Fifth wheels | Strong front support | Not for side-to-side leveling |
| Hydraulic jacks | Use fluid pressure to lift low areas | Motorhomes and larger fifth wheels | Strong and fast | More expensive and needs maintenance |
| Electric leveling jacks | Use powered motors to adjust the RV | Newer trailers and fifth wheels | Convenient | Needs battery power |
| Auto-leveling system | Uses sensors and jacks to level automatically | Larger RVs and modern campers | Fast and easy | Still needs safe ground and proper setup |
Automatic leveling is convenient, but it does not remove all responsibility from the owner. You still need to park safely, avoid extreme slopes, use jack pads on soft ground, and follow your system’s manual.
Auto-leveling also works best when the RV starts fairly close to level. If the campsite is too sloped, the jacks may overextend or the system may show an error. In that case, you may need to reposition the RV or use blocks under the tires or jack feet.
The Correct RV Leveling Order
The order matters. If you do the steps in the wrong sequence, you can make the process harder or create a safety issue. This basic order works for most towable RVs and can be adapted for motorhomes.
- Park on the flattest safe spot available.
- Check the RV level from side to side.
- Raise the low side with blocks or ramps.
- Recheck the side-to-side level.
- Chock the wheels securely.
- Unhitch if you have a travel trailer or fifth wheel.
- Level front to back with the tongue jack or landing gear.
- Lower stabilizer jacks after the RV is level.
- Extend slide-outs according to your owner’s manual.
- Recheck the level after everything settles.
The most important safety step is chocking the wheels before unhitching a towable RV. Once the trailer is disconnected from the tow vehicle, you need the wheels secured so the RV cannot roll.
Also, do not rush the process. Leveling gets easier with practice, but the first few times may take some adjusting.
How To Level A Travel Trailer
A travel trailer is usually leveled with blocks or ramps first, then adjusted front to back with the tongue jack. The process is not difficult, but the order is very important.
Step 1: Park As Level As Possible
Start by choosing the flattest part of the campsite. Even if you have good leveling gear, you do not want to fight a steep slope unless you have no other choice.
Look at the ground before you fully settle into the site. Check for holes, soft soil, rocks, roots, and uneven tire spots. A few minutes of positioning can save you a lot of frustration later.
Step 2: Level Side-To-Side First
Place a bubble level or digital level on a flat surface inside the trailer. Many RVers use the floor, kitchen counter, or a mounted level near the front of the camper.
If one side is low, place leveling blocks or a curved ramp under the tires on that side. Then slowly pull forward or back until the trailer is level side to side.
Take your time here. Small movements can make a big difference, especially with curved ramps.
Step 3: Chock The Wheels Before Unhitching
Once the trailer is level side to side, chock the wheels. Place chocks firmly against the tires so the trailer cannot roll forward or backward.
This step is not optional. The trailer may look stable, but it can still shift when you unhitch, especially on gravel, dirt, or sloped ground.
Step 4: Level Front-To-Back With The Tongue Jack
After the wheels are chocked, you can unhitch the trailer from the tow vehicle. Then use the tongue jack to raise or lower the front of the trailer.
Watch your level as you adjust. If the front is low, raise the tongue. If the front is high, lower it. Stop when the trailer sits level front to back.
Step 5: Lower The Stabilizer Jacks
Once the trailer is level, lower the stabilizer jacks. These jacks should touch the ground firmly, but they should not lift the trailer.
If the ground is soft, place jack pads under the stabilizers. This spreads the weight and helps prevent the jacks from sinking overnight.
How To Level A Fifth Wheel
A fifth wheel is heavier than a travel trailer, but the leveling idea is similar. You level the tires side to side first, then use the landing gear to adjust the front height.
Step 1: Level Side-To-Side With Blocks Or Ramps
Before unhitching, check whether the fifth wheel is level from side to side. If one side is low, use leveling blocks or ramps under the low-side tires.
Because fifth wheels are heavier, make sure your blocks or ramps are rated for the weight. Do not use weak, cracked, or unstable materials under the tires.
Step 2: Chock The Wheels Securely
After side-to-side leveling is complete, chock the wheels. Fifth wheels carry a lot of weight, so good wheel chocks matter.
Use chocks on both sides when needed, especially if the campsite has any slope. You want the fifth wheel fully secure before you disconnect from the truck.
Step 3: Use Landing Gear For Front-To-Back Leveling
After the fifth wheel is chocked and unhitched, use the front landing gear to raise or lower the front.
If the front is too low, extend the landing gear to raise it. If the front is too high, retract the landing gear carefully. Keep checking the level until the RV sits evenly front to back.
Step 4: Stabilize The Rear Of The Fifth Wheel
Once the fifth wheel is level, lower the rear stabilizers if your RV has them. Rear stabilizers help reduce bounce and movement inside the RV.
As with travel trailers, rear stabilizers are not meant to lift the RV. They should provide firm support, not carry the full weight of the camper.
How To Level A Motorhome
Motorhomes can be leveled manually with blocks or automatically with built-in leveling jacks. The right method depends on the motorhome class, size, and equipment.
Leveling A Motorhome With Blocks
Some Class B vans, Class C motorhomes, and smaller Class A motorhomes can be leveled with blocks or ramps. You check which side or corner is low, then drive the correct tires onto blocks.
This method works well when the campsite is only slightly uneven. However, large motorhomes are heavy, so always use blocks or ramps rated for your vehicle’s weight.
Do not stack blocks in a tall, unstable tower. Build a gradual ramp shape and keep the tires centered.
Leveling A Motorhome With Hydraulic Jacks
Many motorhomes have hydraulic leveling jacks. These jacks extend from the frame and lift low areas of the coach.
Hydraulic systems are powerful, but they still need stable ground. If you are parked on grass, dirt, gravel, or hot asphalt, use jack pads under the feet. Without pads, the jack feet can sink and make the RV unlevel again.
Also, avoid using hydraulic jacks on extreme slopes. If the jacks have to lift too high, it may be safer to reposition the motorhome.
Leveling A Motorhome With Auto-Leveling
Auto-leveling systems use sensors and powered jacks to level the motorhome for you. In many cases, you park, set the brake, follow the system instructions, and press the auto-level button.
The system then extends the jacks and adjusts the coach until it reaches level. This is much easier than manual leveling, especially for large RVs.
Still, auto-leveling is not magic. The RV should be parked on reasonably level ground, the parking brake should be set, and jack pads may be needed on soft surfaces.
Why Rear Wheels Should Usually Stay On The Ground
With many motorhomes, the parking brake works through the rear wheels. If the rear wheels lift off the ground, the motorhome may become less secure.
For that reason, many RVers avoid lifting the rear tires completely off the ground. If the campsite requires that much correction, it is often better to move the motorhome, turn it around, or choose another spot.
Always follow your motorhome and leveling system manual, especially with hydraulic or automatic jacks.
How Do RV Leveling Blocks And Ramps Work?
Leveling blocks and ramps are the most common manual tools for RV leveling. They work by raising the tires on the low side until the RV becomes level.
Stackable Leveling Blocks
Stackable leveling blocks are plastic blocks that lock or stack together. You place them under the tires on the low side of the RV.
The best way to stack them is like a small ramp or staircase. That gives the tire a gradual path upward. Avoid making a sharp vertical wall because it can slip, crack, or put stress on the tire.
Stackable blocks are popular because they are lightweight, easy to carry, and simple to store.
Curved Leveling Ramps
Curved leveling ramps are shaped like wedges or arcs. You place the ramp in front of or behind the tire, then slowly drive onto it.
The higher the tire moves on the curve, the more that side of the RV rises. This makes fine adjustments easier than stacking blocks over and over.
Many RVers like curved ramps because they reduce trial and error. However, you need to make sure the ramp fits your tire size and weight rating.
Jack Pads
Jack pads are placed under stabilizer jacks, hydraulic jacks, electric jacks, or tongue jacks. They spread the weight over a wider area.
This is especially helpful on soft ground, wet soil, gravel, grass, sand, or hot asphalt. Without pads, a jack foot can sink into the ground. When that happens, the RV can become unlevel again.
Jack pads also protect the campsite surface and make your setup more stable.
Wood Blocks
Some RV owners use wood blocks instead of plastic leveling blocks. Wood can work in a pinch, but it has downsides.
Wood can split, rot, absorb water, become slippery, and take up more storage space. It can also be heavy compared with plastic blocks.
If you use wood, make sure the pieces are wide, strong, and stable enough for the tire or jack. Never use thin scraps that can crack under weight.
How Level Does An RV Need To Be?
Your RV does not always need to be mathematically perfect. It needs to be level enough for comfort, appliance operation, slide-out alignment, and proper drainage.
A practical test is simple. If the floor feels noticeably sloped, the bed feels uncomfortable, doors swing open by themselves, or the refrigerator is not cooling properly, you should recheck the level.
For most campers, “level enough” means the bubble level is close to centered in both directions. A digital level can help if you want more precision, but you do not need to obsess over tiny differences on a normal campsite.
That said, do not ignore a clear lean. A small tilt for a few minutes while parking is not the same as running the RV fridge or slide-outs for hours while the rig is badly off-level.
Common RV Leveling Mistakes To Avoid
Leveling is simple once you understand the process, but a few common mistakes can cause damage or frustration.
- Using stabilizer jacks to lift or level the RV.
- Unhitching a towable RV before chocking the wheels.
- Extending slide-outs before the RV is level.
- Parking on soft ground without jack pads.
- Stacking leveling blocks too steeply.
- Using blocks or ramps that are not rated for the RV’s weight.
- Letting tires sit half-on and half-off the blocks.
- Forgetting to recheck the level after the RV settles.
- Lifting motorhome rear wheels off the ground without checking the manual.
- Overextending stabilizer jacks.
- Ignoring auto-leveling system error messages.
- Assuming every RV follows the exact same slide-out procedure.
- Leveling on icy, muddy, or unstable ground without extra caution.
The biggest beginner mistake is using the wrong tool for the job. Leveling blocks and proper leveling jacks raise the RV. Stabilizers only steady it after leveling is complete.
RV Leveling Troubleshooting Guide
Even with the right tools, leveling does not always go perfectly. Uneven campsites, soft ground, heavy slide-outs, and equipment issues can all affect the final setup.
| Problem | Likely Cause | What To Do |
| RV still rocks after leveling | Stabilizers are not firm, or the ground is soft | Add jack pads and reset the stabilizers |
| RV cannot get level | Campsite slope is too steep | Reposition the RV or choose another spot |
| Auto-level system shows an error | Low voltage, uneven ground, or system issue | Check battery power and reset per manual |
| Jack foot sinks into the ground | Soft soil, grass, gravel, or hot asphalt | Use wider jack pads |
| Door swings open by itself | RV is still slightly unlevel | Recheck side-to-side and front-to-back level |
| Fridge is not cooling well | RV may be noticeably out of level | Recheck level and allow time to recover |
| Stabilizer jack bends or strains | It may be lifting too much weight | Stop, retract it, and reset without lifting |
| Blocks shift while driving onto them | Blocks are not aligned or ground is loose | Reposition blocks and drive slowly |
| Slide-out sounds strained | RV may not be level or frame may be twisted | Stop and recheck level before continuing |
| RV settles overnight | Ground compressed under blocks or jacks | Add larger pads and recheck the level |
If you keep having the same leveling problem, inspect your gear. Cracked blocks, weak chocks, low batteries, leaking hydraulic jacks, or bent stabilizers can all make setup harder.
Should You Level Before Extending Slide-Outs?
In most cases, yes, you should level your RV before extending slide-outs. A level RV gives the slide-out a better chance to move smoothly and seal correctly.
Slide-outs are heavy, and they can shift the RV’s weight when extended. If the RV is already leaning or twisted, extending the slide can add more strain to the mechanism.
A safe general order is to park, level, stabilize, and then extend the slides. However, your owner’s manual should be the final authority. Some RV manufacturers may give model-specific instructions based on the slide design.
If your slide-out ever sounds strained, moves unevenly, or catches during travel, stop and inspect the setup. Do not force it. Recheck the level and look for anything blocking the slide path.
Quick RV Leveling Checklist
Use this checklist when you arrive at a campsite. It keeps the setup process simple and helps you avoid the most common mistakes.
- Choose the flattest safe campsite.
- Park where your RV has enough clearance.
- Check the level from side to side.
- Place blocks or ramps under the low-side tires.
- Drive slowly onto the blocks or ramps.
- Recheck the side-to-side level.
- Chock the wheels securely.
- Unhitch towable RVs only after chocking.
- Level front to back with the tongue jack or landing gear.
- Use jack pads on soft ground.
- Lower stabilizers after the RV is level.
- Extend slide-outs according to the manual.
- Recheck the level after everything settles.
- Walk around the RV and inspect blocks, jacks, and chocks.
After a few trips, this process becomes second nature. The first time may feel slow, but soon you will know exactly how many blocks you need and how your RV reacts on different campsites.
Final Thoughts
RV leveling works by raising the low side or low end of your camper until the RV sits evenly. The exact method depends on your RV type, but the basic idea stays the same: check the level, correct the low area, secure the RV, and stabilize it after leveling.
For travel trailers, that usually means leveling side to side with blocks or ramps, chocking the wheels, then using the tongue jack for front-to-back leveling. For fifth wheels, you use blocks or ramps first, then landing gear. For motorhomes, you may use blocks, hydraulic jacks, or an automatic leveling system.
The key is not to confuse leveling with stabilizing. Leveling makes the RV even. Stabilizing makes it feel steady. When you do both correctly, your RV becomes safer, more comfortable, and easier to live in at the campsite.
Related FAQs
Do You Level An RV Side-To-Side Or Front-To-Back First?
You usually level an RV side to side first, especially with a travel trailer or fifth wheel. This is because side-to-side leveling often requires driving the tires onto blocks or ramps before you unhitch. After the RV is level side to side, chock the wheels. Then you can adjust front to back with the tongue jack or landing gear.
Can You Use Stabilizer Jacks To Level An RV?
No, you should not use stabilizer jacks to level an RV. Stabilizer jacks are designed to reduce movement after the RV is already level. If you use them to lift the RV, you can damage the jacks, bend parts, or stress the frame. Use leveling blocks, ramps, landing gear, tongue jacks, or proper leveling jacks instead.
Do You Need Leveling Blocks If You Have Auto-Leveling?
You may still need leveling blocks or jack pads even if you have auto-leveling. Auto-leveling systems work best on reasonably level ground. Blocks and pads can help on soft campsites, uneven ground, gravel, grass, and hot asphalt. They can also give jacks a wider and stronger base.
Can An RV Refrigerator Be Damaged If The RV Is Not Level?
An absorption RV refrigerator can have problems if it runs while the RV is noticeably out of level for a long time. It may cool poorly and could suffer damage in some situations. This is one of the main reasons RV owners take leveling seriously. If your RV has a residential-style compressor fridge, it may be less sensitive, but leveling is still a smart setup habit.
Should RV Tires Come Off The Ground When Leveling?
In general, it is better to keep RV tires on the ground unless your specific manual or leveling system says otherwise. This is especially important with motorhomes, where the rear wheels may be part of the parking brake system. If leveling requires lifting tires completely off the ground, the campsite may be too uneven. Repositioning the RV is often safer.
Why Does My RV Still Shake After Leveling?
Your RV can be level and still shake. Leveling makes the RV even, but stabilizing reduces movement. To fix shaking, use stabilizer jacks, jack pads, and good wheel chocks. For towable RVs, wheel chocks between tires can also help reduce movement.
Can I Level My RV On Grass Or Dirt?
Yes, you can level an RV on grass or dirt, but you need to be careful. Soft ground can shift, sink, or compress under the weight of the RV. Use wide jack pads or strong blocks under jacks and tires. Recheck the level after a few hours, especially after rain or heavy movement inside the RV.
Is Auto-Leveling Worth It On An RV?
Auto-leveling can be worth it if you want faster setup and less physical work. It is especially useful on larger motorhomes, fifth wheels, and heavy travel trailers. However, manual leveling blocks still work well for many RVers. If you camp occasionally or own a smaller trailer, blocks and a good level may be all you need.

Michael Carter is an experienced RV traveler who focuses on practical outdoor trips across the States. He writes clear, step-by-step guides and realistic reviews based on real travel needs. His aim is to help RV and camper owners plan informed, simpler journeys with confidence.