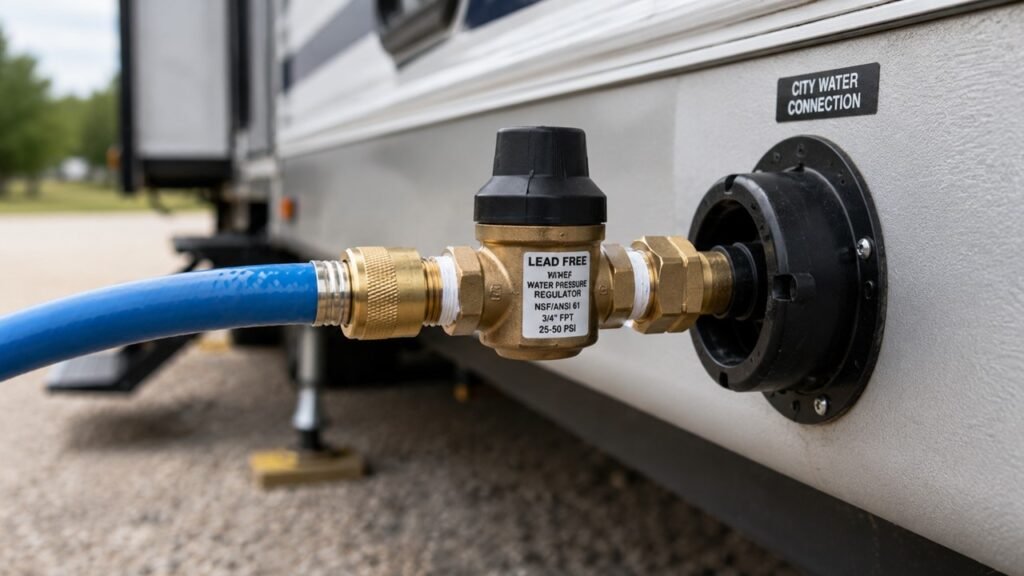
Without an RV water pressure regulator, high or fluctuating city-water pressure can strain fittings, valves, faucets, hoses, and other plumbing components. A weak connection may begin dripping, separate completely, or create a hidden leak behind a cabinet, wall, or floor.
In this guide, I’ll explain why your RV needs regulated water pressure, what can become damaged, where to install the regulator, and what to inspect after connecting without one.
Key Takeaways
- Campground water pressure can change throughout the day and night.
- Excessive pressure often damages fittings, seals, and valves before PEX tubing.
- A small hidden leak can damage flooring, cabinets, walls, and insulation.
- Most RVs need a regulator when connected to an external pressurized supply.
- The regulator should usually be attached directly to the campground spigot.
- Adjustable regulators with gauges provide better control and pressure visibility.
- Your RV owner’s manual should determine the maximum acceptable pressure.
- You normally do not need an external regulator when using the freshwater tank and onboard pump.
What Happens Without an RV Water Pressure Regulator?
Your RV might work normally when you first connect it to a campground spigot without a regulator. Water comes from the faucets, the shower feels powerful, and nothing appears to be leaking.
Unfortunately, that does not prove the incoming pressure is safe.
Without a regulator, your RV receives whatever pressure the campground or residential water system delivers. If that pressure exceeds what your plumbing components can handle, it can overstress connections, seals, fixture valves, and plastic fittings.
The damage may happen immediately. For example, a weak fitting behind a cabinet could separate and begin spraying water. However, high pressure can also weaken a seal gradually, creating a slow leak that appears hours or days later.
Pressure can also change after you finish setting up your campsite. The supply may seem gentle during a busy afternoon when many campers are using water. Later that night, demand may fall and the pressure reaching your RV may increase.
That unpredictability is the main reason I would not connect an RV to city water without some form of verified pressure regulation.
Do I Need a Regulator for My RV?
Most RVs need a water pressure regulator whenever they are connected to an external pressurized water supply. However, some RVs already have a regulator built into the city-water inlet, so you should check your owner’s manual before buying or installing another one.
When Connected to Campground Water
You should generally use a regulator when connecting to campground water.
Water pressure can vary between campgrounds, individual campsites, and different times of the day. You cannot accurately judge whether the pressure is safe simply by watching the water come from the spigot.
Winnebago recommends an inline regulator because city-water pressure varies by location and may damage fresh-water components, connections, and seals. Some Winnebago guidance recommends limiting pressure to 50 PSI, although certain model manuals recommend a 60 PSI regulator.
This difference is important. It shows why your own RV manual should take priority over a general pressure recommendation found online.
When Connected to Water at Home
You may also need a regulator when connecting your RV to an outdoor faucet at home.
A residential supply is still a pressurized city-water source. Its pressure may be completely acceptable for your house while exceeding the limit recommended for your camper.
Do not assume that a driveway hookup is safer than a campground hookup. Install the regulator and confirm the pressure before leaving the RV connected.
When Using the Freshwater Tank and Water Pump
You normally do not need an external regulator when your RV pump draws water from the freshwater tank.
The onboard pump creates and controls the pressure inside the plumbing system. It should shut off after the lines become pressurized and restart when you open a faucet.
The regulator is mainly intended to control pressure entering through the city-water connection.
If your pump produces unusually high pressure, runs continuously, or repeatedly cycles with every fixture closed, investigate the pump and plumbing rather than adding an external campground regulator.
When Filling the Freshwater Tank
Whether you need regulation while filling the freshwater tank depends on how your RV is designed.
A gravity-fill tank is not filled in the same way as a pressurized city-water connection. You insert or hold a potable-water hose at the fill port and allow water to enter the tank without pressurizing the plumbing.
Some newer RVs use a valve-controlled water-management panel that directs pressurized water toward either the tank or plumbing system. Follow the manufacturer’s instructions for that system.
Never intentionally pressurize a gravity-fill freshwater tank. Its vent and overflow system must remain open and unobstructed.
If Your RV Has a Built-In Regulator
Some RVs have a pressure regulator incorporated into the city-water inlet.
For example, Airstream states that certain models have a built-in regulator limited to 50 PSI. In those cases, the company says a separate regulator is unnecessary.
However, do not assume every model from the same manufacturer uses an identical inlet. RV components can differ by model year, floor plan, previous repairs, and owner modifications.
Look in your manual, inspect the inlet specifications, or contact the manufacturer. If a previous owner replaced the original inlet, confirm that the replacement still includes pressure regulation.
Why Campground Water Pressure Can Be Dangerous
Campground water pressure is not necessarily constant. The reading you get during setup may change as demand, pumps, valves, and campground operating conditions change.
Campground Pressure Can Fluctuate
Campground water demand rises and falls throughout the day.
Pressure may feel lower when many people are showering, washing dishes, or filling tanks. When demand decreases, the pressure at your campsite may rise again.
Elevation, pipe size, pump settings, municipal supply conditions, and the campground’s plumbing layout can also affect the pressure reaching different sites.
That means a connection that seems harmless when you arrive may not remain harmless overnight.
Pressure Spikes Can Occur Without Warning
A sudden pressure increase may place more stress on your plumbing than a steady supply at the same average pressure.
A regulator acts as a controlled restriction between the source and your RV. It reduces incoming pressure before that pressure reaches vulnerable downstream components.
Without one, a temporary spike can reach fixture cartridges, toilet valves, check valves, plastic elbows, threaded adapters, and hose connections.
RV Plumbing Is Different From Household Plumbing
RV plumbing must be lightweight, compact, and flexible enough to survive road travel.
Many modern RVs use PEX tubing, which is generally strong and well suited to mobile plumbing. However, the complete system also includes clamps, elbows, tees, adapters, faucet connectors, valves, seals, and plastic fixtures.
Those connections are often more vulnerable than a straight section of PEX.
Movement during travel, freezing temperatures, previous repairs, overtightened fittings, age, and poor installation can weaken a connection further. Excessive pressure may reveal that weakness at the worst possible time.
What Parts of an RV Can High Water Pressure Damage?
High pressure can affect almost every component connected to the pressurized freshwater system. Some failures are visible immediately, while others remain concealed until moisture damages nearby materials.
PEX Fittings and Connections
The PEX line itself may survive pressure that causes a fitting to leak or separate.
Potential failure points include:
- Elbows and tees
- Crimped or clamped connections
- Threaded adapters
- Connections behind faucets
- Low-point drain valves
- Winterization valves
- Water-heater bypass valves
- Repairs made by previous owners
A separated connection can release water quickly. A slightly loosened clamp may create only a fine spray or occasional drip, making the problem much harder to notice.
Faucets and Shower Fixtures
RV faucets contain cartridges, seals, O-rings, aerators, and lightweight supply connections.
Excessive pressure may cause dripping after the faucet is closed or leakage beneath the sink. It can also damage a shower diverter, outdoor shower valve, or connection behind the shower wall.
Pay particular attention to fixtures mounted against thin panels. Water can travel behind the panel and appear far away from the original leak.
RV Toilet Valve
The toilet’s water valve opens whenever you flush and remains pressurized while you are connected to city water.
If the valve, seal, or supply fitting fails, water may collect around the toilet base or spread beneath nearby flooring.
A small toilet-valve leak can be easy to miss because it may run into the bathroom corner, under cabinetry, or through an opening around the plumbing line.
Water Heater Connections
High pressure can strain fittings, check valves, bypass valves, and connections near the water heater.
A campground regulator is not the same as the water heater’s temperature-and-pressure relief valve. The external regulator controls incoming supply pressure, while the relief valve is a safety component on the water heater itself.
Never cap, block, or modify a water heater relief valve to stop dripping. If it is releasing water repeatedly, inspect the system and follow the water-heater manufacturer’s instructions.
City-Water Inlet and Check Valve
The city-water inlet usually contains a check valve that helps prevent water from flowing back out of the connection.
Excessive pressure, age, debris, or physical damage can cause the valve to leak or malfunction. You may notice dripping at the inlet, water entering an unintended part of the system, or problems when switching between city water and the onboard pump.
Drinking-Water Hose
A potable-water hose can also experience the full source pressure.
If you put the regulator at the RV inlet, the camper’s internal plumbing may be protected, but the entire hose remains exposed. A swollen or leaking hose can flood the campsite and leave you without a reliable connection.
Attaching the regulator directly to the spigot protects the hose and everything downstream from it.
Water-Connected Appliances
Larger RVs may include:
- Ice makers
- Residential refrigerators with water dispensers
- Washing machines
- Dishwashers
- Additional filtration systems
- Outdoor kitchens
These appliances contain their own small valves, hoses, connectors, and seals. A failure may occur behind an appliance where it remains hidden for a considerable time.
Common Problems Caused by Unregulated Water Pressure
Excessive pressure does not always cause a dramatic burst. In many cases, the first sign is a small plumbing problem that gradually becomes more serious.
- Dripping faucets and shower fixtures
- Loose or separated plumbing connections
- Cracked plastic elbows and adapters
- Leaking toilet valves
- Failed city-water inlet check valves
- Water-heater connection leaks
- Swollen or leaking potable-water hoses
- Water collecting beneath sinks
- Damp storage compartments
- Wet insulation behind walls
- Soft or discolored flooring
- Swollen cabinet panels
- Peeling wall coverings
- Persistent musty odors
- Mold growth after an undetected leak
- Damage to nearby electrical equipment
The cost of the original fitting may be small. The expensive part is often gaining access to the leak, drying the structure, and replacing damaged flooring or cabinetry.
Can High Water Pressure Burst RV PEX Pipes?
High water pressure can damage an RV plumbing system, but the straight PEX tubing may not be the first component that fails.
PEX is flexible and generally more resistant to vibration than rigid piping. However, the tubing is only one part of the system. Its fittings, clamps, fixture connections, seals, and plastic valves may have different pressure limitations.
A poorly installed clamp or cracked plastic elbow can leak while the surrounding PEX remains intact. Similarly, an old faucet connector may fail before pressure visibly affects the main water line.
System condition also matters. Previous freezing, repeated vibration, UV exposure, accidental kinking, poor repairs, or overtightened threaded fittings may reduce the strength of individual components.
Therefore, I would not rely on the pressure rating of PEX tubing alone. The safest operating limit is the limit specified for your complete RV water system.
What Is a Safe Water Pressure for an RV?
There is no single water-pressure setting that is correct for every RV. Many campers commonly operate around 40–50 PSI, but some manufacturers specify different limits or install their own regulated city-water inlets.
| Water-pressure situation | What it may mean | Recommended response |
| Below approximately 35 PSI | Faucets and showers may feel weak | Inspect the source, regulator, hose, filter, and aerators |
| Around 40–50 PSI | A commonly used range for many RVs | Confirm the setting in your RV manual |
| Around 50–60 PSI | Acceptable for certain systems only | Use only when the manufacturer permits it |
| Above the RV’s stated limit | Increased stress on valves and connections | Reduce the pressure before using the system |
| Rapidly fluctuating pressure | Repeated stress despite a reasonable average | Use a functioning regulator and gauge |
| Unknown pressure | Safety cannot be confirmed by feel | Measure and regulate before connecting |
Manufacturer guidance illustrates why one universal setting should not be applied to every camper. A current nuCamp manual warns not to exceed 50 PSI, while a Winnebago towable manual recommends an inline 60 PSI regulator.
Set an adjustable regulator according to your own manual. When the manual is unavailable, contact the manufacturer or an authorized service center before selecting a higher setting.
How Quickly Can High Water Pressure Damage an RV?
There is no fixed amount of time that an RV can safely tolerate excessive water pressure.
A badly weakened fitting may begin leaking almost immediately. A newer system could remain dry during a brief connection but develop a leak after repeated exposure.
The risk depends on several factors:
- The actual source pressure
- The duration of exposure
- Sudden pressure changes
- Plumbing age and condition
- Quality of the original installation
- Previous freeze damage
- Previous repairs or modifications
- Water temperature
- Condition of fixture valves and seals
Connecting without a regulator once does not guarantee damage occurred. However, getting away with it once does not prove that future hookups will be safe.
Warning Signs of Excessive RV Water Pressure
High pressure may produce noticeable changes before a major leak occurs. Pay attention to anything that feels, sounds, or looks different from your normal water-system operation.
- Banging or hammering inside the plumbing
- Unusually forceful flow from faucets
- A potable-water hose that becomes extremely rigid
- A swollen or leaking hose
- Faucets dripping after being closed
- Water appearing beneath a sink
- A toilet valve that leaks continuously
- Moisture around the city-water connection
- Water around the heater compartment
- A sudden reduction in water flow
- Damp storage compartments
- Swollen cabinet bases
- Soft or discolored flooring
- Musty odors near plumbing areas
If you suspect a leak, shut off the campground spigot immediately. Open a faucet briefly to relieve pressure before inspecting or tightening connections.
Disconnect shore power when water is near electrical equipment, and avoid touching wet electrical components. Contact a qualified technician when you cannot safely locate or isolate the problem.
Where Should an RV Water Pressure Regulator Be Installed?
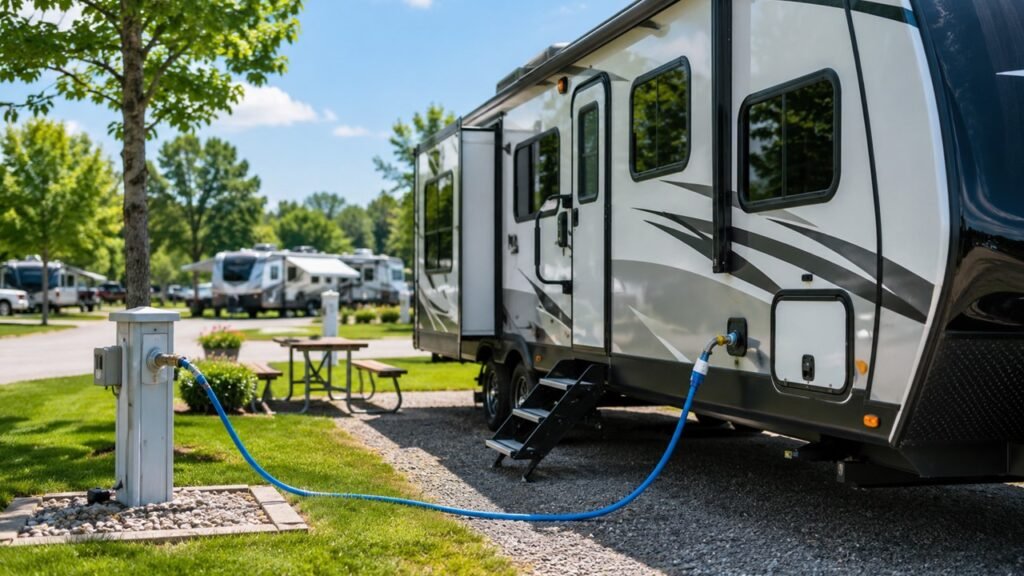
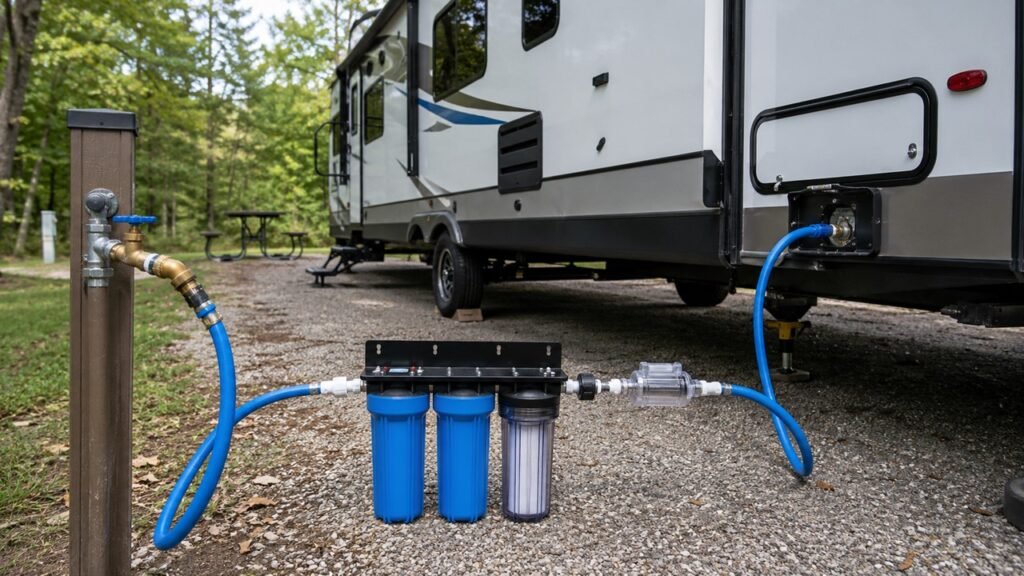
The regulator should usually be attached directly to the campground or household spigot. This arrangement reduces pressure before water enters the hose, filter, fittings, or RV.
- Turn the water spigot off completely.
- Inspect the spigot threads for damage.
- Check that the regulator has a serviceable washer.
- Attach the regulator directly to the spigot.
- Connect the potable-water hose after the regulator.
- Add the filter in the sequence recommended by its manufacturer.
- Connect the hose to the RV’s city-water inlet.
- Open a faucet inside the RV.
- Slowly open the external water supply.
- Allow trapped air to escape.
- Close the faucet.
- Check the gauge and adjust the regulator when applicable.
- Inspect every exterior and interior connection for leaks.
Winnebago describes an RV setup in which the regulator is connected first at the spigot, followed by the filter, hose, and RV. This protects the downstream equipment from excessive source pressure.
Avoid using tools to overtighten ordinary hose connections unless the component manufacturer specifically instructs you to do so. A sound washer and firm hand-tight connection are often sufficient.
RV Water Pressure Regulator Placement Comparison
Where you install the regulator determines which parts of the water hookup receive protection.
| Regulator location | Protects RV plumbing? | Protects the hose? | Main advantage | Main disadvantage |
| Directly at the spigot | Yes | Yes | Protects the complete downstream hookup | More exposed to weather or theft |
| At the RV city-water inlet | Yes | No | Easy to access beside the RV | Hose receives full source pressure |
| Built into the RV inlet | Usually | No | Convenient and always present | Can be harder to inspect or replace |
| No regulator | No | No | No additional setup | Leaves the system exposed to unknown pressure |
A regulator at the RV inlet is still better than no regulator when the RV does not already have built-in protection. However, installing it at the spigot provides more complete coverage.
Types of RV Water Pressure Regulators
RV regulators range from inexpensive fixed devices to adjustable high-flow models with replaceable gauges. The right option depends on your RV, travel habits, water demands, and manufacturer’s pressure limit.
Fixed Inline Regulators
A fixed regulator reduces pressure to a preset level.
It is small, affordable, and simple to use because there is nothing to adjust. This makes it suitable as a backup or for owners who want the easiest possible setup.
However, basic models normally do not show the incoming or regulated pressure. Some can also restrict flow enough to make the shower feel disappointing when another faucet is open.
Adjustable Regulators With Gauges
An adjustable regulator allows you to choose the outlet pressure.
The attached gauge makes it easier to see what pressure is being supplied to the RV. This is useful when you regularly move between campgrounds with different water systems.
An adjustable model must still be set correctly. The ability to increase pressure does not mean you should turn it up until the shower feels strongest.
Set it according to the RV manufacturer’s instructions and periodically verify that the gauge remains accurate.
High-Flow Regulators
A high-flow regulator is designed to deliver a greater volume of water without allowing pressure to exceed the selected level.
This can be helpful in a larger RV where two people may use different fixtures simultaneously. It may also improve shower performance compared with a small fixed regulator.
High flow and high pressure are not the same thing. A quality regulator should provide usable flow while keeping pressure within the RV’s approved limit.
Built-In Regulators
A built-in regulator may be integrated into the city-water inlet or installed inside the plumbing compartment.
This saves setup time and ensures the RV has protection whenever city water is connected. The downside is that replacement may require access behind a panel or removal of the inlet assembly.
A built-in regulator can also clog, wear out, or be replaced with the wrong component. Verify its condition when water flow suddenly changes.
Fixed vs. Adjustable RV Water Pressure Regulators
Both designs can protect an RV when they are correctly sized, functional, and compatible with the plumbing system.
| Feature | Fixed regulator | Adjustable regulator with gauge |
| Pressure adjustment | Not available | User adjustable |
| Pressure visibility | Usually unavailable | Displayed on the gauge |
| Purchase cost | Lower | Higher |
| Setup | Very simple | Requires initial adjustment |
| Flow performance | May be restrictive | Often better with a quality model |
| Troubleshooting value | Limited | Helps identify pressure changes |
| Maintenance | Minimal | Gauge and adjustment mechanism need inspection |
| Best suited for | Basic or backup use | Frequent travel and varying water sources |
For regular campground travel, I prefer the control and visibility of an adjustable regulator. A fixed model can still be useful as a compact spare.
How to Choose the Right RV Water Pressure Regulator
A regulator should protect the plumbing without making normal water use unnecessarily frustrating.
- Check the maximum pressure in your RV owner’s manual.
- Confirm whether the city-water inlet already includes regulation.
- Choose a regulator intended for potable-water systems.
- Look for lead-free materials suitable for drinking water.
- Consider brass or stainless-steel construction.
- Select an adjustable model when visiting different campgrounds.
- Choose a gauge that is large enough to read easily.
- Check the regulator’s expected flow capacity.
- Confirm standard hose-thread compatibility.
- Look for an inlet screen that catches larger debris.
- Check whether the gauge or internal parts can be replaced.
- Consider how the regulator will be protected from freezing.
- Read the manufacturer’s setup and maintenance instructions.
- Avoid selecting a regulator solely because it has the lowest price.
A pressure gauge is especially useful because faucet strength alone cannot tell you the actual system pressure.
Does a Water Pressure Regulator Reduce Water Flow?
A regulator can reduce perceived water flow, especially when it is undersized, clogged, damaged, or set too low.
Pressure and flow are related, but they are not identical. Pressure is the force pushing the water, while flow is the amount of water moving through the system over time.
A good regulator can keep pressure within a safe range while still allowing enough flow for normal showering, dishwashing, and toilet use. A small fixed regulator may create a noticeable restriction even when its pressure setting is technically acceptable.
Before blaming the regulator, check for:
- A partially opened campground spigot
- A kinked potable-water hose
- A clogged regulator screen
- A dirty water-filter cartridge
- A blocked faucet aerator
- A restricted showerhead
- A bent hose connection
- Low campground supply pressure
- Multiple fixtures operating simultaneously
Do not remove the regulator simply to improve the shower. First identify whether the problem is pressure, flow, or an obstruction.
What Should You Do if Campground Water Pressure Is Too Low?
Low campground pressure can be annoying, but removing your regulator may expose the RV to a later pressure increase. Check the complete hookup before changing your protection.
Check the Regulator Setting
If you use an adjustable model, confirm that it is not set unnecessarily low.
Make adjustments while water is flowing, following the regulator manufacturer’s directions. Do not exceed the maximum pressure allowed by your RV manufacturer.
Clean the Regulator Screen
Sediment can collect in the inlet screen and restrict water.
Turn the spigot off, disconnect the regulator, relieve trapped pressure, and inspect the screen. Rinse away debris without damaging the mesh.
Inspect the Hose and Filter
Walk along the full length of the hose and check for sharp bends or compression beneath equipment.
A dirty filter can reduce flow significantly. Replace the cartridge according to its service life or sooner when campground water contains heavy sediment.
Test the Campground Supply
Disconnect the RV setup briefly and observe the spigot flow.
Weak source flow may be a campground problem rather than an RV problem. You can also ask campground staff whether pressure tends to fall during high-demand periods.
Use the Freshwater Tank and Onboard Pump
When campground water is consistently weak, fill your freshwater tank and use the onboard pump.
The pump may provide more consistent pressure for showering and other normal use. Remember that the pump should not run dry, and the tank should be filled only from a safe potable source.
What Should You Do After Connecting Without a Regulator?
A brief unregulated connection does not automatically mean that something broke. Still, a careful inspection can catch a small leak before it damages the RV.
- Turn off the campground or household spigot.
- Open a faucet briefly to relieve trapped pressure.
- Disconnect the existing hookup.
- Install the correct regulator.
- Reconnect at the manufacturer-approved pressure.
- Inspect the potable-water hose for swelling or leakage.
- Check around the city-water inlet.
- Look beneath every sink.
- Inspect the toilet valve and supply connection.
- Check the shower plumbing access panel when available.
- Examine the water-heater compartment.
- Inspect visible PEX fittings and low-point drains.
- Look inside lower cabinets and storage compartments.
- Feel the flooring around plumbing areas.
- Dry any moisture immediately.
- Monitor the system during and after repressurizing it.
If you find substantial water, shut off both the water supply and nearby electrical power. Water can travel into wiring, outlets, converters, inverters, and other equipment.
A technician may need to perform a controlled pressure test when you suspect a concealed leak.
How to Check an RV for Hidden Water Leaks
Hidden leaks are particularly damaging because they can wet structural materials for days before water becomes visible. Work systematically through the plumbing areas instead of checking only the floor beneath the nearest faucet.
Inspect Plumbing Access Areas
Start with locations where lines connect to fixtures or change direction.
Inspect:
- Beneath kitchen and bathroom sinks
- Behind removable shower panels
- Around the toilet valve
- Inside the water-heater compartment
- Behind the exterior shower
- Near the city-water inlet
- Around the water pump and strainer
- At the filter housing
- Near low-point drains
- Inside wet bays and utility compartments
Use a flashlight and a dry paper towel. A paper towel can reveal a slight seep that is difficult to see on a plastic fitting.
Listen for Dripping or Hissing
Turn off appliances, fans, and music, then listen carefully while the water system is pressurized.
A faint hiss, spray, or intermittent drip may lead you toward a leaking fitting. Listen from both inside and outside because a wall cavity can distort where the sound appears to originate.
Watch for Pressure Loss
An adjustable regulator gauge may help identify a possible leak, but it is not a perfect diagnostic tool.
Close all fixtures and stop appliances that use water. If the pressure repeatedly falls without any water being used, inspect the system.
Source fluctuations, regulator behavior, check valves, and appliance cycles can also affect readings, so do not rely on the gauge alone.
Look for Moisture Damage
Search for indirect signs of water, including:
- Darkened wood
- Swollen cabinet bases
- Soft flooring
- Discolored wall panels
- Peeling vinyl
- Damp insulation
- Rust around fasteners
- Unexplained condensation
- Musty odors
- Mold-like spotting
A leak does not have to be directly above the visible damage. Water often follows wiring, pipes, framing, or the RV’s floor slope.
Arrange a Professional Pressure Test
Contact an RV technician when the leak is inside an inaccessible wall, under the floor, or near electrical equipment.
A professional can isolate parts of the system, verify regulator performance, pressure-test the plumbing, and use moisture-detection equipment where necessary.
How to Maintain an RV Water Pressure Regulator
A regulator spends much of its life exposed to water, sediment, weather, and repeated installation. Basic maintenance helps it remain dependable.
- Inspect the body for cracks, corrosion, or impact damage.
- Check threaded connections before every trip.
- Replace flattened or split hose washers.
- Clean sediment from the inlet screen.
- Watch for fogging or water inside the gauge.
- Compare suspicious gauge readings with a known-good gauge.
- Confirm that the adjustment mechanism moves smoothly.
- Relieve pressure before disconnecting the regulator.
- Drain it completely before freezing weather.
- Never leave water trapped inside it during winter storage.
- Store it in a clean, dry compartment.
- Protect the gauge from heavy tools and road vibration.
- Replace damaged seals when parts are available.
- Replace the regulator when it no longer holds a stable setting.
Carry spare hose washers, a screened washer, thread-safe replacement fittings, and a backup regulator. Those small items can save a campsite setup when a component fails.
Regulator Cost Compared With Possible Water Damage
A regulator is a relatively small part of the water hookup. The damage caused by a concealed leak can involve much more than replacing the failed fitting.
| Item or repair | Relative cost | Important consideration |
| Basic fixed regulator | Low | Affordable but may restrict flow |
| Adjustable regulator with gauge | Low to moderate | Offers pressure control and visibility |
| Faucet or valve replacement | Moderate | Labor depends on accessibility |
| Exposed fitting repair | Moderate | Often straightforward when easy to reach |
| Concealed fitting repair | Moderate to high | Panels or cabinetry may require removal |
| Flooring replacement | High | Water can spread beyond the original leak |
| Cabinet or wall repair | High | Matching RV materials can be difficult |
| Moisture or mold remediation | Potentially high | Severity depends on duration and affected area |
| Electrical repair after water exposure | Potentially high | Requires careful inspection and safe isolation |
Exact repair costs depend on the RV, labor rates, damage location, and how long the leak remained active. The important comparison is that preventing excessive pressure is usually much easier than repairing water-damaged materials.
Common RV Water Pressure Regulator Mistakes
Even a good regulator cannot protect your RV when it is installed or used incorrectly.
- Assuming every campground provides safe pressure
- Judging pressure only by how strong the faucet feels
- Forgetting to confirm whether the RV has built-in regulation
- Installing the regulator after the potable-water hose
- Setting an adjustable regulator above the RV’s limit
- Turning the pressure up to compensate for a clogged filter
- Confusing low flow with low pressure
- Ignoring sediment in the inlet screen
- Using a gauge with an unreadable or damaged face
- Overtightening hose-thread connections
- Leaving the regulator full of water during freezing weather
- Allowing the gauge to strike other tools during storage
- Using components not intended for potable water
- Leaving city water running while the RV is unattended
- Assuming a regulator prevents every possible plumbing leak
The best setup combines correct regulation with routine plumbing inspections.
Can You Leave RV City Water Connected Overnight?
You can leave an RV connected to regulated city water overnight, but doing so increases how much water can enter if a connection fails.
Your freshwater tank contains a limited volume. A campground spigot can continue feeding a leak until someone turns it off.
Before going to sleep, check the regulator, hose, inlet, and visible plumbing connections. Never ignore a dripping fixture or unexplained pump behavior.
Many owners turn off the spigot before leaving the campsite for several hours. Others fill the freshwater tank and use the onboard pump, particularly when they are concerned about an unattended leak.
Using the pump offers one practical warning: if it begins cycling while every fixture is closed, you may hear it and investigate. However, the pump itself cannot prevent leaks, and it should be turned off when the RV is unattended.
Is a Water Pressure Regulator Enough to Prevent Every Leak?
A regulator reduces the risk of pressure-related damage, but it cannot prevent every plumbing failure.
Leaks can also result from:
- Freezing water
- Aging seals
- Loose clamps
- Cracked plastic fittings
- Cross-threaded connections
- Poor repairs
- Road vibration
- Damaged check valves
- Worn faucet cartridges
- Failed appliance valves
- Kinked tubing
- Improper winterization
- Rodent damage
A regulator should be part of a broader water-system routine that includes winterization, leak inspections, hose maintenance, filter replacement, and prompt repairs.
Final Thoughts
So, what happens without an RV water pressure regulator? You expose your hose, fittings, valves, fixtures, and hidden plumbing connections to whatever pressure the external water source delivers. Nothing may happen during one hookup, but a sudden increase or weakened connection could produce a serious leak.
Use a properly sized regulator whenever your RV requires external regulation, install it at the spigot, and set it according to your owner’s manual. That small setup step can help prevent damaged fittings, soaked cabinets, soft flooring, and an avoidable interruption to your trip.
Related FAQs
What PSI Is Too High for an RV?
Any pressure above the maximum specified by your RV manufacturer is too high. Many campers commonly operate around 40–50 PSI, while some models permit a different limit.
Can 80 PSI Damage RV Plumbing?
Eighty PSI can exceed the recommended limit of many RV plumbing systems. It may overstress fittings, fixture valves, seals, check valves, and hose connections, even when the PEX tubing remains intact.
Can I Connect My RV to City Water Without a Regulator?
Water may flow normally without a regulator, but your plumbing remains exposed to unknown pressure and possible fluctuations. Use verified built-in regulation or an appropriate external regulator.
Should the RV Water Pressure Regulator Go Before or After the Hose?
Install it before the hose by attaching it directly to the water spigot. This arrangement protects both the potable-water hose and the RV plumbing.
Does Every RV Need a Water Pressure Regulator?
Most RVs need pressure regulation when connected to an external pressurized water supply. Some have a regulator built into the inlet, so check your manual before adding another one.
Does My RV Have a Built-In Water Pressure Regulator?
Some RVs do, but you cannot confirm it by appearance alone. Check the owner’s manual, inlet specifications, plumbing diagram, or manufacturer support information.
Do I Need a Regulator When Using the Freshwater Tank?
You normally do not need an external regulator while using the freshwater tank. The onboard pump creates and controls pressure as it supplies the RV plumbing.
Is a Fixed or Adjustable RV Water Regulator Better?
A fixed regulator is simple and affordable. An adjustable regulator with a gauge offers better control, pressure visibility, and troubleshooting value for frequent travelers.
Why Is My RV Water Pressure Low With a Regulator?
Possible causes include a low adjustment, clogged inlet screen, dirty filter, kinked hose, blocked aerator, restrictive regulator, or weak campground supply.
Can an RV Water Pressure Regulator Go Bad?
Yes. Sediment, freezing, corrosion, internal wear, impact damage, and gauge failure can reduce its accuracy or restrict water flow.
How Do I Know Whether My RV Regulator Is Working?
Use a reliable pressure gauge and compare the regulated reading with the manufacturer’s setting. Unstable readings, pressure creep, leaks, or unusually weak flow may indicate a problem.
Should I Turn Off Campground Water When Leaving My RV?
Turning it off is a sensible precaution when the RV will be unattended. It limits the amount of water available if a hose, fitting, valve, or appliance connection fails.
Can I Use My RV Water Pump While Connected to City Water?
That depends on the RV’s plumbing design. Some manufacturers allow the pump to assist a weak city-water supply, while other systems may operate differently. Follow your owner’s manual.
Does a Water Filter Regulate RV Water Pressure?
No. A water filter removes certain contaminants or sediment, depending on its design. It may reduce flow, but it is not a substitute for a pressure regulator.

Michael Carter is an experienced RV traveler who focuses on practical outdoor trips across the States. He writes clear, step-by-step guides and realistic reviews based on real travel needs. His aim is to help RV and camper owners plan informed, simpler journeys with confidence.