Your RV faucet usually sputters because air is trapped in the water lines, the fresh tank is running low, or the water pump is pulling air through a loose fitting, cracked strainer, damaged hose, or incorrectly positioned winterization valve. A clogged aerator may also cause uneven flow when only one faucet is affected.
In this guide, I’ll help you identify where the sputtering comes from, show you how to clear air from the system, and explain when the pump, water heater, city water connection, or faucet itself needs attention.
Key Takeaways
- Brief sputtering after filling or dewinterizing your RV is usually normal.
- Sputtering from every faucet often points to trapped air or a pump-side leak.
- A single sputtering faucet usually has a clogged aerator or cartridge.
- Hot-water-only sputtering may involve the water heater or bypass valves.
- Pump-only sputtering commonly starts between the fresh tank and pump inlet.
- Persistent sputtering with low pressure should not be ignored.
Why Does My RV Faucet Sputter?
An RV faucet sputters when air mixes with the water before it reaches the tap. Instead of producing a steady stream, the faucet releases short bursts of water, air, or both.
Sometimes, the air is simply left inside the plumbing after you refill the fresh tank, drain the system, complete a repair, or bring the RV out of winter storage. Running the faucets for a few minutes normally clears this temporary air.
However, sputtering that continues or repeatedly returns usually means air is entering the system somewhere. The most common entry points include the water pump strainer, pump inlet fittings, winterization hose, fresh tank suction line, and tank fill or diverter valve.
The pattern of the problem matters. If every faucet sputters, the issue is probably affecting the entire plumbing system. If only one fixture sputters, the restriction is more likely inside that faucet.
RV Faucet Sputtering Diagnosis Chart
You can often narrow down the problem without removing the pump or replacing parts. Start by noticing when the sputtering happens and which fixtures are affected.
| What You Notice | Most Likely Cause | First Thing to Check |
| Sputtering after filling the fresh tank | Trapped air | Run hot and cold faucets |
| Every faucet sputters on pump water | Pump drawing air | Strainer, hoses and inlet fittings |
| Only one faucet sputters | Clogged aerator or cartridge | Remove and clean the aerator |
| Only hot water sputters | Air or sediment in the water heater | Fill, purge or flush the heater |
| Sputtering only on city water | Hose, filter, regulator or campground supply | Test the connection without restrictions |
| Sputtering worsens as the tank empties | Low water level or suction-side leak | Refill the tank and inspect the intake |
| Pump cycles while faucets are closed | Leak, pressure loss or faulty check valve | Inspect fittings and plumbing |
| Water contains visible particles | Sediment or deteriorating material | Check filters, aerators and water heater |
Is RV Faucet Sputtering Normal?
Brief sputtering can be completely normal when air has recently entered an empty or partially drained plumbing system.
You may hear sputtering after refilling the fresh water tank, replacing a filter, installing a new water pump, completing plumbing repairs, draining the water heater, or dewinterizing the RV.
In these situations, the pump must push trapped air out before it can deliver a steady column of water. The flow may alternate between air and water for a few minutes before becoming smooth.
Normal sputtering should gradually improve as you run each hot and cold fixture. It should not return every time the pump starts.
Persistent sputtering is different. If the faucet continues spitting air after the system has been thoroughly purged, air is probably entering through a loose connection, damaged seal, open valve, low tank, or faulty pump component.
First, Identify When the Faucet Sputters
Before you replace anything, pay attention to the pattern. A few simple observations can tell you whether the problem is local, system-wide, pump-related, or connected to the campground supply.
Does One Faucet or Every Faucet Sputter?
When only one faucet sputters, the cause is usually located at that fixture. A clogged aerator, blocked cartridge, kinked supply hose, or debris inside the faucet body can interrupt the water stream.
When every faucet sputters, the problem is more likely occurring before the plumbing branches reach individual fixtures. Check the fresh tank, pump, strainer, winterization valve, main filter, and water source.
Do not replace the pump because one kitchen faucet spits water while the shower and bathroom sink work normally.
Does It Happen on Hot Water, Cold Water or Both?
Hot-water-only sputtering often points toward the water heater. It may not be completely full, its bypass valves may be positioned incorrectly, or sediment may be restricting flow.
Cold-water-only sputtering at one fixture may indicate a clogged faucet cartridge or a restriction in that specific supply line.
If both hot and cold sides sputter throughout the RV, start your diagnosis at the main water source.
Does It Happen on Pump Water or City Water?
Testing both water sources is one of the easiest ways to isolate the problem.
If the RV sputters on pump water but works smoothly on city water, inspect the plumbing between the fresh tank and the pump. The issue could be a low tank, loose fitting, leaking strainer gasket, cracked intake hose, or open winterization valve.
If it sputters on city water but works normally with the pump, inspect the drinking-water hose, pressure regulator, external filter, city water inlet, and campground connection.
If it sputters on both sources, look for trapped air, a clogged main filter, water heater problem, or fixture-level restriction.
Is the Fresh Water Tank Full or Nearly Empty?
An almost-empty tank can allow the water pump to pull air, especially when the RV is parked on an incline.
Tank-level sensors are also not always accurate. Mineral buildup and debris may cause the monitor to show water when the tank is actually nearly empty.
Add enough water to the tank before spending time checking the pump.
Did the Problem Begin After Winterizing or Plumbing Work?
Sputtering after maintenance is often caused by trapped air or a valve left in the wrong position.
Check the winterization suction valve, water heater bypass valves, low-point drains, fresh tank drain, and tank fill selector.
A valve that remains slightly open may allow the pump to draw air even though no water leaks from it.
Common Reasons an RV Faucet Sputters
Several problems can produce similar symptoms. The following causes are arranged from common and easy to check to less common and more involved.
Air Trapped in the RV Water Lines
Trapped air is the most common cause of temporary RV faucet sputtering.
Air enters the plumbing whenever the system is drained, opened, repaired, winterized, or allowed to run dry. It can also enter while you refill an empty fresh tank.
As the pump pushes water through the pipes, the trapped air collects at high points and fixtures. When you open a faucet, the air escapes in bursts and interrupts the stream.
You can normally fix this by running every hot and cold fixture until the flow becomes steady.
A Low or Empty Fresh Water Tank
Your RV water pump cannot deliver a smooth flow when the fresh tank is nearly empty.
The pump may begin drawing a mixture of air and water as the level drops near the outlet. This is more likely when the RV is parked at an angle and the remaining water moves away from the tank pickup.
A low tank may also make an existing pump-side air leak more noticeable because the pump has less gravity-fed water available at its inlet.
Before assuming the pump has failed, refill the tank and test the system again.
A Loose Fitting on the Pump’s Inlet Side
A loose fitting before the pump can draw air into the plumbing without leaking visible water.
This happens because the inlet side operates under suction. The pump pulls water toward itself, and a small opening may pull air inward instead of allowing water to drip outward.
Check every fitting between the fresh tank and pump, including swivel connectors, threaded adapters, elbows, hose clamps, valves, and strainer connections.
A fitting may look secure but still have a flattened O-ring, damaged seal, or slightly loose retaining nut.
A Cracked or Loose Water Pump Strainer
Most RV water pumps have a small strainer installed on the inlet side. It usually has a clear plastic bowl, mesh screen, and rubber gasket.
The strainer catches debris before it reaches the pump diaphragm. Unfortunately, its plastic bowl and gasket can also become sources of air leaks.
The bowl may crack after freezing, overtightening, vibration, age, or chemical exposure. The rubber gasket may harden, flatten, twist, or fall out of its groove.
Even a small leak at the strainer can cause constant sputtering throughout the RV.
A Clogged Pump Strainer or Water Filter
A dirty strainer restricts the water entering the pump. The pump then struggles to maintain a steady supply and may sound louder than normal.
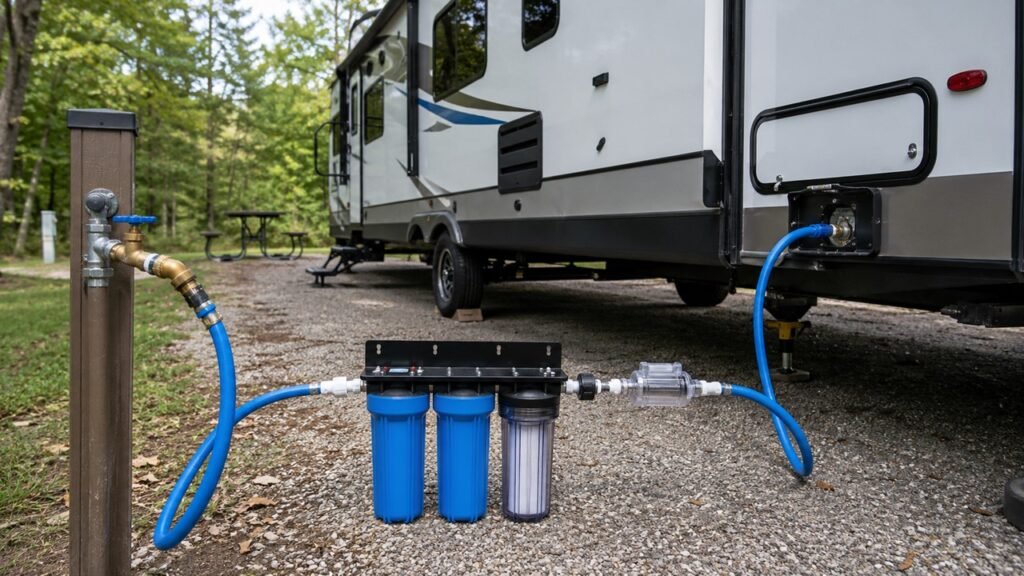
Inline filters and whole-RV water filters can produce similar symptoms when sediment, rust, or mineral deposits block the filter media.
Restrictions usually cause low flow, but they can also make pressure fluctuate or expose a small air leak elsewhere in the system.
Remove or bypass the filter briefly during diagnosis. If the flow improves, clean or replace the restricted component.
A Cracked, Kinked or Collapsed Intake Hose
The hose between the fresh tank and pump must remain airtight and open.
A sharp bend can restrict flow, while a soft hose may collapse inward when the pump creates suction. Older hoses may also develop tiny cracks around clamps, fittings, or areas that rub against cabinets and framing.
These cracks can be difficult to find because they may pull air without leaking water.
Follow the entire hose with your hand and inspect both visible and hidden sections whenever possible.
An Incorrectly Positioned Winterization Valve
Many RVs have a short hose near the pump that draws antifreeze from a bottle during winterization.
A valve switches the pump inlet between the fresh tank and the antifreeze hose. If the valve remains open, partially open, or positioned incorrectly, the pump may suck air through that hose.
Check that the winterization hose is capped and that the valve is fully returned to its normal operating position.
This is one of the first places I would inspect when sputtering begins immediately after dewinterizing.
A Faulty Fresh Tank Fill or Diverter Valve
Some RVs use a selector valve for normal operation, tank filling, city water, sanitizing, or winterizing.
If the valve does not close completely, it may create an unwanted path for air or redirect part of the water flow. Internal seals can wear, and the valve handle may not align perfectly with its label.
Move the selector firmly into the normal-use position. If the problem changes when you move the valve, the valve itself may need inspection or replacement.
A Water Pump Diaphragm or Check-Valve Problem
RV water pumps use internal diaphragms and check valves to pull water and create pressure.
A torn diaphragm, damaged valve, loose pump-head screw, or internal wear can prevent the pump from maintaining a solid flow. The pump may sputter, lose prime, cycle frequently, or continue running without building full pressure.
However, pump failure should not be your first assumption. A loose strainer cap or inlet fitting can create nearly identical symptoms and costs much less to fix.
A Clogged Faucet Aerator
The aerator is the small screen attached to the end of the faucet spout.
It mixes air into the stream and catches small pieces of debris. Over time, mineral scale, plastic shavings, rust, sediment, or pieces of an aging anode rod may collect inside it.
A partially clogged aerator can create an uneven stream that looks and sounds like sputtering.
If only one faucet is affected, remove its aerator before inspecting the water pump.
A Restricted Faucet Cartridge or Supply Line
If removing the aerator does not solve a one-faucet problem, the restriction may be inside the cartridge or supply hose.
Faucet cartridges contain small openings that can trap debris. Flexible supply lines can also kink behind cabinets or become blocked internally.
Turn off the water, relieve pressure, and inspect the supply connections before disassembling the faucet.
Air or Sediment in the RV Water Heater
When only the hot side sputters, the water heater deserves attention.
A recently drained heater contains air until its tank fills completely. You must open a hot faucet while filling the system so the displaced air can escape.
Sediment inside the tank can also interfere with flow. Hard-water minerals, calcium deposits, and pieces of anode material settle at the bottom and may move into the plumbing.
Never turn on the electric heating element or propane burner until the water heater is full.
Excessive or Fluctuating City Water Pressure
Campground water pressure can change throughout the day as other campers use the system.
Very high pressure can stress RV fittings, while rapidly changing pressure may produce uneven flow. A damaged or severely restricted pressure regulator can also reduce or interrupt the stream.
Always use an RV water pressure regulator when connected to campground water. A regulator with a gauge makes it easier to identify pressure changes.
A Leak Elsewhere in the Plumbing System
A hidden leak can allow pressure to drop and make the pump behave unpredictably.
Check under sinks, around the toilet, behind access panels, near the outdoor shower, around the water heater, and beside the pump.
Also inspect low-point drains, outside shower controls, tank drains, and appliance supply connections.
If the pump cycles while every faucet is closed, the system is losing pressure somewhere.
How to Fix a Sputtering RV Faucet
Start with the simplest checks and move toward the pump only when necessary. This approach saves time and reduces the risk of replacing a working component.
1. Check the Fresh Water Tank Level
Make sure the tank contains enough water to cover its outlet.
Do not rely completely on the dashboard monitor. If you are unsure, add several gallons and test the faucet again.
If the sputtering improves after refilling, the tank was low or the outlet was drawing air because of the RV’s angle.
2. Purge Air From the RV Water Lines
Use the following steps to remove trapped air:
- Fill the fresh tank with enough potable water.
- Turn on the water pump or connect regulated city water.
- Open a cold-water faucet slowly.
- Let it run until the stream becomes steady.
- Open the hot side and let the air escape.
- Repeat the process at every sink and shower.
- Run the outdoor shower, if equipped.
- Flush the toilet several times.
- Confirm that the water heater fills completely.
- Close each fixture and listen for the pump to stop.
The water may sputter strongly at first. It should gradually become smoother as the air leaves the system.
Do not activate the water heater until water flows steadily from a hot faucet.
3. Remove and Clean the Faucet Aerator
Unscrew the aerator from the faucet tip. Use a cloth or padded pliers if it is difficult to turn.
Separate the screen, washer, and insert carefully so you can reinstall them in the correct order.
Rinse away loose debris. If you see white mineral deposits, soak the aerator in white vinegar for a few hours and gently scrub it with an old toothbrush.
Run the faucet briefly with the aerator removed. A smooth stream without the aerator confirms that the restriction was at the faucet tip.
Replace the aerator if its screen, threads, or plastic insert is damaged.
4. Inspect the Water Pump Strainer
Turn off the pump and open a faucet to release pressure.
Place a towel beneath the strainer because some water will spill. Unscrew the clear bowl and remove the mesh screen.
Clean the screen and inspect the bowl for hairline cracks. Check the rubber gasket for flattening, twisting, hardening, or damage.
Reinstall the gasket in its groove and tighten the bowl by hand. Do not overtighten it because excessive force can crack the plastic.
Turn the pump on and watch the strainer. Air bubbles inside the bowl may indicate a leak before or around the strainer.
5. Check the Pump’s Inlet Connections
Inspect every connection before the water enters the pump.
Look for:
- Loose swivel fittings
- Flattened or missing O-rings
- Cracked plastic connectors
- Split hose ends
- Loose hose clamps
- Poorly sealed threaded fittings
- Fittings stressed by misaligned hoses
Tighten hand-tight fittings carefully. Plastic fittings can crack when forced.
Do not wrap tape around connectors that seal with an internal rubber O-ring unless the manufacturer specifically requires it.
6. Inspect the Fresh Water Intake Hose
Trace the hose from the fresh tank outlet to the pump.
Look for sharp bends, flattened sections, soft spots, abrasion marks, discoloration, and cracks near clamps.
Run the pump while observing the hose. A weak hose may collapse inward under suction and return to normal when the pump stops.
Replace damaged hose with potable-water-rated tubing of the correct diameter.
7. Verify the Winterization and Bypass Valves
Locate the winterization hose and its selector valve near the pump.
Make sure the valve is set to draw water from the fresh tank rather than the antifreeze hose. Confirm that the hose is capped or securely sealed.
Next, inspect the water heater bypass valves. Return them to the normal-use position so cold water can enter the heater and hot water can leave it.
Valve arrangements vary by RV. Use your owner’s manual or plumbing diagram when the positions are unclear.
8. Test the RV on Both Water Sources
Testing pump water and city water separately can reveal where the problem begins.
If city water flows smoothly but pump water sputters, focus on:
- Fresh tank level
- Tank outlet
- Intake hose
- Winterization valve
- Pump strainer
- Pump inlet fittings
- Pump internals
If pump water flows smoothly but city water sputters, inspect:
- Campground water connection
- Drinking-water hose
- External filter
- Pressure regulator
- City water inlet
- Inlet check valve
If both sources sputter, inspect the affected fixture, water heater, main filter, and shared plumbing lines.
9. Flush the RV Water Heater
Turn off propane and electricity to the water heater. Allow the water to cool completely.
Shut off the water supply and relieve system pressure before removing the drain plug or anode rod.
Drain the tank according to the manufacturer’s instructions. Use a flushing wand, where appropriate, to remove loose sediment.
Inspect the anode rod if your heater uses one. Replace it when it is heavily deteriorated.
Reinstall the drain component, close the bypass, and refill the heater. Keep a hot faucet open until the air stops and a steady stream appears.
Never open a hot, pressurized water heater.
10. Test or Replace the Water Pump
Consider the pump only after checking the tank, valves, hoses, fittings, filters, and strainer.
Signs of a possible pump problem include:
- The pump cannot prime with a full tank.
- Every faucet sputters continuously.
- The pump runs but produces very little water.
- The pump repeatedly loses prime.
- The pump makes unusual mechanical noises.
- Water leaks from the pump housing.
- The pump cycles rapidly despite steady demand.
- A known-good replacement pump solves the problem.
Some pumps can be repaired with a manufacturer-approved diaphragm or valve kit. Others are more practical to replace.
Why Does My RV Faucet Sputter When Using the Water Pump?
Pump-only sputtering usually means the pump is drawing air before the water reaches the pressurized side of the system.
Start with the fresh tank level. Then inspect the winterization valve, pump strainer, inlet fitting, suction hose, tank outlet, and diverter valve.
A leaking connection on the inlet side may never drip because the pump is pulling air inward. This is why you may not find water around the suspected fitting.
If the system works normally on city water, the faucets and most of the pressurized plumbing are probably fine.
Why Does My RV Faucet Sputter on City Water?
When sputtering occurs only on city water, the onboard pump is probably not responsible.
Check these possible causes:
- Air inside the campground supply
- A kinked potable-water hose
- A clogged external filter
- A restricted pressure regulator
- Fluctuating campground pressure
- A loose hose connection
- A damaged city water inlet
- A sticking inlet check valve
- Air introduced after reconnecting the hose
Disconnect the hose and inspect each component separately. You can also test the campground spigot briefly before connecting it to the RV.
Use a potable-water hose and an RV pressure regulator whenever you connect to an external water supply.
Why Does Only One RV Faucet Sputter?
A single sputtering faucet usually has a local restriction.
Remove the aerator and run the faucet. If the stream becomes smooth, clean or replace the aerator.
If the sputtering continues, inspect the faucet cartridge, supply lines, and any nearby shutoff valves. Debris from plumbing work, a deteriorating anode rod, or mineral buildup can lodge inside the cartridge.
Also compare the hot and cold sides. A restriction affecting only one side may be located in that supply hose or faucet inlet.
There is little reason to replace the main water pump when every other fixture works correctly.
Why Does the Hot Water Faucet Sputter?
Hot-water-only sputtering usually begins at the water heater or its nearby plumbing. The cause may be simple trapped air, but overheating and pressure-related symptoms require immediate attention.
The Water Heater Has Not Completely Filled
A drained water heater contains several gallons of air.
When you restore the water supply, keep a hot faucet open. The incoming cold water pushes air from the heater and out through the faucet.
The flow may sputter until the heater becomes completely full. Wait for a steady stream before turning on propane or electricity.
The Water Heater Bypass Valves Are Incorrectly Positioned
Bypass valves reroute water around the heater during winterization.
If one valve remains closed or partially open, the hot-water flow may become weak, inconsistent, or filled with air.
Return the valves to the normal operating position. Depending on your RV, you may have one, two, or three bypass valves.
Sediment Has Accumulated in the Water Heater
Mineral deposits settle at the bottom of tank-style water heaters.
The buildup can restrict flow, create popping sounds, and send small particles toward faucet aerators. Regular flushing helps prevent severe accumulation.
Hard-water conditions may require more frequent maintenance.
The Water Is Extremely Hot
Steam, overheating, or pressure surges can sometimes resemble normal sputtering.
Turn off the water heater if the water is dangerously hot, steam escapes from the faucet, or the pressure-relief valve repeatedly discharges.
Do not open or drain the heater while it is hot and pressurized. Have the thermostat, control system, and relief valve inspected.
Why Does the Faucet Sputter More as the Fresh Tank Empties?
Sputtering that worsens as the tank level drops usually means the pump is beginning to draw air.
The remaining water may move away from the tank outlet when the RV is not level. A damaged or incorrectly positioned pickup tube may also become exposed too early.
Lower water pressure at the pump inlet can make a small fitting or strainer leak more noticeable. The pump must work harder to pull water and may draw air through a weak seal.
Other possibilities include a restricted tank vent, collapsing suction hose, or inaccurate tank monitor.
A properly sealed system should continue producing a steady stream until the water reaches the tank outlet.
Why Does My RV Water Pump Run While the Faucet Sputters?
The pump should run while a faucet is open, but it should still provide a reasonably steady flow.
Continuous sputtering while the pump runs may indicate:
- Air entering the inlet line
- A pump that cannot prime
- A loose strainer bowl
- An empty or low fresh tank
- An open winterization valve
- A restricted filter
- A kinked intake hose
- A plumbing leak
- A faulty pump check valve
- A worn diaphragm
Turn the pump off if it cannot pull water after a reasonable priming attempt. Running it dry for an extended period may overheat or damage it.
How to Find an Air Leak on the Pump Inlet Side
Suction-side air leaks are often difficult to see because they may not release water. Work from the tank toward the pump and inspect one connection at a time.
Start at the Fresh Water Tank Outlet
Locate the fitting where water leaves the fresh tank.
Check for cracks, loose clamps, staining, damaged tubing, or signs that the fitting has moved.
Make sure the fresh tank drain is closed completely.
Follow the Suction Line Toward the Pump
Run your hand along the hose and inspect every bend.
Pay special attention to areas where the hose passes through walls, cabinets, metal openings, or tight corners.
Check any elbows, valves, unions, and adapters installed along the line.
Inspect the Strainer Bowl and Gasket
Remove the strainer bowl and inspect it under bright light.
Hairline cracks can be difficult to see. Flexing, cloudy plastic, distorted threads, or a damaged gasket may justify replacing the inexpensive strainer assembly.
Make sure the gasket sits flat inside its groove.
Check the Winterization Hose
Confirm that the winterization valve fully blocks the antifreeze hose during normal use.
Inspect the hose for cracks and make sure its end is capped. A partially open valve can draw air even when the hose appears unused.
Tighten Fittings Carefully
Snug loose fittings without forcing them.
Many RV plumbing components are plastic and can crack when overtightened. Replace damaged O-rings rather than trying to compensate with excessive pressure.
Follow the pump manufacturer’s instructions when using thread sealant.
Test the System After Each Change
Make one repair at a time and test the pump.
This method helps you confirm which component caused the sputtering. Replacing several parts at once may solve the problem, but you will not know which part actually failed.
RV Faucet Sputtering Troubleshooting Checklist
Use this checklist when you need a fast campsite diagnosis:
- Confirm that the fresh tank contains enough water.
- Park the RV reasonably level.
- Purge every hot and cold fixture.
- Flush the toilet several times.
- Test the pump and city water separately.
- Check whether one or every faucet sputters.
- Remove and clean the affected aerator.
- Inspect the main water filter.
- Clean the pump inlet strainer.
- Inspect the strainer bowl and gasket.
- Check the winterization hose and valve.
- Verify the water heater bypass positions.
- Inspect pump inlet fittings and O-rings.
- Check the fresh tank suction hose.
- Inspect the tank outlet and drain valve.
- Look for hidden plumbing leaks.
- Listen for frequent pump cycling.
- Check the pressure regulator and city water hose.
- Flush the water heater if only hot water sputters.
- Consult the pump manual before replacing the pump.
When Should You Replace the RV Water Pump?
Sputtering does not automatically mean your water pump has failed.
A working pump may sputter because of a loose fitting, low tank, cracked strainer, clogged filter, or open winterization valve. These causes should be ruled out first.
Replacement may be reasonable when:
- The pump cannot prime with a full tank.
- Water leaks from the pump body.
- The motor runs without producing useful flow.
- The pump repeatedly loses prime.
- Internal check valves no longer hold pressure.
- The diaphragm is torn or badly worn.
- The pump overheats or makes grinding noises.
- Manufacturer-approved repairs do not restore operation.
- A replacement pump immediately eliminates the symptoms.
Match the replacement pump’s voltage, flow rate, pressure rating, port size, and electrical requirements to your RV system.
Can a Sputtering Faucet Damage the RV Plumbing?
Brief sputtering while trapped air leaves the system is generally harmless.
Persistent sputtering is more concerning because it may indicate that the pump is running dry, losing prime, or working against a restriction.
Over time, the underlying issue may contribute to:
- Excessive pump operation
- Premature diaphragm wear
- Pump overheating
- Unstable water pressure
- Poor water heater performance
- Loosened plumbing fittings
- Hidden leaks
- Reduced fixture flow
The sputtering itself is often a warning rather than the direct cause of damage. Fixing the source protects the pump and plumbing.
When Should You Call an RV Technician?
Many sputtering problems are easy to correct, but some require access to hidden plumbing, electrical components, or a pressurized water heater.
Contact an RV technician when:
- The pump will not prime after basic troubleshooting.
- Water leaks near electrical wiring or appliances.
- The water heater releases steam.
- Hot water becomes dangerously hot.
- The pump cycles constantly with every faucet closed.
- Plumbing is hidden behind sealed walls or floors.
- The fresh tank outlet appears cracked.
- A diverter valve is inaccessible or damaged.
- Water pressure suddenly becomes extremely high or low.
- You are uncomfortable working around electricity, propane, or hot water.
Stop using the system immediately if you see major leaks or overheated water.
How to Prevent RV Faucets From Sputtering
Routine water-system maintenance can prevent many air leaks, restrictions, and priming problems. A few inspections before each trip can save you from troubleshooting at the campsite.
Keep Enough Water in the Fresh Tank
Avoid running the tank completely dry when using the pump.
Refill it before the level falls below the outlet, especially when camping on uneven ground.
Inspect the Pump Strainer Regularly
Check the strainer screen for debris and examine the bowl for cracks.
Clean it whenever flow decreases or before beginning a long trip.
Check Pump Fittings Before Each Camping Season
Road vibration and temperature changes can loosen fittings over time.
Inspect the pump connections, O-rings, clamps, and suction hose during spring preparation.
Return Every Valve to Its Correct Position After Winterizing
Label winterization and bypass valves if their positions are confusing.
Take a photograph before changing them so you can restore the original arrangement later.
Use a Potable-Water Hose and Pressure Regulator
A drinking-water-safe hose helps protect water quality and resists internal deterioration.
A pressure regulator protects the RV from campground pressure that may exceed the plumbing system’s safe range.
Flush the Water Heater Periodically
Drain and flush the heater according to its manufacturer’s instructions.
Removing sediment improves water quality and reduces the chance of debris reaching faucet aerators.
Sanitize the Fresh Water System
Sanitize the tank and plumbing on a suitable schedule, especially after storage or suspected contamination.
Use the correct concentration of unscented household bleach and rinse the system thoroughly.
Avoid using excessively strong sanitizing mixtures, which may shorten the life of rubber seals and plastic components.
Common RV Faucet Sputtering Mistakes to Avoid
- Replacing the pump before checking the fresh tank
- Ignoring a loose strainer cap or damaged gasket
- Trusting an inaccurate tank-level monitor
- Forgetting the winterization suction valve
- Leaving a water heater bypass valve closed
- Running the water pump dry for too long
- Heating an empty water heater
- Overtightening plastic plumbing fittings
- Applying thread tape to O-ring connections
- Ignoring a restricted water filter
- Diagnosing one clogged faucet as a pump failure
- Opening a hot, pressurized water heater
- Using a non-potable garden hose
- Connecting to city water without a regulator
- Replacing several parts before testing each one
Final Thoughts
Your RV faucet will often sputter briefly when trapped air is leaving the plumbing. In that situation, running every hot and cold fixture should restore a smooth stream.
When the sputtering continues, use the pattern to guide your diagnosis. Check whether it affects one faucet or all of them, hot or cold water, and pump or city water. In most cases, the solution is a low tank, clogged aerator, loose inlet connection, damaged strainer gasket, or incorrectly positioned winterization valve rather than a failed pump.
Related FAQs
How Long Should an RV Faucet Sputter After Filling the Tank?
The sputtering should normally stop within a few minutes after you run every hot and cold fixture. If it continues or returns, inspect the pump inlet, strainer, valves, and tank level.
Can a Clogged RV Water Filter Cause Sputtering?
Yes, a badly clogged filter can restrict water flow and cause unstable pressure. Remove or bypass the filter temporarily to see whether the stream improves.
Why Is My RV Faucet Spitting Air With a Full Fresh Water Tank?
The pump may be pulling air through a loose inlet fitting, damaged strainer gasket, cracked suction hose, or open winterization valve. A full tank rules out low water but not an air leak.
Why Does My RV Faucet Sputter After Dewinterizing?
Air remains inside the empty plumbing after winter storage. The winterization valve or water heater bypass valves may also still be in the wrong position.
Why Does My RV Faucet Sputter After Replacing the Water Pump?
The new pump may not be fully primed, or one of its inlet fittings may not be sealed. Check the strainer, O-rings, hose connections, and fresh tank level.
Can a Bad RV Water Pump Cause Sputtering?
Yes, worn diaphragms or internal check valves can cause sputtering. However, inlet-side air leaks and low tank water are usually easier and more common causes.
Why Does My RV Faucet Sputter Only in the Morning?
A slow air leak may allow the system to lose prime overnight. Temperature changes can also affect loose fittings and seals near the pump.
Should the RV Water Pump Run While Water Is Flowing?
Yes, the pump normally runs while a faucet is open. It should stop shortly after the faucet closes and system pressure returns.
Can a Faulty Pressure Regulator Make an RV Faucet Sputter?
A restricted or damaged regulator can create weak or uneven city-water flow. Test the RV with a known-good regulator before assuming the plumbing is faulty.
Does an RV Accumulator Tank Stop Faucet Sputtering?
An accumulator tank can smooth pressure pulses and reduce pump cycling. However, it will not fix air entering through a leaking fitting, strainer, hose, or valve.

Michael Carter is an experienced RV traveler who focuses on practical outdoor trips across the States. He writes clear, step-by-step guides and realistic reviews based on real travel needs. His aim is to help RV and camper owners plan informed, simpler journeys with confidence.