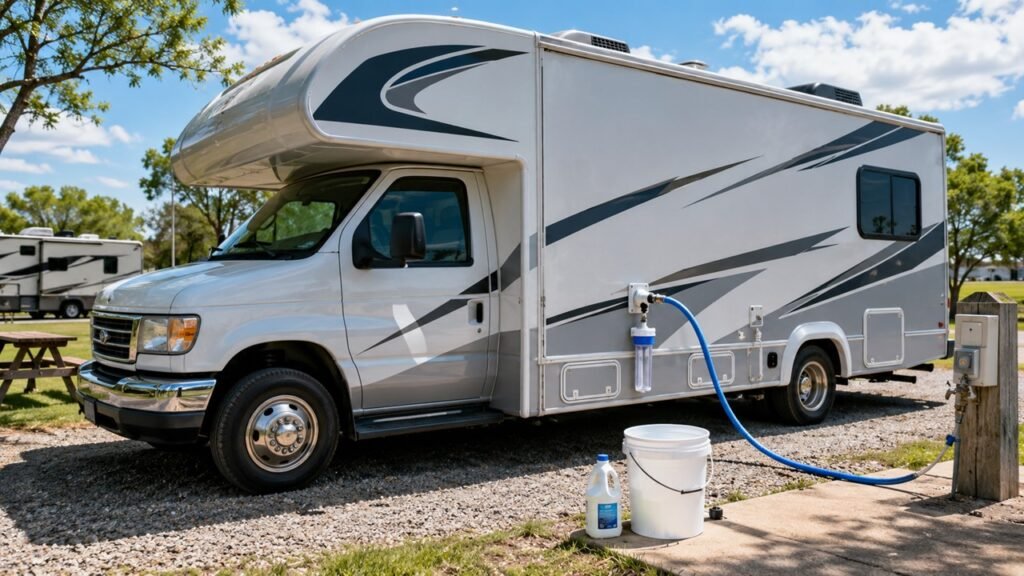
To sanitize an RV fresh water tank, drain the old water, mix 1/4 cup of regular unscented household bleach per 15 gallons of tank capacity with water, add it to the fresh tank, fill the tank, run every faucet until you smell bleach, let it sit for at least 4 hours, then drain and flush until the bleach smell is gone.
In this guide, I’ll walk you through the bleach ratio, supplies, water heater bypass, step-by-step sanitizing process, flushing tips, common mistakes, and answers to the questions RV owners usually ask before drinking from the tank again.
Disclaimer: This guide is for general RV maintenance information only and may not match every RV water system setup. Always follow your RV owner’s manual and product label instructions before using bleach or any sanitizer.
Key Takeaways
- Use regular unscented household bleach, not scented, splash-less, gel, or color-safe bleach.
- The common RV sanitizing ratio is 1/4 cup of bleach per 15 gallons of fresh tank capacity.
- Always dilute bleach in water before adding it to your RV fresh water tank.
- Run the solution through every faucet, shower, toilet line, and outside fixture.
- Let the bleach solution sit for at least 4 hours before draining.
- Flush the system with fresh water until the chlorine smell is gone.
- Never turn on the water heater while it is empty or bypassed.
Quick Answer: The Safe Way to Sanitize an RV Fresh Water Tank
Sanitizing an RV fresh water tank is basically a controlled rinse with diluted bleach. The bleach solution touches the tank, pump, plumbing lines, faucets, shower, and toilet supply line, then gets flushed out with clean water.
Here is the simple version:
- Drain the old water from the fresh tank.
- Turn off and bypass the water heater.
- Remove or bypass water filters.
- Mix the correct amount of bleach with water.
- Add the diluted bleach solution to the fresh tank.
- Fill the tank completely with potable water.
- Run every fixture until you smell bleach.
- Let the solution sit for 4–12 hours.
- Drain the tank and water lines.
- Refill and flush until the bleach odor is gone.
- Return the water heater and filters to normal.
The main thing to remember is this: you are not only cleaning the tank. You are sanitizing the whole RV fresh water system.
When Should You Sanitize Your RV Fresh Water Tank?
Your RV fresh water tank may look sealed and protected, but it still holds water in a warm, dark space. That means stale water, bacteria, biofilm, and musty odors can build up if the system sits too long.
You should sanitize your RV fresh water tank:
- At the beginning of every camping season.
- After de-winterizing your RV.
- After the RV has been stored for weeks or months.
- After filling from a questionable water source.
- When the water smells stale, musty, sour, or plastic-like.
- When you buy a used RV.
- After replacing the water pump or plumbing parts.
- After noticing slime, discoloration, or odor in the water.
- Every 6 months for occasional RV use.
- Every 3–4 months if you camp often or live in your RV.
I also like to sanitize before a long trip. It gives you one less thing to worry about when you are already thinking about food, fuel, campground reservations, and route planning.
What You Need Before You Start
Before you start, gather everything first. The job is simple, but it becomes annoying if you have bleach measured, drains open, and then realize you need a funnel or your owner’s manual.
You will need:
- Regular unscented household bleach.
- Measuring cup.
- Clean 1-gallon jug or bucket.
- Drinking-water-safe hose.
- Funnel, siphon hose, or winterizing port access.
- Rubber gloves.
- Eye protection.
- Fresh potable water.
- Access to a dump station or safe drain location.
- Your RV owner’s manual.
- Optional chlorine test strips.
Do not mix bleach with vinegar, ammonia, toilet chemicals, tank treatments, or other cleaners. Mixing bleach with the wrong chemical can create dangerous fumes.
How Much Bleach Do You Need to Sanitize an RV Fresh Water Tank?
The easiest way to calculate bleach is by using your RV’s total fresh water tank capacity. Do not calculate based only on how much water is currently inside the tank.
Use this common RV sanitizing ratio:
1/4 cup of regular unscented bleach for every 15 gallons of fresh tank capacity.
| Fresh Water Tank Size | Bleach Amount | Dilute Bleach In | Minimum Soak Time |
| 15 gallons | 1/4 cup | 1 gallon of water | 4 hours |
| 30 gallons | 1/2 cup | 1–2 gallons of water | 4 hours |
| 40 gallons | About 2/3 cup | 2 gallons of water | 4 hours |
| 45 gallons | 3/4 cup | 2–3 gallons of water | 4 hours |
| 60 gallons | 1 cup | 3–4 gallons of water | 4 hours |
| 75 gallons | 1 1/4 cups | 4–5 gallons of water | 4 hours |
| 90 gallons | 1 1/2 cups | 5–6 gallons of water | 4 hours |
| 100 gallons | About 1 2/3 cups | 5–6 gallons of water | 4 hours |
A little extra bleach is not better. Too much bleach can be hard on rubber seals, plastic parts, water filters, metal fittings, and water heater components. Measure it properly and dilute it before adding it to the tank.
Should You Bypass the Water Heater and Remove Filters?
This is one of the most important parts of the job. Sanitizing the fresh tank is simple, but you can create problems if bleach sits inside filters or if you accidentally turn on an empty water heater.
Bypassing the Water Heater
Before adding bleach, turn off the water heater. Switch off both propane and electric heating modes if your RV has both. Then let the water heater cool before touching any valves, drain plugs, or bypass lines.
Most RVs have water heater bypass valves near the back of the water heater, inside a cabinet, under a bed, behind a panel, or in the wet bay. The bypass position lets water flow through the plumbing without filling the water heater tank.
Bypassing the water heater helps reduce the chance of bleach sitting in the heater tank, reacting with an anode rod, or leaving a strong odor in the hot water system. Every RV is a little different, so check your owner’s manual if you are not sure which valve position is correct.
Most importantly, do not turn the water heater on while it is empty or bypassed. That can damage the heating element or the heater itself.
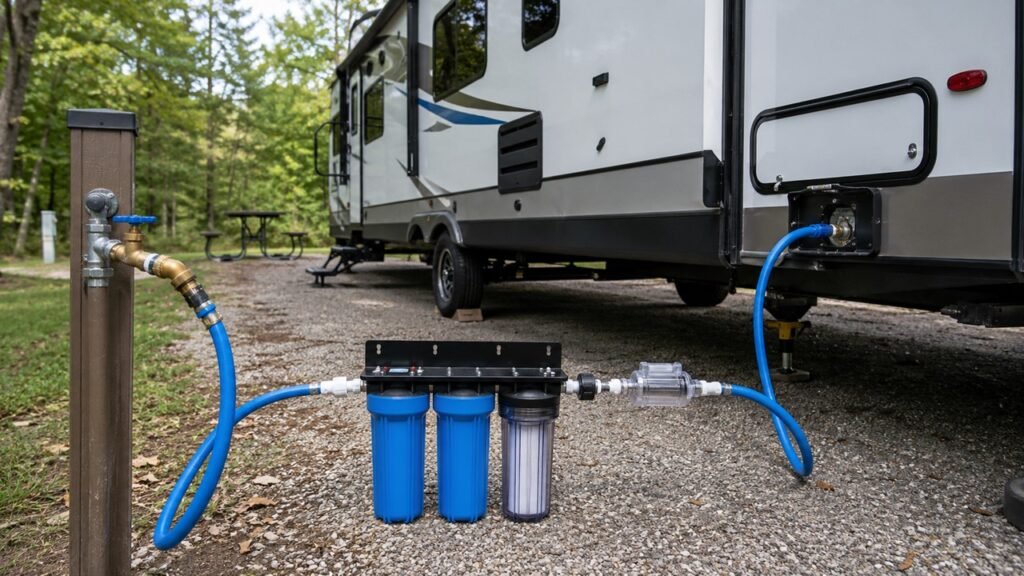
Removing or Bypassing Water Filters
Water filters should usually be removed before sanitizing. Bleach can damage filter media, and carbon filters can reduce the sanitizer before it reaches the rest of the plumbing.
Remove or bypass:
- Inline hose filters.
- Canister filter cartridges.
- Under-sink drinking water filters.
- Refrigerator water filters, if connected.
- Ice maker filters, if equipped.
- Any filter cartridge installed before the pump.
After sanitizing, reinstall new filters or put the old housings back together if the filters are still usable. If a filter is old, slimy, clogged, or has been sitting wet in storage, replace it.
What About Tankless Water Heaters?
Tankless RV water heaters can have specific maintenance instructions. Some manufacturers may have different rules for flushing, descaling, or sanitizing the water lines.
If your RV has a tankless water heater, check the manual before running bleach solution through it. When in doubt, bypass it and sanitize the rest of the fresh water system first.
Step-by-Step: How to Sanitize an RV Fresh Water Tank
This process works for most travel trailers, fifth wheels, Class A motorhomes, Class B camper vans, and Class C RVs. The exact valve locations may vary, but the basic process is the same.
Step 1: Drain the Old Water
Start by draining the old water from your fresh tank. Turn off the water pump before opening drains so the pump does not run dry.
Open the fresh water tank drain and let the old water empty out. If your RV has low-point drains, you can open those too. This helps remove stale water from the lines.
Before moving to the next step, make sure:
- The fresh tank is drained.
- The water pump is off.
- Faucets are closed.
- Low-point drains are closed again.
- The fresh tank drain is closed before refilling.
You do not need to make the tank bone-dry. You just want the old water out before adding the sanitizer.
Step 2: Turn Off and Bypass the Water Heater
Turn off the water heater from the control panel. If it has electric and propane modes, turn both off. Let the heater cool before you drain, bypass, or work around it.
Then set the water heater bypass valves. The usual goal is to keep the bleach solution out of the water heater tank while still letting you run water through the plumbing lines.
If you recently used hot water, be careful. Water inside the heater can be very hot and may cause burns.
Step 3: Remove Water Filters
Remove any filter that bleach water would pass through. This includes inline filters at the hose, whole-RV canister filters, and drinking water filters under the sink.
If your filter housing needs to stay installed for water to flow, remove the cartridge and reinstall the empty housing. This lets the bleach solution pass through without ruining the filter cartridge.
Step 4: Mix the Bleach Solution
Measure the bleach based on your fresh water tank size.
Use this formula:
Bleach needed = 1/4 cup × tank capacity ÷ 15
For example:
- A 30-gallon tank needs 1/2 cup of bleach.
- A 40-gallon tank needs about 2/3 cup of bleach.
- A 45-gallon tank needs 3/4 cup of bleach.
- A 60-gallon tank needs 1 cup of bleach.
Pour the measured bleach into a clean jug or bucket filled with water. Mix it gently. Do not pour straight bleach directly into your fresh water tank because it can hit one area too strongly before diluting.
Step 5: Add the Diluted Bleach to the Fresh Tank
How you add the bleach depends on your RV’s fill setup.
If your RV has a gravity fill, use a funnel and pour the diluted bleach solution into the fresh water fill opening. Go slowly so it does not splash back.
If your RV has a winterizing port or siphon line, you may be able to draw the bleach solution into the system and route it into the fresh tank. This method is clean, but you need to know your valve positions.
If your RV fills through a city water connection with a tank-fill valve, you can use the hose method. Pour the diluted bleach solution into an empty drinking-water-safe hose, connect the hose, set the RV to tank fill, and let fresh water push the solution into the tank.
Use whichever method matches your RV. Do not force water through a connection if you are unsure where it goes.
Step 6: Fill the Tank With Potable Water
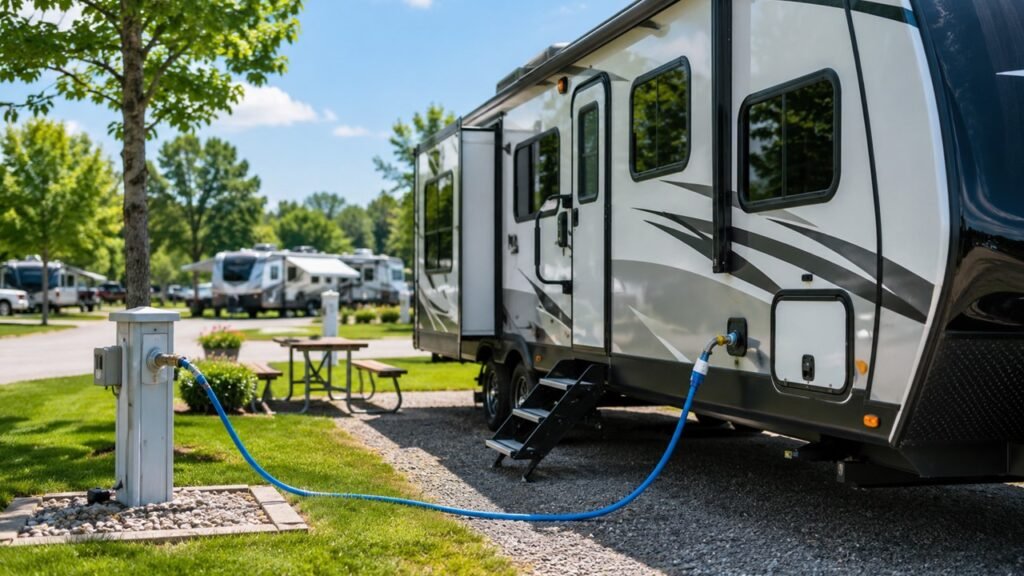
After the bleach solution is inside, fill the fresh water tank completely with potable water. Use a drinking-water-safe hose, not a regular garden hose.
Filling the tank mixes the bleach through the water and gives you enough volume to push the sanitizer through every line.
Stay nearby while the tank fills. Fresh tanks can overflow, and some RVs vent water underneath when full.
Step 7: Run Every Fixture Until You Smell Bleach
Turn on the 12-volt water pump. Then open each fixture one at a time until you smell a light bleach odor.
Run both hot and cold sides where available. Even if the water heater is bypassed, you still want sanitizer to reach as many plumbing lines as your bypass setup allows.
Run bleach water through:
- Kitchen sink hot and cold.
- Bathroom sink hot and cold.
- Shower.
- Outside shower.
- Toilet supply line.
- Low-point line, if needed.
- Washer prep line, if equipped.
- Fridge water line, if manufacturer-approved.
- Ice maker line, if manufacturer-approved.
Do not forget the outside shower. That line often gets ignored, and it can hold stale water for months.
Step 8: Let the Bleach Solution Sit
Once the tank and lines contain bleach water, let the solution sit for at least 4 hours. Many RVers leave it overnight because it is easier to sanitize in the evening and flush in the morning.
Do not leave a strong bleach solution sitting in the system for days. Longer is not always better. Bleach can be tough on seals, soft parts, and some metal components if it sits too long or is mixed too strong.
Step 9: Drain the Tank and Lines
After the soak time, drain the fresh water tank and plumbing lines. You can run the faucets to move the chlorinated water through the system, but keep an eye on your gray tank level.
If possible, drain at a dump station or approved sewer connection. Avoid dumping chlorinated water into streams, ponds, grass, gardens, or sensitive soil areas.
When the fresh tank is empty, turn off the pump so it does not run dry.
Step 10: Flush With Fresh Water
Now refill the fresh tank with clean potable water. Turn on the pump and run every fixture again.
Flush:
- Kitchen sink.
- Bathroom sink.
- Shower.
- Outside shower.
- Toilet line.
- Any extra water lines you used earlier.
Keep flushing until the bleach smell is gone. If you still smell chlorine, refill and flush again. Some RVs need two or three flushes, especially if the tank is large or the lines held a strong odor.
Step 11: Return the System to Normal
Once the water smells clean, put the system back to normal.
Before using the water heater again:
- Turn the bypass valves back to normal.
- Make sure the water heater tank fills with water.
- Open a hot faucet until water flows steadily.
- Only then turn the water heater back on.
Also reinstall or replace filters, check for leaks, and make sure the pump cycles normally.
Gravity Fill, City Water Hose, or Winterizing Port: Which Method Works Best?
Not every RV has the same fresh water fill setup. Some have a simple gravity fill, some use a wet bay, and some rely on a city water connection with a tank-fill valve.
Gravity Fill Method
The gravity fill method is usually the easiest. You pour the diluted bleach solution into the fresh water fill opening with a funnel, then top off the tank with potable water.
This method works well for many travel trailers and older RVs. The only downside is that it can get messy if the funnel slips or you pour too fast.
City Water Hose Method
Some RVs do not have a gravity fill. In that case, you may be able to use the potable hose method.
With this method, you add the diluted bleach solution into an empty drinking-water-safe hose. Then you connect the hose to the RV, turn on the spigot, and use the RV’s tank-fill setting to push the solution into the fresh tank.
This method is useful, but you need to understand your RV’s valve setup. If the valve is set wrong, the bleach solution may go somewhere you do not expect.
Winterizing Port or Siphon Method
Many RVs have a winterizing port that lets the water pump pull fluid from a jug. This is usually used for RV antifreeze, but some systems can also help draw sanitizer into the plumbing or tank.
This method can be cleaner than pouring bleach through a funnel. However, valve positions matter. If you are unsure, check your owner’s manual before using it.
Which Method Should Beginners Use?
If your RV has a gravity fill, use that first. It is usually the most straightforward method.
If your RV does not have a gravity fill, the city water hose method may be easier. If your RV has a wet bay and winterizing port, use the method your manual recommends.
The best method is the one that gets the diluted bleach solution into the fresh tank safely without spilling, guessing, or forcing water through the wrong connection.
How Long Should Bleach Sit in an RV Fresh Water Tank?
For the standard RV fresh water tank bleach ratio, let the solution sit for at least 4 hours. That gives the diluted bleach enough contact time inside the tank and water lines.
Leaving it overnight is also common. It is convenient, and it gives the solution plenty of time to work.
However, do not leave bleach water in the RV fresh water system for several days. Bleach is a sanitizer, not a storage treatment. Once the contact time is done, drain it and flush the system with fresh water.
If your owner’s manual gives a different contact time or bleach ratio, follow the manual for your exact RV.
How to Flush the Bleach Smell Out Faster
A light chlorine smell after sanitizing is normal. It usually goes away after one or two good flushes. If it lingers, you may have bleach water trapped in a filter housing, hose, low-point line, or fixture you forgot to flush.
To remove the bleach smell faster:
- Refill the tank with fresh potable water.
- Run both hot and cold sides of each faucet.
- Flush the outside shower.
- Flush the toilet line several times.
- Remove faucet aerators and rinse them.
- Drain and refill the tank again if needed.
- Let clean water sit for an hour, then flush again.
- Replace old carbon filters after sanitizing.
- Flush the potable water hose too.
Do not add vinegar while bleach water is still in the system. Bleach and acidic cleaners should not be mixed. Flush the bleach out first.
Common Mistakes to Avoid When Sanitizing an RV Fresh Water Tank
Sanitizing is not hard, but small mistakes can make the water taste bad or create extra flushing work.
Avoid these common mistakes:
- Using scented bleach.
- Using splash-less bleach.
- Using gel bleach.
- Using color-safe bleach.
- Pouring undiluted bleach directly into the tank.
- Guessing the bleach amount instead of measuring.
- Using too much bleach.
- Forgetting to bypass the water heater.
- Turning on the water heater while it is empty.
- Leaving water filters installed.
- Forgetting the outside shower.
- Forgetting the toilet water line.
- Not flushing the hot and cold sides.
- Draining bleach water in the wrong place.
- Filling with a dirty garden hose afterward.
- Assuming a water filter can sanitize the tank.
- Drinking the water before flushing the bleach smell out.
The biggest mistake is rushing the rinse. If the water still smells strongly of bleach, keep flushing.
Is Sanitized RV Tank Water Safe to Drink?
Yes, water from a sanitized RV fresh water tank can be safe to drink if the system was sanitized properly, flushed well, and refilled from a potable water source.
But sanitizing your RV tank does not make every water source safe. If you fill from contaminated water, floodwater, a questionable well, or a non-potable spigot, sanitizing the tank will not fix everything.
For drinking water, use:
- A potable water source.
- A drinking-water-safe hose.
- A clean fresh water inlet.
- A sanitized tank and plumbing system.
- A filter suited for taste, sediment, and odor.
Many RV owners still use a water filter after sanitizing. That is fine. Just remember that filters improve water quality, taste, and odor, but they do not replace tank sanitizing.
Can You Sanitize an RV Fresh Water Tank Without Bleach?
Bleach is the most common method because it is cheap, effective, and easy to measure. Still, some RV owners prefer alternatives because they dislike the smell or worry about flushing enough.
Commercial RV Fresh Water Tank Sanitizers
Commercial RV fresh water tank sanitizers are designed for RV plumbing systems. They can be easier to use because the label gives specific instructions.
If you use one, follow the product directions exactly. Do not mix it with bleach, vinegar, or other chemicals.
Hydrogen Peroxide-Based Sanitizers
Some sanitizing products use hydrogen peroxide or peroxide-based formulas. These may have less chlorine smell, but dosage and contact time can vary.
Use only products intended for potable water systems, and follow the label carefully.
Vinegar
Vinegar can help with some mineral taste, light odors, or scale-related issues, but it is not the standard choice for disinfecting an RV fresh water system.
Also, vinegar should never be mixed directly with bleach. If you use vinegar for odor or taste later, flush the bleach out completely first.
Chlorine Dioxide Tablets
Chlorine dioxide tablets are often used for treating water in camping or emergency situations. Some products may help with stored water odor or microbial concerns.
However, treating a small container of water is not the same as sanitizing an entire RV tank and plumbing system. Always follow the product label.
What If the Water Still Smells or Tastes Bad After Sanitizing?
Sometimes sanitizing the tank fixes the problem right away. Other times, the smell is coming from the hose, filters, water heater, campground water, or old plumbing lines.
Bleach Smell Will Not Go Away
If the bleach smell remains, the system probably needs more flushing.
Try this:
- Refill the tank with clean water.
- Run every faucet again.
- Flush the outside shower.
- Flush hot and cold sides separately.
- Drain the tank again.
- Rinse filter housings.
- Replace carbon filters.
- Check the water hose for chlorine odor.
A slight chlorine smell may fade after another fresh water rinse. A strong smell means bleach water is still somewhere in the system.
Water Still Tastes Plastic-Like
Plastic taste often comes from the hose or plumbing, not the tank itself.
Possible causes include:
- A regular garden hose.
- A cheap potable water hose.
- New plastic plumbing.
- Stagnant water in the lines.
- Old inline filters.
- Warm water sitting in the hose.
Use a drinking-water-safe hose, keep it out of direct sun when possible, and flush the hose before filling the tank.
Rotten Egg Smell Comes Back
A rotten egg smell usually points to sulfur bacteria, campground water, or the water heater. It often appears more strongly on the hot water side.
If the smell comes mostly from hot water, inspect the water heater, anode rod, and hot water lines. The fresh tank may not be the only problem.
Musty or Earthy Smell Remains
Musty water can come from biofilm, dirty hoses, old filters, or a contaminated fill inlet.
Check the hose ends, fresh water fill cap, inlet screen, filter housing, and tank vent. If those parts are dirty, the tank may smell bad again even after sanitizing.
Pump Sputters After Sanitizing
If the pump sputters after sanitizing, it may have air in the lines.
Check that the fresh tank has enough water, the pump strainer is clean, and all drains are closed. Then run one faucet at a time until the water flows steadily.
How to Keep Your RV Fresh Water Tank Clean Longer
Sanitizing is important, but daily habits matter too. A clean tank will not stay clean if you fill it with dirty water or leave stale water sitting for months.
To keep your RV fresh water tank cleaner:
- Fill only from potable water sources.
- Use a drinking-water-safe hose.
- Keep hose ends capped.
- Flush the hose before filling the tank.
- Drain the tank after trips if the RV will sit.
- Avoid storing water for long periods in hot weather.
- Sanitize after storage.
- Replace filters on schedule.
- Keep the fresh water fill cap closed.
- Avoid topping off old water again and again.
- Clean the inlet screen when needed.
- Do not use a dirty funnel for filling.
- Flush the system before long trips.
Think of your RV fresh tank like a large reusable water bottle. If water sits in it too long, you clean it before trusting it again.
Quick RV Fresh Water Tank Sanitizing Checklist
Use this checklist when you are ready to sanitize your RV water system.
- Check your fresh tank capacity.
- Measure the correct bleach amount.
- Dilute bleach in clean water.
- Drain old water from the tank.
- Turn off the water heater.
- Bypass the water heater.
- Remove or bypass filters.
- Add the diluted bleach solution.
- Fill the tank with potable water.
- Turn on the water pump.
- Run every faucet until you smell bleach.
- Flush the toilet line.
- Run the outside shower.
- Let the solution sit for at least 4 hours.
- Drain the tank and lines.
- Refill with fresh water.
- Flush every fixture.
- Repeat until the bleach smell is gone.
- Return bypass valves to normal.
- Reinstall or replace filters.
- Fill the water heater before turning it on.
- Check water smell and taste before drinking.
Final Thoughts
Sanitizing an RV fresh water tank is one of those jobs that sounds intimidating the first time. Once you understand the bleach ratio, soak time, and flushing process, it becomes a simple maintenance routine.
Use 1/4 cup of regular unscented bleach per 15 gallons, dilute it first, run it through the whole system, let it sit for at least 4 hours, and flush until the water smells clean again.
Your RV’s owner’s manual should always be your final guide because valve layouts, filters, and water heater setups vary. But for most RV owners, this process is a safe and practical way to keep the fresh water tank ready for camping, cooking, washing, and drinking.
Related FAQs
How Often Should You Sanitize an RV Fresh Water Tank?
You should sanitize your RV fresh water tank at least every 6 months. Also sanitize it after storage, after de-winterizing, after buying a used RV, or after filling from a questionable water source.
Can I Leave Bleach in My RV Fresh Water Tank Overnight?
Yes, you can usually leave the standard diluted bleach solution in the tank overnight. Just do not leave a strong bleach solution sitting in the system for several days.
How Much Bleach Do I Use for a 30-Gallon RV Fresh Water Tank?
Use 1/2 cup of regular unscented household bleach for a 30-gallon RV fresh water tank. Dilute it in water before adding it to the tank.
How Much Bleach Do I Use for a 40-Gallon RV Fresh Water Tank?
Use about 2/3 cup of regular unscented household bleach for a 40-gallon RV fresh water tank. Mix it with water first before pouring it into the system.
Do I Need to Sanitize the RV Water Lines Too?
Yes, you should sanitize the water lines too. Run the bleach solution through each faucet, shower, toilet line, and outside fixture until you smell bleach.
Should I Sanitize My RV Water Hose?
Yes, your drinking-water-safe hose should also be flushed and kept clean. A dirty hose can make your freshly sanitized tank taste or smell bad again.
Can Too Much Bleach Damage RV Plumbing?
Yes, too much bleach can be hard on seals, rubber parts, filters, fittings, and some metal components. Use the correct ratio and flush the system well.
Can I Use Pool Chlorine Instead of Household Bleach?
It is better to use regular unscented household bleach. Pool chlorine can be much stronger and may contain additives that are not ideal for RV fresh water systems.
Do I Need to Sanitize a Brand-New RV Fresh Water Tank?
Yes, it is a good idea to sanitize a brand-new RV fresh water tank. New plumbing can contain dust, manufacturing residue, or stale water from testing.
Why Does My RV Water Still Taste Bad After Sanitizing?
Bad taste can come from the hose, water source, filters, water heater, minerals, or old plumbing. If sanitizing does not fix it, check each part of the water system.
Can I Drink the Water Right After Sanitizing?
You can drink from the tank after the bleach solution has been drained, the system has been flushed, and the tank has been refilled with potable water. If it still smells strongly of bleach, flush it again.
Should I Sanitize Before or After Replacing Water Filters?
Sanitize before installing new filters. Bleach can damage filter cartridges, so remove old filters first, sanitize the system, flush it well, and then install fresh filters.

Michael Carter is an experienced RV traveler who focuses on practical outdoor trips across the States. He writes clear, step-by-step guides and realistic reviews based on real travel needs. His aim is to help RV and camper owners plan informed, simpler journeys with confidence.