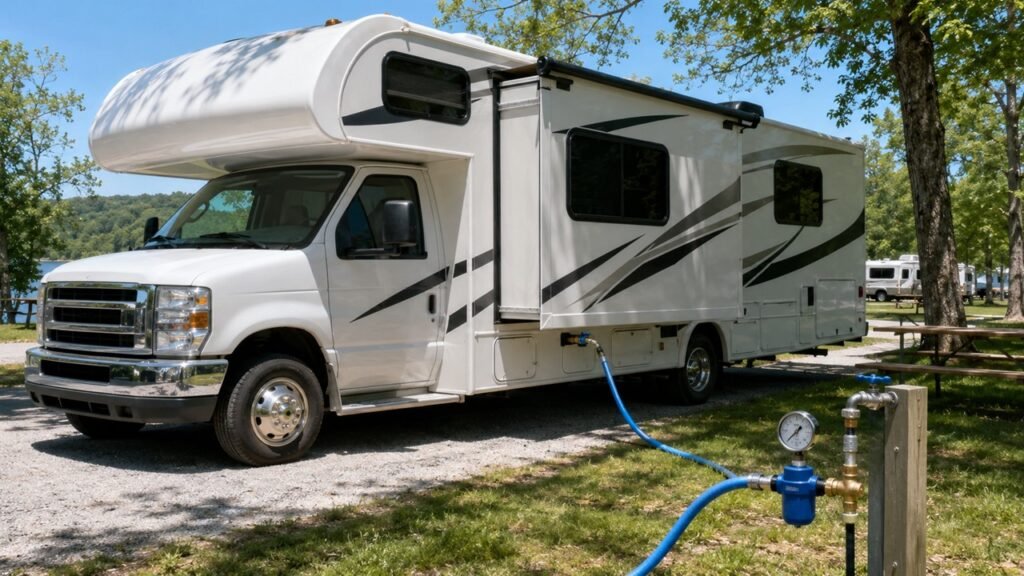
Low RV water pressure is usually caused by a clogged water filter, faulty pressure regulator, kinked hose, dirty faucet aerator, weak water pump, low battery voltage, blocked inlet screen, or incorrect valve setting. Most RV water systems feel comfortable around 40–55 PSI, but you should always follow your RV manufacturer’s recommended pressure limit.
In this guide, I’ll walk you through the most common reasons your RV water pressure is low, how to troubleshoot city water and freshwater tank pressure separately, and what to fix first before replacing expensive parts.
Key Takeaways
- Low RV water pressure can come from the campground supply, your hose setup, or your RV plumbing.
- If pressure is low everywhere, check the water filter, regulator, hose, inlet screen, and valves first.
- If only one faucet or shower is weak, the problem is usually a clogged aerator, showerhead, or fixture.
- If pressure is weak from the freshwater tank, inspect the water pump, pump strainer, battery voltage, and valve settings.
- A water pressure regulator protects your RV, but a clogged or restrictive one can also reduce flow.
- Never increase water pressure beyond your RV’s safe PSI limit just to get a stronger shower.
- Most low-pressure problems can be fixed with simple cleaning, testing, or part replacement.
What Is Normal RV Water Pressure?
Most RV plumbing systems work best around 40–55 PSI. Some newer RVs may handle slightly higher pressure, while older rigs may need to stay closer to 40–50 PSI. The safest answer is always the number listed in your owner’s manual.
It also helps to understand the difference between pressure and flow. Pressure is the force pushing water through your plumbing. Flow is how much water actually comes out of the faucet or showerhead.
That means you can have “safe” pressure on a gauge but still get weak water flow inside the RV. A clogged filter, small hose, bad regulator, dirty aerator, or restricted showerhead can make the water feel weak even if the PSI looks normal.
So, before you blame the pump or campground, look for restrictions. In many cases, low RV water pressure is really a low-flow problem.
Quick Diagnosis: Where Is the Low Pressure Coming From?
Before you start replacing parts, narrow down where the pressure drop is happening. This table gives you a quick way to match the symptom with the most likely cause.
| Symptom | Likely Cause | First Thing To Check |
| Low pressure only on city water | Campground pressure, regulator, hose, or inlet screen | Test pressure at the spigot |
| Low pressure only from freshwater tank | Pump, pump strainer, low battery, or valve issue | Check pump operation and strainer |
| Low pressure at one faucet | Clogged aerator or fixture | Remove and rinse the screen |
| Low pressure at every faucet | Filter, regulator, hose, leak, or valve restriction | Remove restrictions one by one |
| Pump runs but water is weak | Dirty pump strainer, air leak, low voltage, or worn pump | Clean strainer and check battery |
| Pump cycles on and off quickly | Leak, pressure switch issue, or accumulator problem | Inspect fittings and pump area |
| Shower pressure is weak | Clogged showerhead, hose kink, or flow restrictor | Clean the showerhead |
| Hot water pressure is weak but cold is fine | Water heater sediment or bypass valve issue | Check bypass valves and hot-water lines |
| Pressure changed after winterizing | Valve left in wrong position | Check winterization and bypass valves |
Use this table like a starting map. Once you know whether the issue happens on city water, tank water, one fixture, or every fixture, the troubleshooting becomes much easier.
First, Check If You Are Using City Water or the Freshwater Tank
The first big question is simple: are you connected to campground city water, or are you using your onboard freshwater tank and pump? These two setups use different parts, so the cause of low pressure can be completely different.
If Low Pressure Happens on City Water Only
If your water pressure is weak only when connected to city water, the problem is usually outside the pump system. In this case, your RV is relying on pressure from the campground spigot.
Common causes include:
- Low campground water pressure
- A clogged or restrictive water pressure regulator
- A kinked freshwater hose
- An undersized or old hose
- A clogged inline water filter
- A blocked city water inlet screen
- A partially closed campground spigot
Start at the spigot and work toward the RV. Check the campground pressure, then the regulator, then the hose, then the filter, and finally the RV inlet.
If Low Pressure Happens From the Freshwater Tank Only
If pressure is weak only when using your onboard freshwater tank, the city water connection is probably not the issue. Instead, focus on the 12-volt water pump system.
Common causes include:
- Clogged pump strainer
- Low freshwater tank level
- Low house battery voltage
- Air in the water lines
- Winterization valve left open
- Pump pulling air through a loose fitting
- Weak or aging water pump
- Faulty pump pressure switch
Your RV pump needs good suction, clean flow, and enough battery power. If one of those is missing, pressure can drop quickly.
If Low Pressure Happens on Both Sources
If pressure is low on both city water and the freshwater tank, the problem is likely inside the RV plumbing after water enters the system.
In that case, check things like clogged filters, dirty faucet aerators, blocked showerheads, water heater bypass valves, partially closed valves, leaks, and sediment in the lines.
This is also when you should pay close attention to whether the pressure is low everywhere or only at one fixture. One weak sink usually means a local clog. Weak flow everywhere usually means a main restriction.
Common Causes of Low RV Water Pressure and How To Fix Them
Most RV water pressure problems come from small restrictions, not major plumbing failures. Work through these causes from the easiest to the hardest before buying a new pump or calling a technician.
1. Clogged RV Water Filter
A clogged RV water filter is one of the most common reasons for low water pressure. Campground water can carry sediment, rust, sand, minerals, and other debris. Over time, that buildup restricts water flow.
If your pressure is low at every faucet, your inline filter should be one of the first things you check.
Here’s what to do:
- Turn off the water supply.
- Remove the inline water filter.
- Reconnect the hose without the filter for a short test.
- Turn the water back on slowly.
- Check whether pressure improves.
- Replace the filter if flow gets better.
Do not keep using an old disposable filter just because water still passes through it. Once it becomes restricted, it can make the whole RV feel like the plumbing is failing.
If you camp in areas with sandy or mineral-heavy water, carry spare filters. You may also want to use a sediment pre-filter to catch larger debris before it reaches your main filter.
2. Faulty or Restrictive Water Pressure Regulator
A water pressure regulator is important because campground water pressure can be unpredictable. Some parks have low pressure, while others may have pressure high enough to damage RV plumbing.
However, a regulator can also cause low pressure if it becomes clogged, corroded, worn out, or too restrictive.
A basic fixed regulator may protect your RV, but it may also reduce flow more than you like. An adjustable regulator with a gauge gives you more control because you can see the actual PSI and adjust it within your RV’s safe range.
To test your regulator, try this:
- Check the gauge if your regulator has one.
- Look for corrosion, debris, or damaged threads.
- Test with another regulator if you have one.
- Briefly remove the regulator only for diagnosis.
- Replace it if pressure improves without it.
Do not run campground water without a regulator long-term unless you have tested the pressure and know it is safe. The goal is not just stronger water. The goal is safe, steady water.
3. Kinked, Long, or Undersized Freshwater Hose
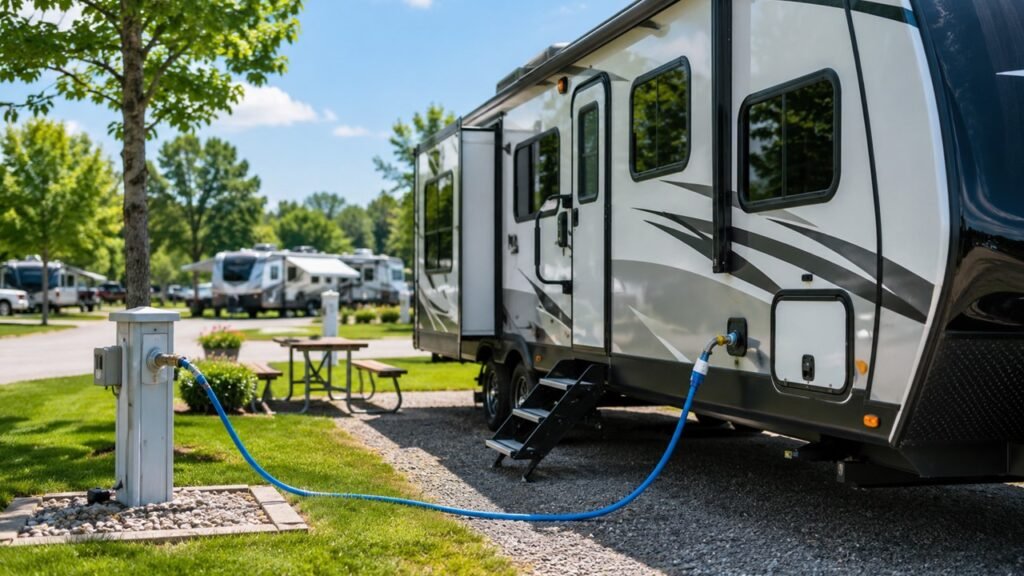
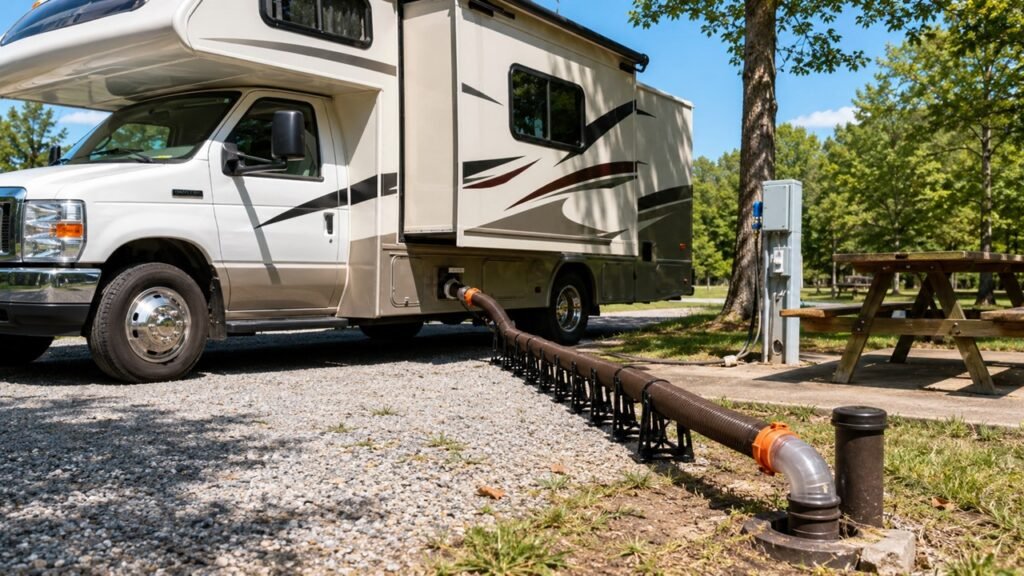
A hose problem can make your RV water pressure feel terrible. A kink, sharp bend, crushed section, or internal blockage can reduce flow before water even reaches the RV.
Hose diameter also matters. A narrow hose may restrict flow more than a wider drinking-water-safe RV hose. Long hose runs can also reduce performance, especially when the campground pressure is already weak.
Check your hose carefully:
- Straighten the hose fully.
- Look for kinks near the spigot and RV inlet.
- Check for crushed or flattened areas.
- Remove unnecessary hose length.
- Use a drinking-water-safe RV hose.
- Replace old hoses with internal buildup.
- Make sure washers are not blocking flow.
Also avoid using a regular garden hose for drinking water. It can affect water taste and may not be made for potable water use.
4. Clogged Faucet Aerators or Showerhead
If only one sink or shower has low pressure, the issue is probably not your whole RV system. It is often a clogged aerator, faucet screen, or showerhead.
Small screens catch debris from water lines. That is helpful, but they can also clog with sand, plastic shavings, mineral scale, and sediment.
Here’s how to clean them:
- Unscrew the faucet aerator or showerhead.
- Remove the small screen if possible.
- Rinse out trapped debris.
- Use a soft brush for mineral buildup.
- Soak stubborn scale in vinegar.
- Reinstall and test the fixture.
This is one of the easiest fixes, and it often makes an immediate difference. If your kitchen sink is strong but your bathroom sink is weak, start here.
5. Blocked City Water Inlet Screen
Many RVs have a small mesh screen at the city water inlet. This screen helps stop debris from entering the RV plumbing, but it can also become clogged.
If the screen is packed with sediment, water may struggle to enter the RV even if the campground spigot has good pressure.
Turn off the water, disconnect the hose, and inspect the inlet. Rinse the screen gently and remove visible debris. Be careful around the check valve inside the inlet. If you damage it, you may create a leak or backflow issue.
A blocked inlet screen can look like a pump problem or regulator problem, but it is much simpler to fix.
6. Low Campground Water Pressure
Sometimes your RV is not the problem at all. The campground water supply may simply be weak.
This often happens during busy times, especially in the morning and evening when many campers are showering, washing dishes, or using water at the same time.
The easiest way to confirm this is with a water pressure gauge. Attach it to the campground spigot and check the reading before water enters your hose and regulator.
If the campground pressure is low, you have a few options. You can fill your freshwater tank and use your RV pump, take showers during off-peak times, or use a pressure booster if your setup supports it safely.
7. Partially Closed Valves or Wrong Bypass Settings
RV plumbing has several valves, and one wrong position can reduce pressure or stop water flow. This is especially common after winterizing, de-winterizing, draining the system, or working around the water heater.
Check these valves:
- Water heater bypass valve
- Antifreeze siphon valve
- Freshwater tank valve
- Low-point drain valves
- Outdoor shower valves
- Shutoff valves under sinks
- Valves near filters or water panels
The antifreeze siphon valve is a common one to miss. If it is left open, the pump may pull air instead of water from the freshwater tank. That can cause weak pressure, sputtering, or no steady flow.
Also check the water heater bypass valve. If it is not set correctly, hot water pressure may be weak or inconsistent.
8. Air Trapped in the Water Lines
Air in the RV water lines can cause sputtering, uneven pressure, and weak flow. This can happen after winterizing, draining the system, changing filters, running the tank dry, or reconnecting water lines.
To bleed air from the system, fill the freshwater tank or connect to city water. Then open one faucet at a time, starting with the fixture closest to the water source. Let the water run until it flows steadily without sputtering.
Do both hot and cold sides. Air can get trapped in either side of the plumbing.
If the pump keeps sputtering after bleeding the lines, check for a loose fitting or suction-side air leak near the pump.
9. Leaks in the RV Plumbing System
A leak can reduce water pressure because water is escaping before it reaches the fixture. Even a small leak can affect flow, especially when using the onboard pump.
Leaks can also make the pump cycle when no faucet is open. If you hear the pump turn on and off while everything is closed, there may be a leak or pressure loss somewhere.
Check these areas:
- Under kitchen and bathroom sinks
- Around the water pump
- Near the water heater
- Inside storage bays
- Behind access panels
- Around the toilet water line
- Near filters and fittings
- Along visible PEX lines
Look for damp spots, water stains, soft flooring, musty smells, or dripping fittings. Fix leaks quickly because RV water damage can become expensive.
10. Water Heater Sediment or Bypass Problems
If your cold water pressure is fine but your hot water pressure is weak, look at the water heater side of the system.
Sediment can build up in the water heater tank, especially in areas with hard water. Bypass valves can also be left partially closed after maintenance or winterization.
Check the hot-water flow at more than one fixture. If hot water is weak everywhere but cold water is normal, the issue is probably near the water heater, bypass valve, or hot-water line.
Flushing the water heater and confirming the bypass valve position may restore better flow.
Low Pressure When Using the Freshwater Tank and Pump
If the pressure is weak only when using the onboard freshwater tank, focus on the pump system. Your RV pump needs clean water flow, enough power, proper valve settings, and an airtight suction line.
Check the Water Pump Strainer
Most RV water pumps have a small strainer on the inlet side. This strainer catches debris before it enters the pump. If it clogs, the pump may run but produce weak pressure.
Here’s how to clean it:
- Turn off the water pump.
- Open a faucet to release pressure.
- Locate the pump strainer.
- Unscrew the clear cap carefully.
- Remove and rinse the mesh screen.
- Check the O-ring before reinstalling.
- Tighten the cap without overtightening.
- Turn the pump back on and test flow.
If the cap is not sealed properly, the pump may pull air. That can make pressure worse, so reinstall it carefully.
Check Battery Voltage
Your RV water pump runs on 12-volt DC power. If your house batteries are low, the pump may run slowly or struggle to maintain pressure.
This is especially common when boondocking, camping without hookups, or using several 12-volt appliances at once.
To test this, plug into shore power or charge the batteries, then run the pump again. If water pressure improves, low battery voltage may have been part of the problem.
Also check the pump wiring, fuse, and connections if the pump sounds weak or does not run at all.
Listen to the Pump
Your water pump can tell you a lot if you listen carefully.
Here are common pump sounds and what they may mean:
- Constant running may mean low tank water, air in the line, or poor suction.
- Rapid cycling may mean a leak, pressure switch issue, or accumulator problem.
- Loud grinding may suggest debris, pump wear, or mounting vibration.
- No sound may mean a blown fuse, bad switch, loose wiring, or failed pump.
- Smooth cycling with weak flow may point to a clogged strainer or restriction.
A healthy pump should build pressure, shut off, and restart when you open a faucet. If it never reaches shutoff pressure, something is wrong.
Inspect the Fresh Tank Pickup and Valve Settings
If your freshwater tank is low, the pump may pull air instead of water. This can cause sputtering and weak pressure.
Also check the pickup line and valve positions. If the winterization valve is open, the pump may try to draw from the antifreeze siphon line instead of the tank.
This is one of those simple mistakes that can feel like a major pump failure. Before replacing the pump, make sure it is actually pulling water from the freshwater tank.
Consider Pump Age or Size
RV water pumps do not last forever. Over time, the internal diaphragm, check valve, pressure switch, or motor can wear down.
However, replacing the pump should not be your first move. Clean the strainer, check battery voltage, inspect valves, bleed air, and look for leaks first.
If the pump is old, noisy, leaking, or unable to build pressure after basic troubleshooting, replacement may be the right fix.
Low Pressure When Connected to City Water
When low pressure only happens on city water, the issue is usually before the water enters your RV or right at the inlet. Start outside and work your way toward the plumbing system.
Test the Campground Spigot
A pressure gauge is one of the most useful tools you can carry in an RV. Attach it directly to the campground spigot and turn the water on.
If the reading is low at the spigot, your RV is not the main problem. The campground supply is weak.
If the pressure is strong at the spigot but weak inside the RV, the restriction is likely in your regulator, hose, filter, inlet screen, or RV plumbing.
Test the Regulator
Your regulator should protect your RV without choking the flow too much. If it is old, clogged, corroded, or very restrictive, it can make water pressure feel weak.
Check these things:
- Does the regulator have a readable gauge?
- Is the pressure set too low?
- Are the threads leaking?
- Is there visible corrosion?
- Does flow improve with another regulator?
- Is it a fixed regulator that restricts flow too much?
An adjustable regulator with a gauge is helpful because you can see what is happening instead of guessing.
Check the Hose and Filter Order
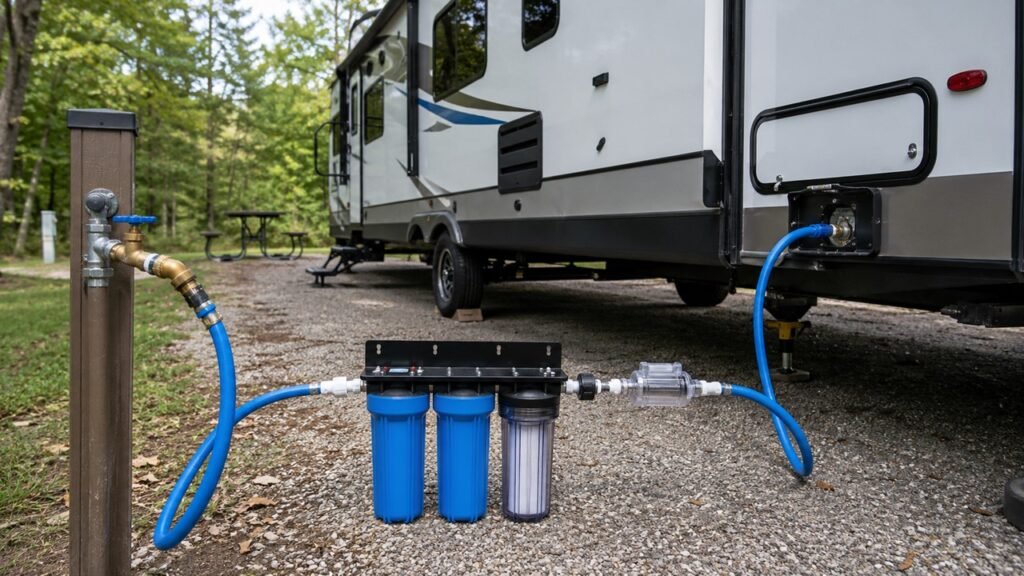
A good city water setup usually looks like this:
Campground spigot → pressure regulator → drinking water hose → water filter → RV city water inlet.
Some RVers place the filter in a different spot, depending on their setup. However, the regulator is usually best near the spigot because it protects the hose and RV from high incoming pressure.
Also make sure every connection is fully open and not leaking. A bad washer, loose fitting, or cross-threaded filter can reduce performance.
Inspect the City Water Inlet
The city water inlet is easy to overlook. It may have a small screen, check valve, or connection point that gets clogged with debris.
Turn off the water, disconnect the hose, and inspect the inlet with a flashlight. Clean the screen gently and check for damage.
If water sprays back out of the inlet or the check valve sticks, the inlet assembly may need attention.
Why Is My RV Shower Pressure Low But Sinks Are Fine?
If only your RV shower pressure is low, the problem is probably local to the shower. That is good news because it is usually easier to fix than a full-system pressure problem.
Clogged Showerhead
RV showerheads can clog with mineral scale, sediment, and small debris from the water lines. This is especially common if you camp in hard-water areas.
Remove the showerhead and rinse it. If you see white crusty buildup, soak it in vinegar and scrub the nozzles gently.
If pressure improves with the showerhead removed, the showerhead is the restriction.
Shower Hose Restriction
Handheld shower hoses can kink, twist, or collapse internally. Sometimes the outside of the hose looks fine, but the inside restricts water flow.
Check both ends of the hose. Look for clogged washers, small screens, or damaged fittings. Also make sure the hose is not sharply bent behind the shower wall or near the handle.
Replacing an old shower hose is usually inexpensive and simple.
Flow Restrictor or Pause Button
Many RV showerheads have flow restrictors or pause buttons. These help save water, which is useful when boondocking. However, they can also make pressure feel weaker.
Make sure the pause button is fully open. If your showerhead has a removable restrictor, follow the manufacturer’s guidance before changing anything.
A better RV showerhead can make the spray feel stronger without pushing unsafe pressure through your plumbing.
Hot Water Side Restriction
If cold shower pressure is fine but hot shower pressure is weak, the problem may be on the hot-water side.
Check the water heater bypass valve, hot-water line, and shower mixing valve. Sediment in the water heater can also reduce hot-water flow.
This issue is different from general low RV water pressure because it affects hot water more than cold water.
How To Increase RV Water Pressure Safely
The goal is not to force maximum pressure through your RV. The goal is to remove restrictions, improve flow, and keep the system within a safe PSI range.
Use an Adjustable Water Pressure Regulator
A good adjustable regulator with a gauge lets you protect your RV while still getting usable pressure.
Fixed regulators are simple and affordable, but some reduce flow too much. If you often struggle with weak campground water, an adjustable model may give you better control.
Set the regulator within your RV’s recommended safe range. Do not guess. If your RV manual gives a maximum PSI, stay under it.
Upgrade the Showerhead
An RV-specific showerhead can make a big difference. Some models use better spray patterns or air mixing to make the water feel stronger without using excessive pressure.
This is especially useful if your main complaint is shower comfort, not weak flow everywhere.
Clean your current showerhead first. If cleaning does not help, then consider upgrading.
Replace Old Filters and Hoses
Old filters and hoses can quietly reduce water flow. Replacing them is often cheaper than replacing pumps or plumbing parts.
Good habits include:
- Replace clogged inline filters.
- Carry spare filter cartridges.
- Use a drinking-water-safe hose.
- Avoid unnecessary hose length.
- Replace damaged hose washers.
- Keep hose ends capped during storage.
- Use a wider hose if your setup supports it.
- Avoid crushed, twisted, or sun-damaged hoses.
Small improvements in the hose and filter setup can make the whole RV water system feel better.
Use Your Freshwater Tank and Pump When Campground Pressure Is Weak
If campground pressure is poor, filling your freshwater tank and using your onboard pump may give you steadier water pressure.
This does not increase the campground supply, but it lets your RV pump control the flow instead of relying on a weak spigot.
Just make sure your pump, strainer, battery, and tank are in good shape.
Add an Accumulator Tank
An accumulator tank stores a small amount of pressurized water. It can smooth out pump cycling and make water flow feel more consistent.
This is especially helpful if your pump pulses, cycles rapidly, or creates uneven flow at the faucet.
An accumulator does not fix clogged filters or bad valves, but it can improve comfort once the rest of the system is working properly.
Consider a Pressure Booster Only When Needed
A pressure booster can help in certain situations, but it should not be your first fix.
Before adding a booster, check the filter, regulator, hose, inlet screen, pump, valves, and leaks. If those are all fine and the campground supply is still weak, a booster may help.
Use it carefully and keep your RV within its safe pressure rating.
What Not To Do When RV Water Pressure Is Low
- Do not remove the pressure regulator permanently on campground water.
- Do not exceed your RV manufacturer’s safe PSI limit.
- Do not assume the water pump is bad before cleaning the strainer.
- Do not ignore leaks, even if they look small.
- Do not use a regular garden hose for drinking water.
- Do not overtighten plastic fittings or filter housings.
- Do not run the water pump dry for long periods.
- Do not forget to check valve positions after winterizing.
- Do not replace expensive parts before checking simple restrictions.
- Do not leave dirty hoses uncapped in storage.
Step-by-Step RV Water Pressure Troubleshooting Checklist
Use this checklist when you want a simple order to follow. Start with the easy checks first, then move deeper into the system.
- Decide whether the issue happens on city water, tank water, or both.
- Test the campground spigot with a pressure gauge.
- Inspect the freshwater hose for kinks, twists, or damage.
- Check whether the hose is too long or too narrow.
- Remove or replace the inline water filter.
- Test the water pressure regulator.
- Clean the city water inlet screen.
- Remove and rinse faucet aerators.
- Clean the showerhead and shower hose.
- Check for partially closed valves.
- Inspect water heater bypass settings.
- Look for leaks under sinks and around fittings.
- Check the water pump area for drips or loose connections.
- Clean the pump strainer.
- Check house battery voltage.
- Listen for strange pump cycling or grinding.
- Bleed air from the water lines.
- Confirm the winterization valve is closed.
- Flush sediment from the water heater if hot water is weak.
- Replace faulty parts only after basic checks are complete.
This order saves time because it starts with the most common and easiest causes. Many RV water pressure problems are fixed before you ever reach the pump replacement stage.
When Should You Call an RV Technician?
Many low water pressure problems are simple DIY fixes. Cleaning a filter, replacing a hose, rinsing an aerator, or checking a valve is usually manageable for most RV owners.
However, you should call an RV technician if the pump does not run despite having power, you suspect a hidden leak, or the pressure problem started after plumbing repairs.
You should also get professional help if you notice water damage, soft flooring, mold smells, electrical issues near the pump, or leaking around the water heater.
RV plumbing problems can become expensive when water gets behind walls, under floors, or inside cabinets. If you are unsure, it is better to stop and get help before the damage spreads.
How To Prevent Low RV Water Pressure in the Future
- Use a water pressure regulator every time you connect to city water.
- Keep a pressure gauge in your RV toolkit.
- Replace inline water filters on schedule.
- Flush the freshwater system regularly.
- Sanitize the freshwater tank as part of seasonal maintenance.
- Drain and maintain the water heater when needed.
- Store hoses with caps on both ends.
- Use only drinking-water-safe hoses.
- Keep spare hose washers and inlet screens.
- Check the pump strainer before long trips.
- Inspect valves after winterizing and de-winterizing.
- Clean faucet aerators when water flow starts to weaken.
- Avoid filling from questionable or dirty water sources.
- Fix small leaks as soon as you find them.
Preventing low pressure is mostly about keeping the system clean and unrestricted. A little maintenance before a trip can save you from a weak shower at the campground.
Conclusion
Low RV water pressure can be annoying, but it is usually not hard to diagnose. Most of the time, the problem comes from a clogged filter, restrictive regulator, kinked hose, dirty aerator, weak campground supply, pump issue, valve mistake, or small leak.
Start with the easiest checks before replacing parts. Look at the hose, filter, regulator, inlet screen, aerators, and showerhead. Then move on to the pump, battery, valves, water heater, and plumbing lines.
A few minutes of troubleshooting can usually tell you whether the problem is at the campground spigot, your hose setup, your regulator, or inside the RV plumbing system.
Related FAQs
What PSI Should My RV Water Pressure Be?
Most RVs operate best between 40–55 PSI, which provides a good balance of flow and safety for the plumbing system. Always check your RV owner’s manual for the exact recommended range, as exceeding it can damage pipes and fixtures.
Why Is My RV Water Pressure Low on City Water?
Low pressure on city water is often caused by weak campground supply, a clogged or restrictive regulator, a kinked hose, a dirty filter, or a blocked inlet screen. Start troubleshooting at the campground spigot and work your way toward the RV.
Why Is My RV Water Pressure Low When Using the Pump?
If pressure is low only when using the pump, check the pump strainer, freshwater tank level, battery voltage, air in the lines, and valve settings. A worn or aging pump can also reduce pressure, but simple issues are more common.
Can a Water Pressure Regulator Cause Low Pressure?
Yes, a faulty or overly restrictive regulator can reduce water pressure if it is clogged, corroded, or set too low. Testing with another regulator or using one with a gauge can help confirm the issue.
Why Is Only My RV Shower Pressure Low?
If only the shower has low pressure, the issue is usually a clogged showerhead, restricted hose, or built-in flow limiter. Removing and cleaning the showerhead often restores normal flow.
Should I Remove My RV Water Pressure Regulator?
You can remove the regulator briefly for testing, but it should always be used during normal operation to protect your RV plumbing. High campground pressure can cause serious damage without it.
Can a Dirty RV Water Filter Lower Pressure?
Yes, a clogged water filter can restrict flow throughout the RV, leading to low pressure at all fixtures. If removing the filter improves flow, it should be replaced.
Why Does My RV Water Pump Run But Pressure Is Weak?
A pump that runs but produces weak pressure may have a clogged strainer, low battery power, air leaks, or worn internal components. Cleaning and checking basic connections should be done before replacing the pump.
Can Low Battery Power Affect RV Water Pressure?
Yes, low battery voltage can reduce pump performance since it relies on 12-volt power. Charging the batteries or connecting to shore power can help restore proper pressure.
How Do I Make My RV Shower Pressure Stronger?
Improving shower pressure usually involves cleaning the showerhead, checking for hose restrictions, removing mineral buildup, and ensuring proper system pressure. Upgrading to a high-efficiency RV showerhead can also help.
Why Is My Hot Water Pressure Low in My RV?
Low hot water pressure is typically caused by sediment buildup in the water heater, a partially closed bypass valve, or a restriction in the hot-water line. If cold water is normal, focus on the water heater system.
Why Does My RV Water Pressure Go Up and Down?
Fluctuating pressure can result from air in the lines, pump cycling issues, inconsistent campground supply, a faulty regulator, or leaks. Checking the pump system and removing air from the lines often helps stabilize flow.

Michael Carter is an experienced RV traveler who focuses on practical outdoor trips across the States. He writes clear, step-by-step guides and realistic reviews based on real travel needs. His aim is to help RV and camper owners plan informed, simpler journeys with confidence.