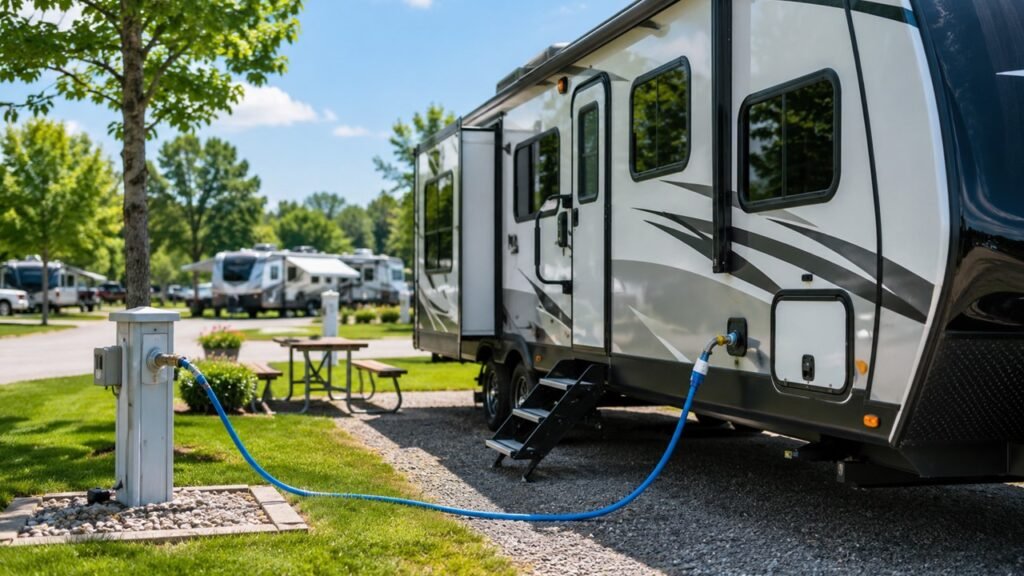
An RV water system works by bringing clean water into your RV from either a freshwater tank or a city water hookup. That water then moves through plumbing lines to your faucets, shower, toilet, and water heater. After use, the dirty water drains into separate gray and black holding tanks until you dump them safely.
In this guide, we’ll walk through the full RV water system in simple terms. You’ll learn how fresh water, city water, RV water pumps, hot water, gray tanks, black tanks, dumping, maintenance, and common water problems all work together.
Key Takeaways
- RVs usually have three main water tanks: fresh, gray, and black.
- Fresh water comes from either the onboard tank or a city water hookup.
- The RV water pump is used when drawing water from the freshwater tank.
- City water is already pressurized, so the pump is usually not needed.
- A water pressure regulator helps protect RV plumbing from high pressure.
- The water heater supplies hot water to sinks and the shower.
- Gray water comes from sinks and showers.
- Black water comes from the RV toilet.
- Always dump the black tank first, then the gray tank afterward.
- Tank sensors are helpful, but they are not always fully accurate.
How an RV Water System Works in Simple Terms
An RV water system is not as complicated as it looks. Think of it as three basic stages: clean water comes in, usable water moves around, and dirty water goes out.
Clean water enters your RV in one of two ways. You either fill the freshwater tank and use your RV water pump, or you connect a hose to a campground water spigot through the city water inlet. Both methods send water to the same faucets, shower, toilet, and water heater.
When you use the freshwater tank, the water pump creates pressure inside the plumbing lines. When you open a faucet, flush the toilet, or turn on the shower, the pump pushes water from the tank to that fixture.
When you use city water, the campground water supply already has pressure. That means the outside spigot pushes water through your RV plumbing without needing the pump in most cases.
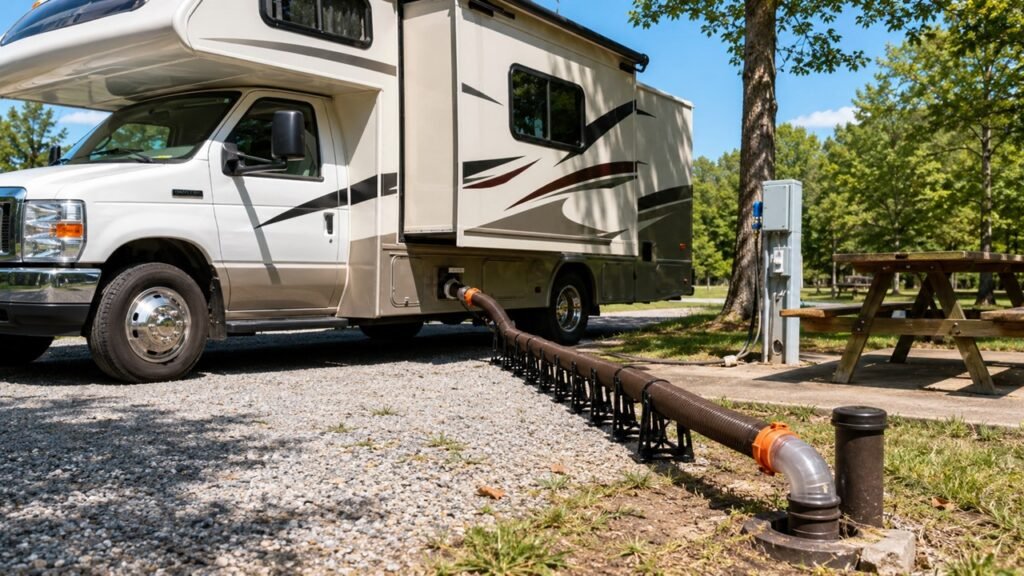
After the water is used, it does not simply disappear. Sink and shower water drains into the gray water tank. Toilet waste drains into the black water tank. Once those tanks are full enough, you empty them through the RV sewer outlet at a dump station or full-hookup campsite.
So, the simple version is this: fresh water enters, the pump or campground pressure moves it, the water heater warms some of it, and used water leaves through gray and black tanks.
Main Parts of an RV Water System
Before you use an RV water system confidently, it helps to know what each part does. Most RVs use the same basic parts, although the exact layout can vary by motorhome, travel trailer, fifth wheel, campervan, or truck camper.
| RV Water Part | What It Does | When You Use It |
| Freshwater Tank | Stores clean water onboard | Dry camping, boondocking, travel days |
| City Water Inlet | Connects the RV to an outside water source | Full-hookup campsites |
| RV Water Pump | Pressurizes water from the freshwater tank | When using stored tank water |
| Water Pressure Regulator | Reduces high incoming water pressure | When connected to city water |
| Drinking Water Hose | Carries potable water into the RV | Filling the tank or using city water |
| RV Water Filter | Improves taste and catches sediment | Before water enters the RV |
| Water Heater | Heats water for sinks and shower | Washing, showering, cleaning |
| Gray Water Tank | Holds sink and shower wastewater | After using drains |
| Black Water Tank | Holds toilet waste | After flushing the toilet |
| Sewer Outlet | Connects tanks to a sewer hose | When dumping tanks |
| Dump Valves | Release gray or black water | At dump stations or sewer hookups |
| Tank Monitor Panel | Shows tank levels | During camping and before dumping |
Once you understand these parts, the whole system becomes easier to manage. You are not dealing with one mysterious plumbing setup. You are dealing with a clean water side, a hot water side, and a waste water side.
The Two Ways Fresh Water Gets Into an RV
Most RVs get clean water in two ways: from the onboard freshwater tank or from a city water connection. Both send water to the same fixtures, but they work in different ways.
Freshwater Tank
The freshwater tank is the onboard tank that stores clean water inside your RV. This is the water you use when you are camping without hookups, driving between campgrounds, staying overnight in a parking area, or boondocking off-grid.
You usually fill the freshwater tank through a gravity fill port or a designated freshwater fill connection. Some RVs also use the city water connection with special valve settings to fill the tank. Because every RV is slightly different, it is always smart to check your owner’s manual before filling the tank for the first time.
Once the tank has water, you turn on the RV water pump. The pump pulls water from the tank and pressurizes the plumbing lines. Then, when you open a faucet or turn on the shower, water flows like it would at home.
Freshwater tank size depends on the RV. Smaller campervans may have modest tanks, while larger motorhomes and fifth wheels usually carry more water. The bigger the tank, the longer you can camp without refilling, but water is heavy. Carrying a full tank can add a lot of weight to your RV.
Your RV should also have a tank monitor panel. This panel usually shows whether your fresh tank is empty, one-third full, two-thirds full, or full. Some newer systems show percentages. These readings are helpful, but they should not be your only guide.
City Water Connection
The city water connection is used when you are staying somewhere with a water hookup. This is common at RV parks, campgrounds, resorts, and some private campsites.
To use city water, you connect a potable drinking water hose from the campground spigot to your RV’s city water inlet. Once you turn on the spigot, pressurized water flows directly into your RV plumbing.
In most RVs, city water bypasses the freshwater tank and water pump. That means you usually do not need to fill your tank or turn on the pump when connected to city water.
However, city water needs a little caution. Campground water pressure can vary a lot from one location to another. Some campsites have weak pressure, while others have pressure that is too high for RV plumbing. That is why a water pressure regulator is one of the most important RV water accessories.
You should also use a drinking-water-safe hose, not a regular garden hose. A regular garden hose may affect taste and may not be designed for water you plan to drink, cook with, or shower in.
Freshwater Tank vs City Water
Both freshwater tank use and city water use are important. The best option depends on where you are camping and what hookups are available.
| Feature | Freshwater Tank | City Water Hookup |
| Best For | Boondocking and dry camping | Campgrounds with hookups |
| Needs Pump? | Yes | Usually no |
| Water Source | Onboard tank | External spigot |
| Pressure Source | RV water pump | Campground water pressure |
| Main Risk | Running out of water | High water pressure |
| Best Accessory | Pump strainer or spare pump parts | Pressure regulator |
| Good Habit | Monitor tank level | Turn off water when away |
If you have full hookups, city water is usually easier. If you are camping without hookups, your freshwater tank and pump make the RV fully usable.
How the RV Water Pump Works
The RV water pump is the part that makes stored tank water feel like running water. It pulls water from the freshwater tank and pushes it through the RV plumbing lines.
When the RV Water Pump Turns On
Most RV water pumps are on-demand pumps. That means they do not run all the time. Instead, they turn on when the system needs water pressure.
Here is what happens in simple terms. When all faucets are closed, the plumbing lines stay pressurized. When you open a faucet, the pressure drops. The pump senses that drop and turns on. Then it pushes water through the line until the pressure returns to normal.
Once you close the faucet, the pump should shut off again after a short moment. That short delay is normal. However, a pump that keeps running for a long time may be warning you about a problem.
You can often hear the pump when it runs. Some RV pumps are quiet, while others make a humming or vibrating sound. A little noise is normal, especially in smaller RVs where the pump is installed close to the living space.
When You Should Use the Water Pump
Use your RV water pump when you are drawing water from the freshwater tank.
You will usually use the pump when:
- You are camping without a city water hookup.
- You are boondocking or dry camping.
- You are using water during a travel stop.
- You filled the freshwater tank before a trip.
- The campground water pressure is weak.
- You are testing your RV plumbing before leaving home.
- You are using tank water overnight in freezing weather.
The pump runs from your RV’s 12-volt electrical system. That means it can work from your house battery, even when you are not connected to shore power. This is one reason RVs are so useful for off-grid camping.
When You Should Turn the Water Pump Off
The water pump is helpful, but you do not need to leave it on all the time.
Turn the pump off:
- While driving
- When the freshwater tank is empty
- When connected to city water
- When leaving the RV unattended
- At night if you are worried about leaks
- Before working on plumbing lines
- If the pump keeps running for no clear reason
Turning the pump off is a simple safety habit. If a faucet opens accidentally or a leak starts while you are away, the pump will not keep pushing water through the system.
Why the Water Pump Runs When No Faucet Is Open
If your RV water pump turns on when nobody is using water, the system is losing pressure somewhere. Sometimes the issue is small. Other times, it can point to a leak that needs attention.
Common causes include a dripping faucet, loose fitting, toilet valve leak, air in the lines, dirty pump strainer, faulty check valve, or pressure switch problem.
Start with the easy checks. Look under sinks, around the toilet, near the water heater, and around the pump. Check for drips, wet flooring, damp cabinet corners, or loose connections. If the pump cycles every few minutes, do not ignore it. A small leak can become a bigger repair if water reaches flooring, walls, or cabinets.
How City Water Works in an RV
City water is the easiest water source when you are parked at a campsite with hookups. Instead of using stored water from your tank, your RV receives pressurized water directly from an outside spigot.
Basic City Water Setup
Setting up city water is simple, but the order matters. A good setup protects your RV plumbing and gives you cleaner water.
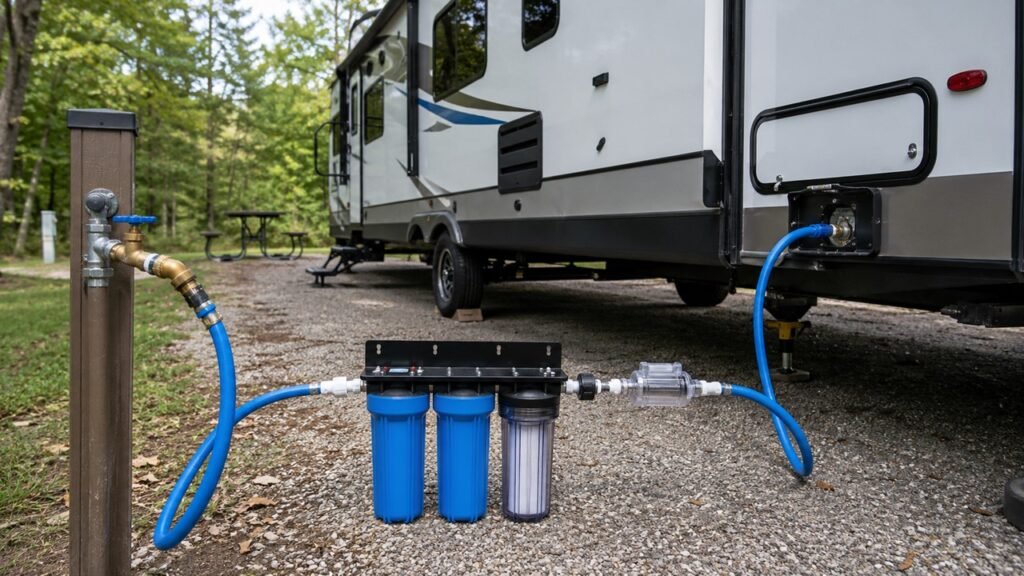
- Attach a water pressure regulator to the campground spigot.
- Connect a drinking-water-safe hose to the regulator.
- Add an RV water filter if you use one.
- Connect the hose to your RV city water inlet.
- Turn the campground spigot on slowly.
- Check the hose connections for leaks.
- Go inside and test the faucets.
- Keep the water pump off unless your RV manual says otherwise.
Some RVers install the filter near the spigot. Others install it near the RV inlet. Either method can work, but filtering the water before it enters your RV is the main goal.
Why You Need a Water Pressure Regulator
A water pressure regulator helps control the pressure coming from the campground spigot. This matters because RV plumbing is not built exactly like house plumbing. It can be more sensitive to high pressure, especially at fittings, plastic lines, valves, and older connections.
Without a regulator, strong campground pressure can stress your plumbing. In the worst case, it can cause leaks or damage inside the RV.
Many RVers use an adjustable regulator with a gauge because it shows the incoming pressure. Basic inline regulators are also common and easy to carry. Whichever style you choose, use one before the water enters your RV.
Why You Should Use a Drinking Water Hose
A drinking water hose is designed for potable water. That means it is made for water you may drink, cook with, brush your teeth with, or shower in.
A regular garden hose is not the best choice for RV drinking water. It may give the water an unpleasant taste, and it may not be made for potable use. RV drinking water hoses are usually labeled as safe for potable water.
It is also smart to keep your drinking water hose separate from your sewer or rinse equipment. Never use the same hose for freshwater and sewer cleanup. Store them in separate bins if possible.
Where the Water Filter Goes
An RV water filter can be placed between the spigot and the hose, or between the hose and the RV inlet. The purpose is to reduce sediment, improve taste, and help keep debris out of your RV plumbing.
A simple inline filter is enough for many weekend campers. Full-time RVers or people who camp in areas with questionable water may prefer a larger multi-stage system.
Filters do not last forever. If your water pressure drops suddenly, the filter may be clogged. If your water tastes stale or strange, the filter may need replacement.
How Hot Water Works in an RV
RV hot water works by routing cold water through a water heater before it reaches your hot-side faucets and shower. Depending on your RV, the heater may use propane, electricity, or both.
Traditional RV Water Heater
A traditional RV water heater stores hot water in a small tank. Many RV tank-style water heaters hold around 6 to 12 gallons, although sizes can vary.
When the heater is on, it warms the water inside the tank and keeps it ready for use. When you turn on a hot faucet, hot water leaves the tank and cold water enters to replace it. The heater then warms the new water.
Traditional RV water heaters may run on propane, electricity, or both. Propane is helpful when you are camping without shore power. Electric mode is useful when you are plugged into campground power and want to save propane.
Some RVers use both propane and electric modes at the same time when they need faster recovery, but you should only do this if your water heater is designed for it.
Tankless RV Water Heater
A tankless RV water heater heats water as it flows through the unit. It does not store hot water in a tank. When you turn on the hot water, the system senses the flow and heats the water on demand.
Tankless systems can be nice because they may provide longer hot showers, as long as you have enough water, propane, and power. However, they can also be sensitive to water flow and temperature settings.
If the flow is too low, the heater may not activate properly. If the water source is very cold, the heater may need more time or fuel to reach a comfortable temperature.
Important Water Heater Safety Tip
Never turn on a tank-style RV water heater unless the tank has water inside it. Running the water heater dry can damage the heating element and may create a safety risk.
Before turning on the heater, make sure the water system is pressurized and hot water flows from a faucet. This helps confirm that the water heater tank is full.
Also remember to check bypass valves after winterization. If the water heater is still bypassed, water may not enter the tank correctly.
Where Used RV Water Goes
Once water goes down an RV drain or toilet, it collects in holding tanks. This is different from a house, where wastewater usually leaves through a permanent sewer line.
Gray Water Tank
The gray water tank holds used water from sinks and showers. This usually includes water from the kitchen sink, bathroom sink, and shower. Some RVs may also send washing machine water to a gray tank if they have laundry hookups.
Gray water may sound harmless, but it can smell bad. It often contains soap, food particles, grease, toothpaste, body oils, dirt, and other residue. If the tank is not dumped or cleaned properly, odors can come back through drains.
To reduce gray tank smells, avoid letting food scraps go down the kitchen sink. Wipe greasy pans before washing them. Also keep water in the P-traps under sinks and showers, because those traps help block tank odors from entering the RV.
Black Water Tank
The black water tank holds toilet waste. It contains human waste, water, and RV-safe toilet paper. Because of that, it needs more careful handling than the gray tank.
The most important black tank rule is to use plenty of water. Water helps break down waste and toilet paper. It also helps the tank dump more completely.
If you leave the black tank valve open at a full-hookup site, liquids may drain away while solids stay behind. This can create a hard buildup inside the tank. Many RVers call this the “pyramid” problem, and it can be difficult to clear.
Why Some RVs Have More Than One Gray Tank
Some RVs have more than one gray tank because of the floorplan. For example, a large fifth wheel may have one gray tank for the kitchen and another for the bathroom. Some rigs may also have a separate tank for a washer or rear bathroom.
This is why it is important to learn your specific RV layout. You may have more than one gray valve, more than one tank reading, or more than one drain path. Your owner’s manual and underbelly labels can help you understand what each valve controls.
How to Dump RV Gray and Black Water Tanks
Dumping RV tanks can feel intimidating the first time. However, once you know the order and use the right gear, the process becomes routine.
Equipment You Need Before Dumping
Before you dump your tanks, keep the right equipment stored in your RV. Do not mix sewer gear with freshwater gear.
Useful dumping equipment includes:
- RV sewer hose
- Disposable or reusable gloves
- Clear sewer elbow
- Sewer hose support
- Dedicated rinse hose
- Hand sanitizer
- Disinfecting wipes
- Sewer hose caps
- Tank treatment, if you use one
- Extra sewer hose adapter
A clear elbow is especially helpful because it lets you see when the tank is finished draining. A sewer hose support also helps keep the hose sloped toward the dump inlet.
Correct Dumping Order
Follow this basic order when dumping your tanks:
- Put on gloves.
- Connect the sewer hose to the RV sewer outlet.
- Connect the other end to the dump station inlet.
- Make sure both connections are secure.
- Open the black tank valve first.
- Let the black tank drain completely.
- Close the black tank valve.
- Open the gray tank valve.
- Let the gray tank drain through the hose.
- Close the gray tank valve.
- Disconnect the hose carefully.
- Rinse and store the sewer equipment.
- Wash or sanitize your hands afterward.
Always follow campground and dump station rules. Never dump gray or black water on the ground unless a legal and designated system allows it.
Why You Dump Black Water Before Gray Water
You dump the black tank first because it contains toilet waste. Then you dump the gray tank afterward so the sink and shower water helps rinse the sewer hose.
This order makes cleanup easier. The gray water will not fully sanitize the hose, but it helps push out leftover black tank residue before you disconnect.
If your RV has two gray tanks, many owners dump the dirtier gray tank first. For example, kitchen gray water may contain more grease and food residue than shower water. Then the cleaner bathroom gray tank can help rinse the hose last.
Should You Leave Tank Valves Open at a Full-Hookup Site?
You should usually keep the black tank valve closed until you are ready to dump. The black tank needs enough liquid inside to carry solids out of the tank. If the valve stays open, liquid can drain away too early and solids may stay behind.
Many RVers also keep the gray tank valve closed until dumping time. This gives you enough gray water to rinse the sewer hose after dumping the black tank.
For longer stays, you can dump when the tanks are mostly full. You do not have to wait until they are completely full, but the black tank usually dumps better with plenty of liquid inside.
How RV Tank Sensors Work
Most RVs have a monitor panel that shows tank levels for the fresh, gray, and black tanks. These sensors help you know when to refill fresh water or dump waste tanks.
Freshwater tank sensors are often more reliable because clean water does not leave much residue. Gray and black tank sensors can be less accurate because debris, grease, soap scum, toilet paper, or waste can stick to the sensor points.
This is why your black tank may show full even after dumping. It does not always mean the tank is actually full. Sometimes the sensor is dirty.
Do not rely only on the monitor panel. Learn your own water use pattern. After a few trips, you will start to know how long your freshwater lasts and how quickly your waste tanks fill.
You can also watch for practical signs. Slow shower drainage may mean the gray tank is getting full. Burping or bubbling near the toilet may mean the black tank needs attention. These signs are not perfect, but they help when sensors are wrong.
Common RV Water Problems and What They Mean
RV water problems are common, especially when you are new to camping. The good news is that many problems have simple causes.
| Problem | Likely Cause | What to Check First |
| No water from faucets | Empty tank, pump off, closed valve, disconnected city water | Tank level, pump switch, hose connection |
| Weak water pressure | Clogged filter, bad regulator, kinked hose, dirty pump strainer | Filter, regulator, hose, strainer |
| Pump runs constantly | Leak, air in lines, loose fitting, pressure switch issue | Faucets, toilet valve, pump fittings |
| Pump is loud | Loose mounting, vibration, air in line | Pump mount, rubber pad, water level |
| Fresh tank fills on city water | Stuck or failed check valve | City water inlet and pump check valve |
| Bad water taste | Old hose, stale water, dirty tank, expired filter | Hose, filter, tank sanitation |
| Sewer smell inside RV | Dry P-trap, toilet seal issue, dirty tank | P-traps, toilet bowl seal, tank treatment |
| Gray tank smells | Food scraps, grease, soap buildup | Sink drains and gray tank cleaning |
| Black tank clogs | Not enough water, wrong toilet paper, valve left open | Add water, flush tank, keep valve closed |
| Hot water runs out fast | Small heater tank, high water use, recovery delay | Heater settings and shower habits |
| Water heater will not heat | No propane, no power, bypass valve issue | Fuel, breaker, switch, bypass valves |
When troubleshooting, start with the easiest and safest checks first. Confirm water source, pressure, power, valves, and visible leaks before replacing parts.
RV Water System Maintenance
A little routine maintenance keeps your RV water system cleaner, safer, and easier to use. Most RV water problems start when tanks, hoses, filters, or pump parts are ignored for too long.
Sanitize the Freshwater System
Your freshwater tank and lines should be sanitized regularly. This is especially important if the RV has been stored, if the water smells stale, or if you bought a used RV.
Sanitize the system:
- Before the camping season
- After long storage
- After buying a used RV
- If the water smells strange
- If algae or buildup is suspected
- After filling from an uncertain water source
A clean freshwater system helps protect taste and reduces unwanted buildup in the tank and lines. Always follow your RV manufacturer’s instructions for the correct sanitizing process.
Clean or Replace Water Filters
Water filters can improve taste and reduce sediment, but they also clog over time. A clogged filter can make your water pressure feel weak even when the pump and campground pressure are fine.
Replace inline filters according to the filter instructions. If you camp often, use questionable water sources, or notice reduced flow, you may need to replace them more frequently.
Do not leave an old filter attached for months after use. If the filter sits wet for a long time, it may affect water quality and taste.
Check the Pump Strainer
Many RV water pumps have a small strainer on the inlet side. This strainer catches debris before it enters the pump.
If the strainer gets clogged, the pump may become noisy, water pressure may drop, or water flow may become inconsistent. Cleaning it is usually simple, but turn off the pump and release pressure before opening anything.
This small part is easy to forget, but it can save the pump from damage.
Inspect Hoses and Fittings
Water leaks often start at small fittings, washers, or hose connections. Checking these areas before and during trips can prevent bigger problems.
Look for:
- Drips around the city water inlet
- Cracked hose ends
- Worn rubber washers
- Loose fittings under sinks
- Damp cabinets
- Kinked hoses
- Wet flooring near the toilet
- Water around the pump
- Leaks near the water heater
A slow drip may not look serious at first. But inside an RV, trapped moisture can damage wood, flooring, insulation, and wall panels.
Keep Water in P-Traps and Toilet Bowl
The P-traps under your sinks and shower hold a small amount of water. That water blocks odors from coming up through the drains. If the RV sits unused, the water in those traps can evaporate.
The toilet bowl seal works in a similar way. A little water in the bowl helps block black tank smells and keeps the seal from drying out.
If you smell sewer odors inside your RV, check the P-traps and toilet bowl first. Sometimes the fix is as simple as adding water.
RV Water Tips for Boondocking
Boondocking means camping without full hookups. Your freshwater tank, water pump, gray tank, and black tank all become more important because you are managing everything yourself.
Use these tips to make water last longer:
- Fill the freshwater tank before arriving.
- Know where the nearest potable water source is.
- Know where the nearest dump station is.
- Take short navy showers.
- Turn water off while brushing your teeth.
- Use a dish tub when washing dishes.
- Wipe plates before washing them.
- Avoid letting food scraps enter the gray tank.
- Carry extra drinking water separately.
- Check tank levels daily.
- Do not let the pump run dry.
- Dump tanks before remote camping.
- Use campground showers when available.
- Fix small leaks before leaving home.
- Turn the pump off when not needed.
Boondocking teaches you how much water you really use. Once you understand your habits, you can plan better trips and stay off-grid longer.
RV Water Tips for Cold Weather
Cold weather can freeze hoses, fittings, tanks, and water lines. Even one hard freeze can create expensive plumbing damage, so it is important to protect your RV water system early.
When Connected to City Water
If freezing temperatures are expected, be careful with your city water hose. A hose full of water can freeze quickly when exposed outside.
In mild cold, some RVers use a heated water hose. In harder freezes, it may be safer to disconnect the city water hose, drain it, and use the freshwater tank and pump overnight.
If you disconnect the hose, turn off the campground spigot first. Then release pressure and store the hose where it will not freeze solid.
When Using the Freshwater Tank
Using the freshwater tank in cold weather can help because the water is stored inside or under the RV instead of sitting in an exposed hose. However, this only works well if your RV is designed for cold-weather use.
Some RVs have enclosed and heated underbellies. Others have exposed tanks and lines that can freeze more easily.
Keep the living space warm if plumbing runs through cabinets or interior walls. Open cabinet doors if needed so warm air can reach pipes. Also watch low-point drains, outside showers, and exposed fittings.
When the RV Is Stored
If your RV will sit unused during freezing weather, winterize the water system. Winterizing usually means draining water lines, protecting the water heater, and adding RV antifreeze where needed.
Do not treat winterization casually. Water expands when it freezes, and that expansion can crack fittings, lines, valves, and water heater parts.
If you are unsure, follow your owner’s manual or have an RV technician winterize it for you.
Beginner Mistakes to Avoid With RV Water
RV water systems are beginner-friendly once you understand them. Still, a few common mistakes can create leaks, smells, clogs, or damage.
Avoid these mistakes:
- Using a regular garden hose for drinking water
- Forgetting a water pressure regulator on city water
- Turning on the water heater before it has water
- Running the pump with an empty freshwater tank
- Leaving the pump on while away from the RV
- Ignoring a pump that cycles when no water is running
- Leaving the black tank valve open at a campsite
- Dumping gray water before black water
- Trusting tank sensors completely
- Forgetting to sanitize the freshwater tank
- Mixing freshwater and sewer equipment
- Letting food scraps go into the gray tank
- Using too little water when flushing
- Forgetting to keep water in P-traps
- Leaving city water on when leaving camp
Most of these mistakes are easy to avoid. Create a simple setup and shutdown routine, and RV water management becomes much less stressful.
RV Water System Setup Checklist
A checklist makes RV water setup easier, especially when you are tired after driving. Use these steps as a simple starting point, then adjust them for your specific RV.
For City Water
- Attach the water pressure regulator to the spigot.
- Connect a potable drinking water hose.
- Add a water filter if you use one.
- Connect the hose to the RV city water inlet.
- Turn the spigot on slowly.
- Check every connection for leaks.
- Test the faucets inside.
- Keep the pump off unless needed.
- Turn off the spigot when leaving camp for long periods.
For Freshwater Tank
- Fill the tank with potable water.
- Turn on the water pump.
- Open a faucet to remove air from the lines.
- Check water flow and pump sound.
- Confirm the water heater has water before turning it on.
- Monitor tank levels during use.
- Turn the pump off when leaving the RV.
- Refill before the tank gets too low.
For Dumping Tanks
- Put on gloves.
- Connect the sewer hose securely.
- Confirm the hose slopes toward the dump inlet.
- Dump the black tank first.
- Close the black tank valve.
- Dump the gray tank second.
- Close the gray tank valve.
- Rinse and store equipment.
- Add some water back to the black tank.
- Wash or sanitize your hands.
This checklist is especially useful for new RV owners. After a few trips, the process will feel natural.
So, How Does RV Water Work Overall?
RV water works by moving clean water into the RV, sending it through fixtures, heating some of it when needed, and storing used water until it can be dumped.
When you are using the freshwater tank, the RV water pump pulls water from the tank and pressurizes the system. When you are connected to city water, the outside water source provides pressure, so the pump is usually not needed.
Cold water goes directly to fixtures, while hot water passes through the water heater first. After use, sink and shower water drains into the gray tank. Toilet waste drains into the black tank.
When the tanks are ready to empty, you connect a sewer hose and dump the black tank first. Then you dump the gray tank so it can help rinse the hose.
Once you understand this flow, RV water becomes much easier to manage. You do not need to be a plumber. You just need to know where the water comes from, how it moves, where it goes, and how to keep the system clean.
Related FAQs
Do I Need to Use My RV Water Pump When Connected to City Water?
No, you usually do not need the RV water pump when connected to city water. City water is already pressurized by the campground or outside water source. In most cases, the pump should stay off.
Can I Drink Water From My RV Freshwater Tank?
Yes, you can drink water from your RV freshwater tank if the tank, hose, and plumbing are clean and sanitized. Many RVers still use a water filter for better taste and extra peace of mind.
Why Is My RV Water Pressure Low?
Low RV water pressure can come from a clogged filter, weak campground pressure, a bad regulator, a kinked hose, or a dirty pump strainer. Start with the simple checks before replacing the pump.
Why Does My RV Water Pump Keep Running?
If your RV water pump keeps running when no faucet is open, the system may be losing pressure. Common causes include a leak, air in the lines, loose fittings, or a faulty pressure switch.
How Often Should I Dump My RV Tanks?
Dump your RV tanks when they are close to full or before leaving a campsite. The black tank usually dumps better when it has enough liquid inside.
Should I Leave My Black Tank Valve Open?
No, you should usually keep the black tank valve closed until you are ready to dump. Leaving it open can let liquid drain away while solids stay behind and cause buildup.
What Is the Difference Between Gray Water and Black Water?
Gray water comes from sinks and showers. Black water comes from the RV toilet and contains human waste.
Why Does My RV Freshwater Tank Fill While Connected to City Water?
This can happen when a check valve fails or gets stuck. City water may backflow into the freshwater tank and cause it to fill unexpectedly.
Why Does My RV Smell Like Sewer Inside?
Sewer smells can come from a dry P-trap, a dry toilet bowl seal, a dirty gray tank, or a black tank issue. Start by adding water to drains and checking the toilet seal.
Can I Leave City Water Connected All Night?
You can, but many RVers turn it off at night or when leaving the RV. This reduces the risk of water damage if a hose, fitting, or inside plumbing connection leaks.

Michael Carter is an experienced RV traveler who focuses on practical outdoor trips across the States. He writes clear, step-by-step guides and realistic reviews based on real travel needs. His aim is to help RV and camper owners plan informed, simpler journeys with confidence.